Tips to Reset Local Group Policy to default Windows 10:
In this post, we are going to discuss on How to Reset Local Group Policy to default Windows 10. You will be guided with easy steps/methods to do so. Let’s starts the discussion.
‘Local Group Policy Editor’: Group Policy is feature of Microsoft Windows NT family of operating system including Windows 10/8/7 and Windows 11, and Windows Server 2003+ that controls the working environment of user accounts and computer accounts. Group Policy provides centralized management and configuration of operating systems, and applications, and user’s settings in Active Directory Environment.
One core difference between Local Policy and Group Policy is that the Local Policy applies to local computer only while group policy applies to all computers in domain network depending on settings, security policy, filters, etc. Applying changes in Local Group Policy in your Windows computer affects the System performances, customizations, and experiences. It is quite simple to open and use Local Group Policy Editor app in your Windows 10 and perform various operations and changes in Local Group Policy.
If you are experience some issues in your Windows 10 due to some unwanted changes done by you in Local Group Policy settings, then you can perform Reset Local Group Policy to default Windows 10 in order to fix the issue. If you are looking for the ways to perform Reset Local Group Policy to default, then you are in right-place for this. Let’s go for the steps.
How to Reset Local Group Policy to default Windows 10?
Method 1: How to Reset All Local Group Policy to default using Local Group Policy Editor
To do so, you will need to perform this for Administrative Templates in Computer Configuration and User Configuration sections.
Reset computer configuration settings:
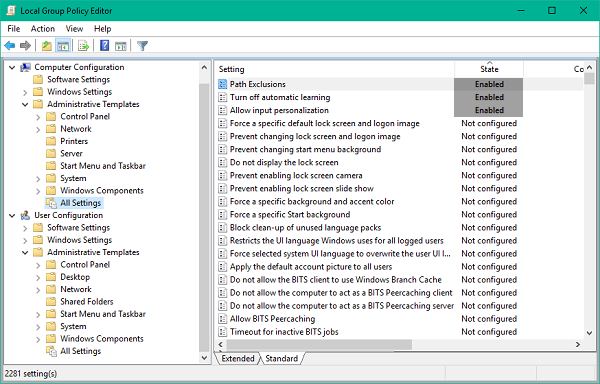
Step 1: Press ‘Windows + R’ keys on keyboard, type ‘gpedit.msc’ in ‘Run’ window and click the top result to open Local Group Policy Editor app, and navigate to following path
Computer Configuration > Administrative Templates > All Settings
Step 2: Click ‘State’ column header to sort settings and view the one that are ‘Enabled’ and ‘Disabled’
Step 3: Double-click on one of policies that you are previously modified and select ‘No Configured’ option, and then hit ‘Apply > Ok’ button to save the changes. Repeat the same steps to reset any remaining policy.
Reset User Configuration Settings:
Step 1: Open ‘Local Group Policy Editor’ app in Windows PC using above method and go to following path
User Configuration > Administrative Templates > All Settings
Step 2: Click ‘State’ column header to sort settings and view the ones that are ‘Enabled’ and ‘Disabled’. Double-click one of policies that your previously modified. Select ‘Not Configured’ option, and then hit ‘Apply > Ok’ button to save the changes.
Step 3: Repeat the same steps to reset any other policy you have configured.
Method 2: How to Reset all Local Group Policy to default Windows 10 using Command Prompt?
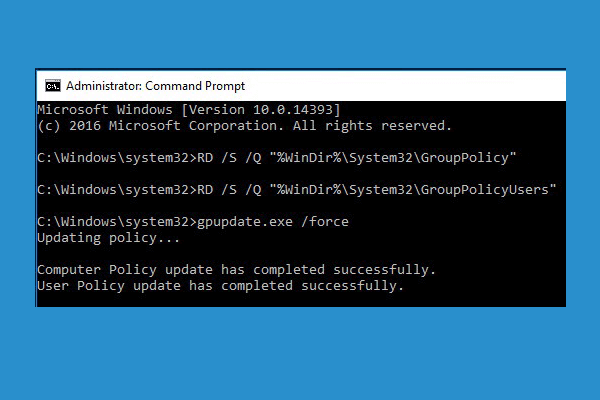
Step 1: Type ‘cmd’ in Windows Search Box and press ‘SHIFT + ENTER’ keys to open ‘Command Prompt as Administrator’
Step 2: Type the following command and hit ‘Enter’ key to execute. This will reset all Group Policy settings.
RD /S /Q “%WinDir%\System32\GroupPolicyUsers” && RD /S /Q “%WinDir%\System32\GroupPolicy”
Step 3: Once executed, type the following command and hit ‘Enter’ key to execute. This will update the changes in Local Policy Console.
gpupdate /force
Step 4: Once executed, restart your computer and check if it works.
Conclusion
I hope this article helped you on How to Reset Local Group Policy to default Windows 10 with several easy steps/methods. You can read & follow our instructions to do so. That’s all. For any suggestions or queries, please write on comment box below.


