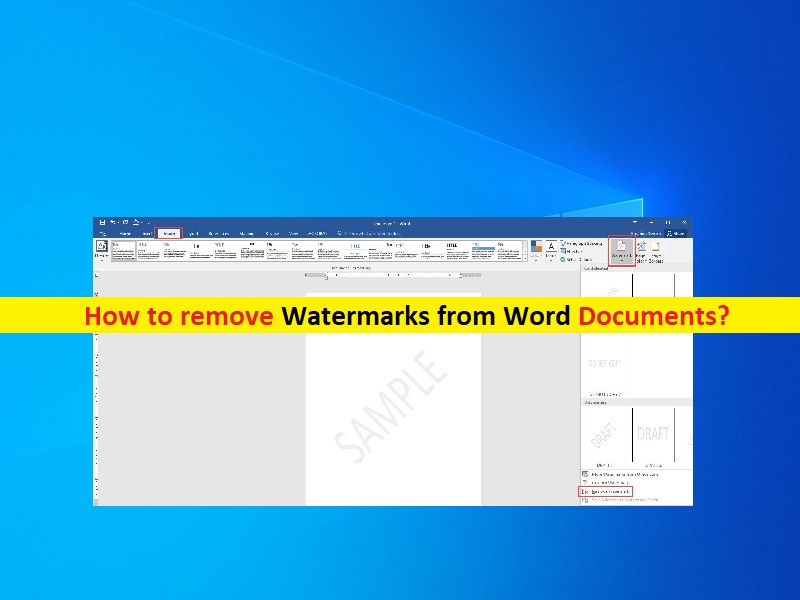
Tips to remove Watermarks from Word Documents in Windows PC:
If you are facing some problems while trying to remove Watermarks from your Microsoft Word Documents in your Windows 10/8/7 computer, then you are in right place for the solution. You will be guided here with easy steps/methods to do so. Let’s starts the discussion.
‘Microsoft Word’: Microsoft Word is word processing software designed & developed by Microsoft. Commercial versions of Word are licensed as standalone product or as component of Microsoft Office 365, or Microsoft 365 Premium subscription, Windows RT or discontinued Microsoft Works Suite. Microsoft Word is available standalone or as part of Microsoft Office Suite for both Windows OS and MacOS based devices. Word files are commonly used as the format for sending text documents via email because almost every user with computer can read a Word Document by using Word application.
‘Watermarks’: Watermarks feature in Microsoft Word helps you to make certain attributes in documents super clear to readers. You can use Watermarks to let colleagues know that your Word Document is a draft, or even confidential to mention but few. It is quite simple to add or remove watermarks to your Microsoft Word Documents/files with just few taps/clicks.
But at some point, you no longer need watermark and want to delete watermarks from your MS Word documents. Some users reported they faced some problems while they attempting to remove Watermarks from MS Word Documents. However, it is quite easy & simple to remove Watermarks from MS Word Documents/Files with our instructions. Let’s go for the steps/methods.
How to remove Watermarks from Word Documents in Windows 10/8/7?
Method 1: Recommended method to remove Watermarks from Word Documents
Step 1: Open MS Word Document you want to remove Watermarks from
Step 2: Now, go to ‘Design’ tab (For latest MS Word editions). For Word 2010 and Word 2007, click ‘Page Layout’ tab
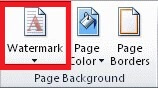
Step 3: Now, locate ‘Page Background’ tab and select ‘Watermark’
Step 4: Select ‘Remove Watermark’ option. Your MS Word document should no longer display watermark
Method 2: How to remove Watermarks from Word Documents using ‘Footer Section’?
![]()
Step 1: In the opened your MS Word Document, go to ‘Footer’ Section, again by double-click on it
Step 2: Select ‘Watermarks’ and press ‘Delete’ key on keyboard. Repeat this step for every section in your document.
Method 3: Save MS Word Document as in XML format
XML (eXtensible Markup Language) is another markup language similar to HTML. You can try to save MS Word file as XML file if after executing the above solutions the watermark won’t still delete.
Step 1: Open your MS Word Document, click on ‘File menu > Save As’
Step 2: Choose a preferred file location like ‘This PC’ to save your file, type suitable filename and click on ‘Save as type’ dropdown and select ‘Word XML’ option and click ‘Save’ to save the file
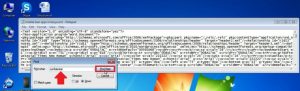
Step 3: Now, locate the created and saved new WORD document, right-click on it and select ‘Open with Notepad’
Step 4: In the opened file, press ‘CTRL + F’ keys on keyboard to find watermark phrase. You can try ‘Confidential’ if that’s the watermark wording and then place the next
Step 5: Delete Word/phrase without deleting quotation marks. Search and delete again until all occurrence are gone. Once done, save the changes by clicking ‘Save’ button
Step 6: Now, re-open the MS Word document but this time in MS Word app and finally, save it as WORD Document and check if it works.
Method 4: How to remove Watermarks from Word Documents using ‘Header Section’?
In recent Word versions including Office 365, Word 2016 and Word 2019, watermarks are anchored in ‘Header’ section. So, you can remove watermark in these Word versions via Header section.
Step 1: In the opened MS Word Document (In above mentioned Word versions), double-click on header area of document
Step 2: Select the watermark by clicking and press ‘Delete’. Repeat the same step if your Word Document consists of multiple unlinked sections to remove all instances of watermarks.
Or
Step 1: Access the document’s header section by double-clicking it
Step 2: Now, go to ‘Home’ tab and choose ‘Select Objects’. Now, click on ‘Watermark’ in ‘Header’ area and then press ‘Delete’ option to delete it
Method 5: Using 4-way arrow
The 4-way arrow replaces the ‘Select Object arrow’ and it also helpful in nearly all latest word replaces including Word Online.
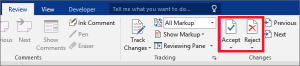
Step 1: Turn OFF ‘Changes Tracking’ in MS Word and click on ‘Review’ and then press ‘Track Changes’
Step 2: Permanently remove any markup in document by accepting or rejecting changes and deleting any documents
Step 3: Now, click ‘Review’ and then hit ‘Next > Accept or Reject’
Step 4: Open Header sections in document by double-clicking inside the area
Step 5: Move the cursor over a few of letters making sup the watermark until it changes into ‘4-way arrow’
Step 6: Select the waterkmark and press ‘Delete’, and repeat the same step for all other sections with dogged watermark
Method 6: Remove the Header/Footer
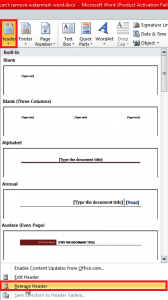
Step 1: Open your MS Word Document and go to ‘Insert’ tab and choose ‘Header’
Step 2: Select ‘Remove Header’
Or
Step 1: Open MS Word document and place the cursor in footer area
Step 2: Go to ‘Insert’ tab and ‘Footer’ section, and select ‘Remove Footer’
Or
Step 1: Open Header area of the page displaying watermark
Step 2: Select the watermark and press ‘Delete/Backspace’, or right-click on it and select ‘Cut’, and check if it works.
Fix Windows PC Issues with ‘PC Repair Tool’
‘PC Repair Tool’ is easy & quick way to find and fix BSOD errors, DLL errors, EXE errors, problems with programs/applications, malware or viruses issues, system files or registry issues, and other system issues with just few clicks.
Conclusion
I am sure this post helped you on How to remove Watermarks from Word Documents in Windows 10/8/7 with several easy steps/methods. You can read & follow our instructions to do so. That’s all. For any suggestions or queries, please write on comment box below.


