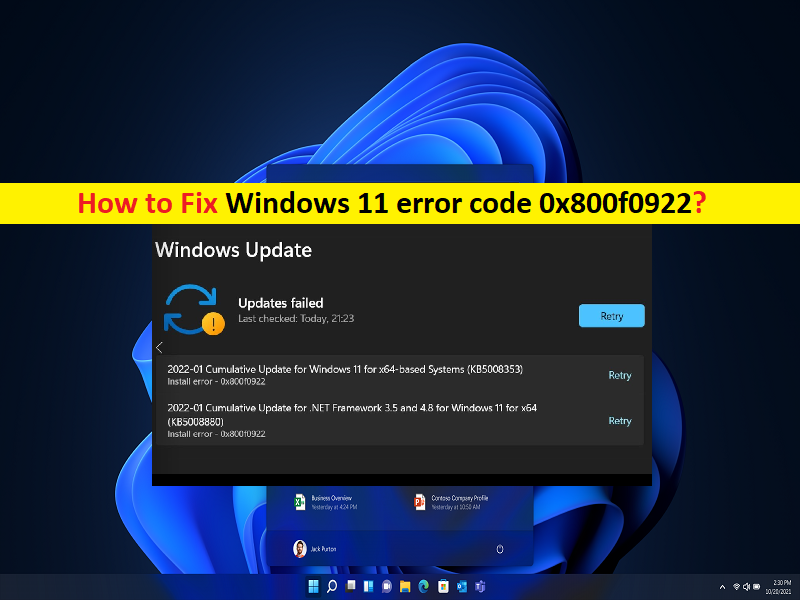
What is ‘Windows 11 error code 0x800f0922’?
If you are facing Windows 11 error code 0x800f0922 when you try to install Windows update in Windows computer, then you are in right-place for the solution. Here, you are provided with easy steps/methods to resolve the issue. Let’s go for the solution.
‘Windows 11 error code 0x800f0922’: it is common Windows Problem considered as Windows update installation error. This error is usually appeared when you try to install Windows update in Windows 11/10 computer. This issue indicates you are unable to finish Windows update in your Windows 11 computer for some reasons. The Windows update error can block you from installing cumulative updates, quality updates, security updates, and feature updates.
There could be several reasons behind the issue including corrupted system files or registry or in system image, malware or viruses infections in computer, de-activated .NET Framework components or connection problems, corrupted Windows update components, and other issues. You can run System scan for malware or viruses with some powerful antivirus software or PC Repair Tool offers you to find and remove all threats in computer and fix Windows PC issues, or to fix the issue. let’s go for the solution.
How to fix Windows 11 error code 0x800f0922?
Method 1: Fix Windows 11 error code 0x800f0922 with ‘PC Repair Tool’
‘PC Repair Tool’ is easy & quick way to find and fix BSOD errors, DLL errors, EXE errors, problems with programs/applications, malware or viruses infections in computer, system files or registry issues, and other system issues with just few clicks.
Method 2: Run Windows Update troubleshooter
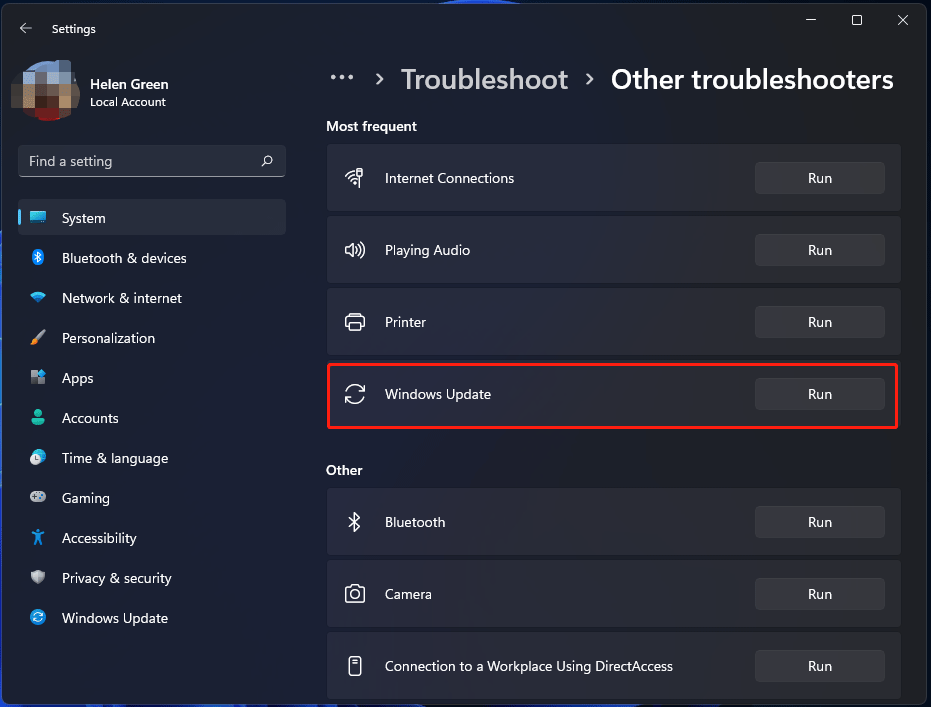
Windows built-in Windows Update troubleshooter can resolve the issue.
Step 1: Open ‘Settings’ app in Windows Search Box and go to ‘System > Troubleshoot > Other troubleshooters’
Step 2: Find and click ‘Windows Update’ troubleshooter, and click ‘Run’ and follow on-screen instructions to finish troubleshooting. Once finished, check if the issue is resolved.
Method 3: Enable Microsoft .NET Framework 3.5
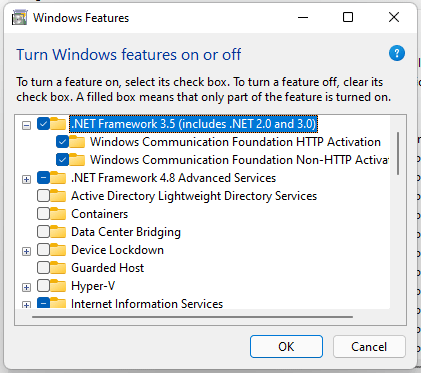
Step 1: Open ‘Control Panel’ in Windows PC via Windows Search Box and go to ‘Uninstall a Program > Programs & Features’ and click ‘Turn Windows Features ON or OFF’ link
Step 2: Find and tick ‘.NET Framework 3.5 (Included .NET 2.0 and 3.0)’ checkboxes. Make sure boxes for ‘Windows Communication Foundation HTTP Activation’ and ‘Windows Communication Foundation Non-HTTP Activation’ are also selected. Finally, click ‘Ok’ button to save the changes and then check if the issue is resolved.
Method 4: Disable Windows Firewall
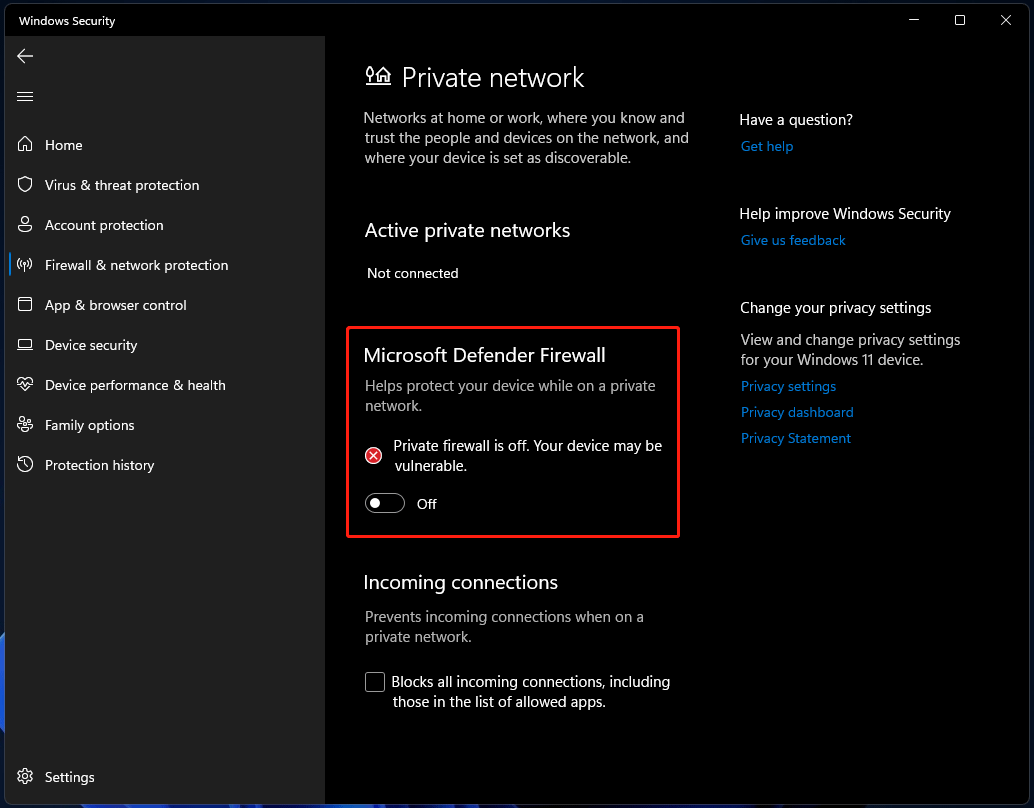
Step 1: Open ‘Settings’ App and go to ‘Privacy and Security > Windows Security > Open Windows Security’
Step 2: Tap ‘Firewall & Network Protection’ and choose the network that is currently active and disable the toggle of ‘Microsoft Defender Firewall’. Once done, check if it works for you.
Method 5: Run SFC scan and DISM scan
You can run SFC scan and DISM scan in computer.
Step 1: Type ‘cmd’ in Windows Search Box and press ‘SHIFT + ENTER’ keys on keyboard to open ‘Command Prompt as Administrator’
Step 2: Type the following command and hit ‘Enter’ key after each to execute.
sfc /scannow
DISM /Online /Cleanup-Image /CheckHealth
DISM /Online /Cleanup-Image /ScanHealth
DISM /Online /Cleanup-Image /RestoreHealth
Step 3: Once executed, restart your computer and check if the issue is resolved.
Method 6: Reset Windows Update components
Resetting Windows update components can resolve the issue.
Step 1: Open ‘Command Prompt as Administrator’ using above method
Step 2: Type the following commands and hit ‘Enter’ key after each to execute.
net stop wuauserv
net stop cryptSvc
net stop bits
net stop msiserver
ren C:\Windows\SoftwareDistribution SoftwareDistribution.old
ren C:\Windows\System32\catroot2 Catroot2.old
net start wuauserv
net start cryptSvc
net start bits
net start msiserver
Step 3: Once executed, restart your computer and check if the issue is resolved.
Method 7: Start the App Readiness service
This issue can be occurred if App Readiness Service is not running in computer. You can restart/start the service in order to fix.
Step 1: Open ‘Services’ app in Windows PC via Windows Search Box
Step 2: Find and double-click on ‘App Readiness’ to open its Properties. Select ‘Automatic’ from ‘Startup Type’ dropdown, and hit ‘Start’ button under ‘Service Status’ section, and then hit ‘Apply > Ok’ to save the changes and then restart your computer, and check if the issue is resolved.
Method 8: Turn OFF VPN connection
This issue can be occurred due to interference of VPN connection in computer. You can disable VPN connection in computer in order to fix the issue, and check if it works for you.
Method 9: Use Media Creation Tool
If the issue is still persist, then you can try to fix the issue by using Media Creation Tool to upgrade your PC.
Step 1: Open your browser and visit ‘Microsoft Official site’ to download Media Creation Tool. Click ‘Download Now’ from Create Windows 11 Installation Media section
Step 2: Double-click on .exe file to launch the tool in Windows 11, accept the license terms, choose ‘Upgrade this PC now’ and click ‘Next’, and follow on-screen instructions to finish upgrade. Once done, check if the issue is resolved.
Conclusion
I am sure this post helped you on How to fix Windows 11 error code 0x800f0922 with easy steps/methods. You can read & follow our instructions to do so. That’s all. For any suggestions or queries, please write on comment box below.


