What is ‘Windows 10 startup folder not working’ issue?
In this post, we are going to discuss on “How to fix Windows 10 startup folder not working issue”. You will be guided here with several easy steps/methods to resolve the issue. Let’s starts the discussion.
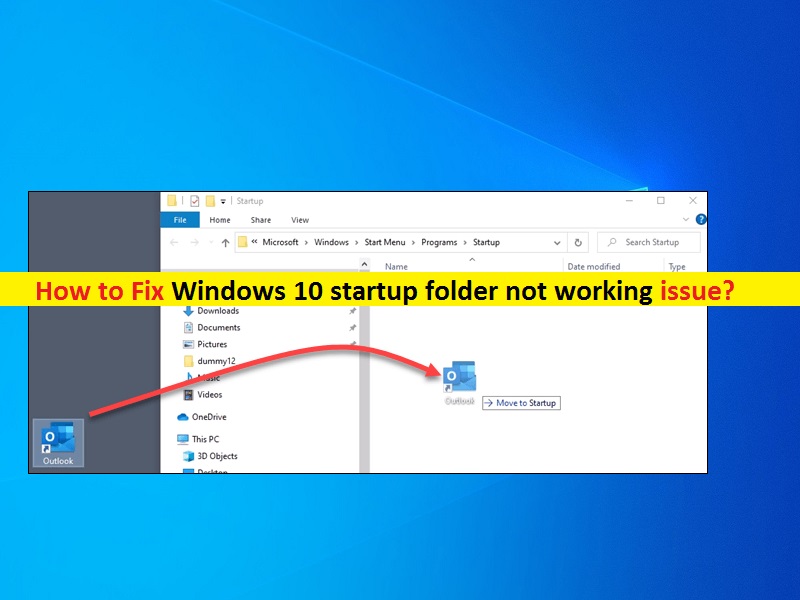
‘Windows 10 startup folder’: Windows startup folder includes a list of programs/processes that run automatically as Windows PC is turned ON. The programs/applications stored in ‘Windows startup’ folder runs with Windows Operating System. Startup Folder in Windows 10 stores entire shortcuts of the program. Also, it is possible to change or edit those folders stored inside Windows Startup folder to make changes to the Windows Startup programs.
Windows Startup programs are of two types and help you manage user favorites for Windows Startup including the System Level of folders which is applied to all users of the computer, and user-specific applications folder. For example, if you have added your antivirus software in Windows Startup folder for entire users means you have set it in System Level, then the program stats, it doesn’t matter who login the computer. However, you can also set your antivirus software to start only for specific user that will block antivirus from loading at startup if you logged-in into computer with other user.
However, several users reported that they faced ‘Windows 10 startup folder not working’ issue while they tried access to Windows Startup Folder in Windows 10. The most common problem with Windows Startup programs is that they tend to bloat your system and slowdown the startup process. This issue prevents you from access Windows Startup Folder for some reasons. There could be several reasons behind this issue including: if there are a lot of programs in startup folder, it can take even longer to load.
Also, if Windows critical process, service or system task is hung up on starting, your startup program may take a minute to launch. One possible way to resolve the issue is to restart your Windows computer. Restarting computer will resolve any temporary glitch in computer and resolve Startup folder not working issue. Let’s go for the solution.
How to fix Windows 10 startup folder not working issue?
Method 1: Fix Windows 10 startup folder not working with ‘PC Repair Tool’
‘PC Repair Tool’ is easy & quick way to find and fix BSOD errors, EXE errors, DLL errors, problems with programs/applications, malware or viruses issues, system files or registry issues, system files or registry issues, and other system issues with just few clicks. You can get this tool through button/link below.
Method 2: Check Windows Startup Manager
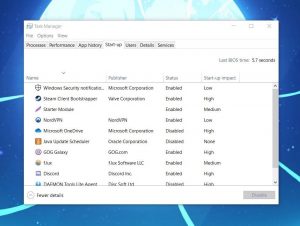
Step 1: Press ‘CTRL + SHIFT + ESC’ keys on keyboard to open ‘Task Manager’
Step 2: In ‘Task Manager’ window, click on ‘Startup’ tab, open ‘Startup Folder’ and enable each program one-by-one
Step 3: If you can’t open Startup folder anymore, then identify the application you enabled recently
Step 4: Now, remove the app from Startup folder
Method 3: Create batch file and force the program to start with Operating System
Step 1: Right-click on empty area on Windows desktop and select ‘New > Text Document’
Step 2: This will open a notepad window. Enter or paste the following text in the opened document
@echo off
“C:\Program Files\DAEMON Tools Lite\DTLauncher.exe”
exit
Step 3: Now, click on ‘File > Save as’, name file with .bat file extension. For example, you can name file to ‘batch1.bat’, and then close the document
Step 4: Now, double-click on created batch file to run. Once done, restart your computer and check if the program is started with Operating System
Method 4: Reinstall the problematic program
Sometimes, this issue can be occurred due to some problematic application/program installed in your computer and that are included in Startup folder in Windows 10. You can uninstall and then reinstall the program that causes this issue, in order to fix the issue.

Step 1: Open ‘Control Panel’ in Windows 10 and go to ‘Uninstall a Program > Programs and Features’
Step 2: Find and select the program that won’t start with Operating System, and select ‘Uninstall’. Follow on-screen instructions to finish uninstall.
Step 3: Now, open ‘C:\Program Files’ or ‘C:\Program Files (86)’ folder and delete remaining folders relating to the program you have uninstalled using ‘step 2’.
Step 4: Once done, reinstall the program again and then restart your computer, and check if the issue is resolved.
Method 5: Try inserting the program shortcut manually
You can also try to resolve the issue by creating a shortcut on your own.
Step 1: Open ‘File Explorer’ and navigate to the installation folder of problematic program
Step 2: Find and right-click on executable of the program, and create a shortcut
Step 3: Now, press ‘Windows + R’ keys on keyboard, type ‘shell:startup’ in the opened ‘Run’ dialog box and hit ‘Ok’ to open Startup folder
Step 4: Now, copy the created shortcut and paste into the Startup folder
Step 5: Finally, restart your computer and check if the program runs automatically at startup with Windows OS.
Method 6: Add program to startup using Task Scheduler
Step 1: Open ‘Run’ window using ‘step 3’ of above method, type ‘taskchd’ and hit ‘Ok’ button to open Task Scheduler
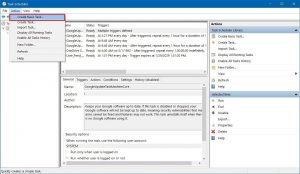
Step 2: Find and click ‘Find Create Task’ at bottom of window and click on ‘General’ tab in the ‘Open to Create task’ wizard
Step 3: Give the program/task a name and check ‘Run with highest privileges’ checkbox
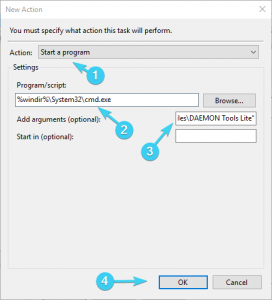
Step 4: Now, click on ‘Actions’ tab and click on ‘New’, select ‘Start a Program’ from ‘Action’ dropdown
Step 5: Click on ‘Browse’ and open the program you want to run with Windows OS at startup and then hit ‘OK’ button to save the changes. After that, restart your computer and check if the program is started with Windows OS.
Method 7: Disable UAC (User Account Control)
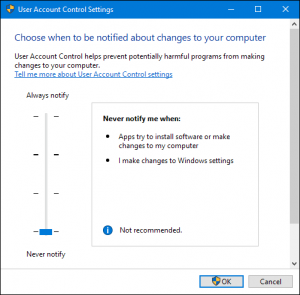
Step 1: Type ‘UAC’ in ‘Windows Search Box’ and open ‘Open UAC Control Settings’ from results appear
Step 2: In the opened window, drag the slider to bottom to disable UAC and then hit ‘OK’ to save the changes. Once disabled, please check if the issue is resolved.
Method 8: Fix Windows 10 startup folder not working issue using Registry Editor
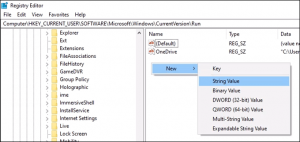
Step 1: Press ‘Windows + R’ keys on keyboard, type ‘regedit’ in the opened ‘Run’ dialog box and hit ‘Ok’ button to open ‘Registry Editor’
Step 2: Navigate to following path in left pane
HKEY_LOCAL_MACHINE \ Software \ Microsoft \ Windows \ CurrentVersion \ Run
Step 3: Now, right-click on empty space and select ‘New > String Value’, name the value as program you want to run is named
Step 4: Now, right-click on newly created value, and select modify. Set its value data to the actual path of executable of the program you want to run, and hit ‘Ok’ to save the changes
Step 5: Now, restart your computer and check if the program is started with Windows OS at Startup.
Method 9: Perform Windows 10 Reset
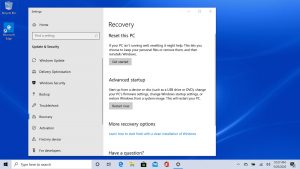
If the problem is still persist, then you can try to fix the issue by performing Windows 10 Reset.
Step 1: Open ‘Settings’ App in Windows 10 and go to ‘Update & Security > Recovery > Reset This PC > Get Started’
Step 2: Select ‘Keep my files’ or ‘Remove Everything’ and follow on-screen instructions to finish resetting process
Step 3: Once done, check if the issue is resolved.
Conclusion
I am sure this post helped you on How to fix Windows 10 startup folder not working with several easy steps/methods. You can read & follow our instructions to do so. That’s all. For any suggestions or queries, please write on comment box below.


