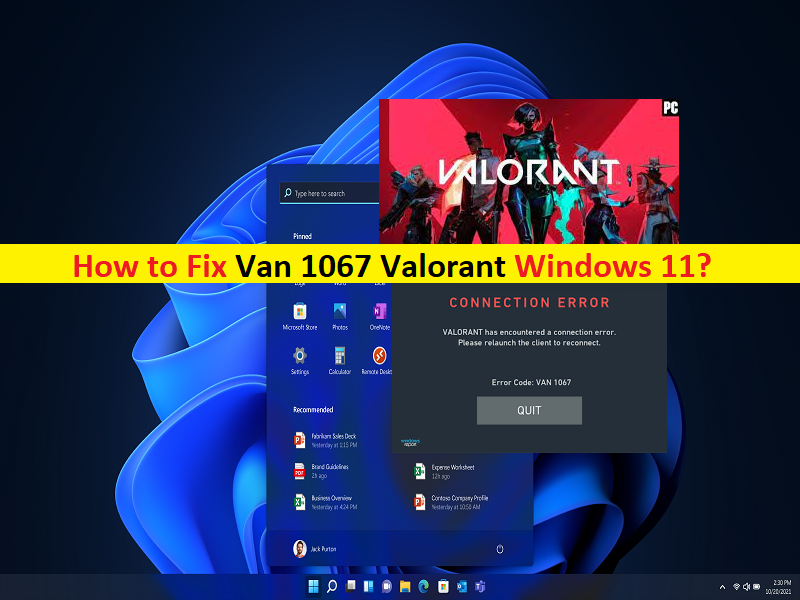
Tips to fix Van 1067 Valorant Windows 11:
If you are facing Van 1067 Valorant Windows 11 while launching and playing Valorant game, then you are in right-place for the solution. Here, you are provided with easy steps/methods to resolve the issue. Let’s starts the discussion.
‘Van 1067 Valorant Windows 11’:
‘Valorant’: Valorant is free-to-play first-person hero shooter game designed & developed and published by Riot Games, for Microsoft Windows. The game starts a closed beta period with limited access on April 2020. In this game, players play as one of a set of Agents, characters designed based on several countries and cultures around the world. In main game mode, players are assigned to either the attacking or defending team with each tem having 5 players on it.
However, several Windows users reported they faced Van 1067 Valorant Windows 11 or Van 1067 Valorant while laughing or playing Valorant game on their Windows 11 computer. This issue indicates you are unable to launch and play Valorant game in Windows computer for some reasons. One possible reason behind the issue can be the game compatibility issue. It might possible your Windows 11 PC/laptop is not eligible to run Valorant game that’s why you are facing the issue.
The issue can be caused either by Secure Boot or TPM 2.0 being disabled on Windows 11. If you are not aware, Secure Boot feature protects from security threats during the startup of their devices while TPM 2.0 is hardware security and protect data used to authenticate your PC which is important when playing Valorant game. You can run Microsoft’s PC Health Check app in your computer offers to identify any applications and hardware that aren’t compatible with Windows 11. Let’s go for the solution.
How to fix Van 1067 Valorant Windows 11?
Method 1: Fix Van 1067 Valorant Windows 11 with ‘PC Repair Tool’
‘PC Repair Tool’ is easy & quick way to find and fix BSOD errors, DLL errors, EXE errors, problems with programs/applications, malware or viruses infections in computer, system files or registry issues and other system issues with just few clicks.
Method 2: Run PC Health Check app to check compatibility of Windows 11 and Valorant game
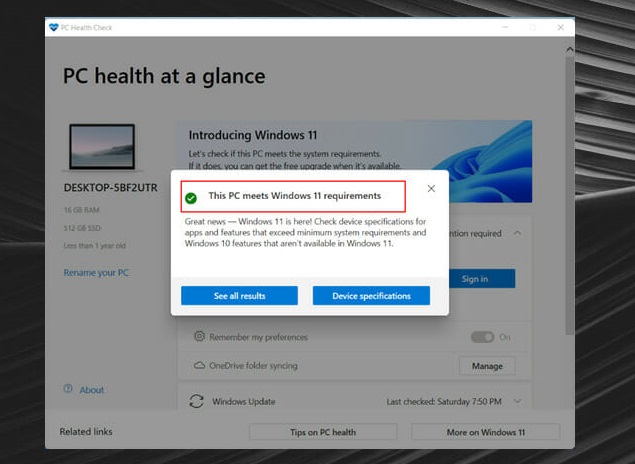
Step 1: Open your browser and visit ‘https://aka.ms/GetPCHealthCheckApp’ page to download PC Health Check app and click on it to start installation
Step 2: Click ‘Finish’ button once process is done. Click ‘Check Now’ button. You will get one this message if your PC meets requirements: This PC meets Windows 11 requirement. Or you may also receive message ‘This PC doesn’t currently meet Windows 11 system requirements’
Step 3: If you investigate, you can’t run Windows 11. It could be an error that you can easily fix using below methods.
Method 3: Enable TPM 2.0 and Secure Boot
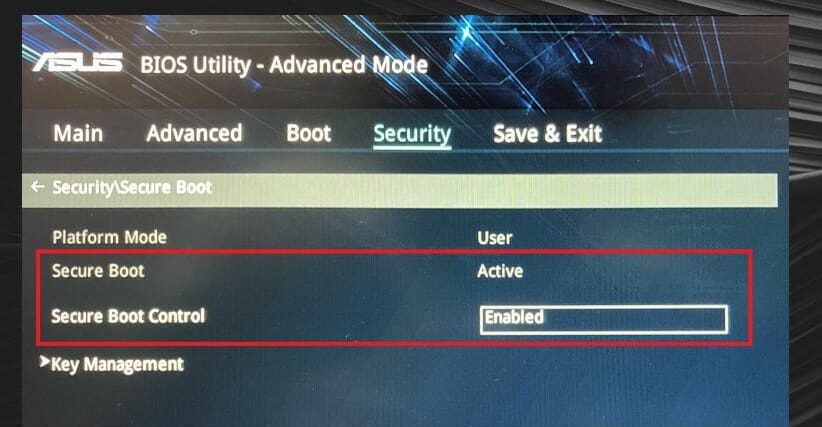
Step 1: Press & hold ‘SHIFT’ key on keyboard and restart your computer while holding to open ‘Windows Recovery Environment (WinRE)’
Step 2: Go to ‘Troubleshoot > Advanced Options > UEFI Firmware Settings > Security’ tab and enable ‘Trusted Platform Module (TPM)’
Step 3: Find ‘Secure Boot’ and enable it. Once done, restart your computer normally and check if it works.
Method 4: Update Windows OS
Update Windows OS to latest version can resolve the issue.
Step 1: Open ‘Settings’ App in Windows PC via Windows Search Box and go to ‘Windows Update’ and click ‘Check for updates’ button
Step 2: Download and install all available updates in computer and once updated, restart your computer and check if the issue is resolved.
Method 5: Disable Discord
Step 1: Open ‘Discord’ app and go to ‘Settings > Windows Settings’ and turn OFF ‘Open Discord’
Step 2: Restart your computer and check if it works.
Method 6: Restart VGC service
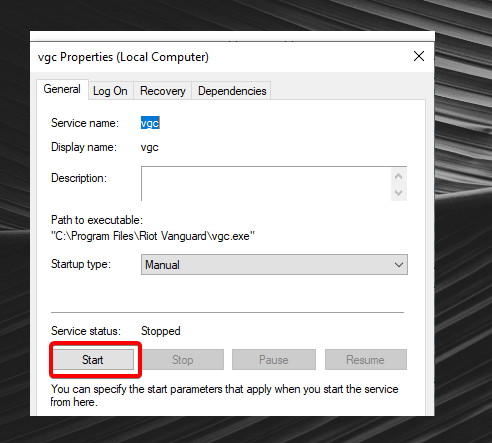
Step 1: Open ‘Services’ app in Windows PC via Windows Search Box
Step 2: Find and double-click ‘vgc’ service to open its ‘Properties’. Select ‘Automatic’ from ‘Startup Type’ dropdown and hit ‘Ok’ button to save the changes. Once done, restart your computer and check if the issue is resolved.
Method 7: Disable CSM
Step 1: Restart your computer and when booting initiates, press ‘F2’, ‘DEL’ or other supported key to open BIOS
Step 2: Locate ‘CMS Support’ under ‘BIOS’ tab and double-click on it and select ‘Disabled’
Step 3: Save the changes. Click ‘Power’ tab and go to ‘Save & Exit Setup’
Step 4: Restart your computer and enter BIOS screen again. Double-click ‘Secure Boot’ in BIOS and enable it.
Step 5: Go to ‘Power’ tab and click ‘Save & Exit Setup’ and click ‘Yes’ and restart your computer one final time
Step 6: Enter BIOS again and go to ‘Peripherals’ tab, double-click ‘Intel Platform Trusted Technology (PPT)’ and select ‘Enabled’
Step 7: Save the changes and go to ‘Power’ tab and click ‘Save & Exit Setup’. Once done, check if the issue is resolved.
Conclusion
I hope this post helped you on How to fix Van 1067 Valorant Windows 11 with easy steps/methods. You can read & follow our instructions to do so. That’s all. For any suggestions or queries, please write on comment box below.


