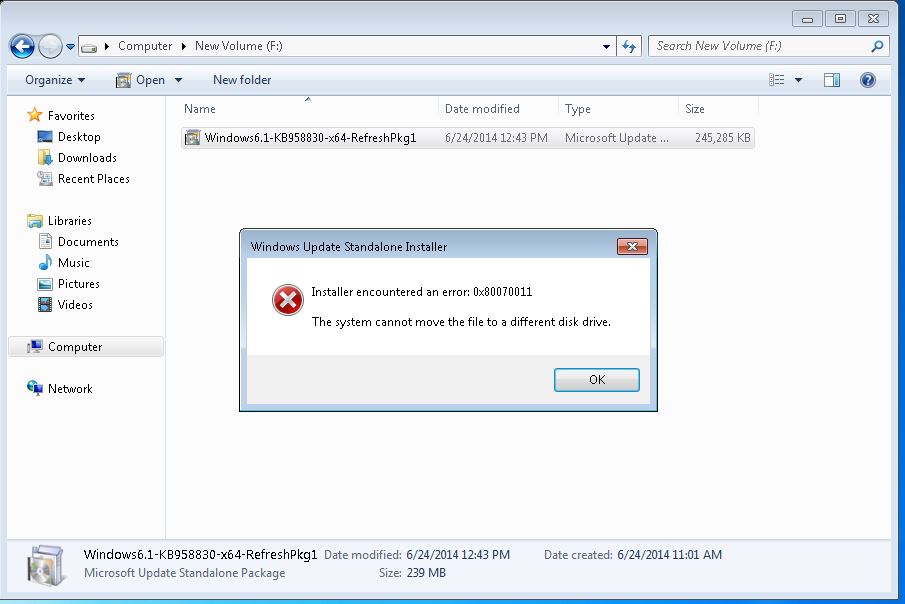
Working with Windows Operating System can be both blessing and a curse. Some users reported that, when they try to move a file to a different disk drive or trying to update to their Windows they get the error message saying, “Installer encountered an error 0x80070011” “The system cannot move the file to a different disk drive”
There are various factors behind this issue:
- Outdated Software Version.
- Missing SYS, EXE o DLL files.
- Corrupted System Files
- Damaged or deleted registries etc.
If you are one of those people who encountered the system cannot move the file to a different disk drive Windows 10 then don’t panic, there are multiple other users that have reported the same issue. For that reason, we have provided you with every possible solutions and methods along with the steps required.
How to fix System Cannot Move Files Error
Method 1: Scan your Whole Computer
The reason why this error is happening in the first place can be due to malware infections. You can use Microsoft’s own security solution “Windows Defender” to scan and look for infections. To do so, follow the steps
Step 1: In Start menu, go to search bar.
Step 2: Type Windows Defender and press Enter.
Step 3: In Windows Defender, find full system scan.
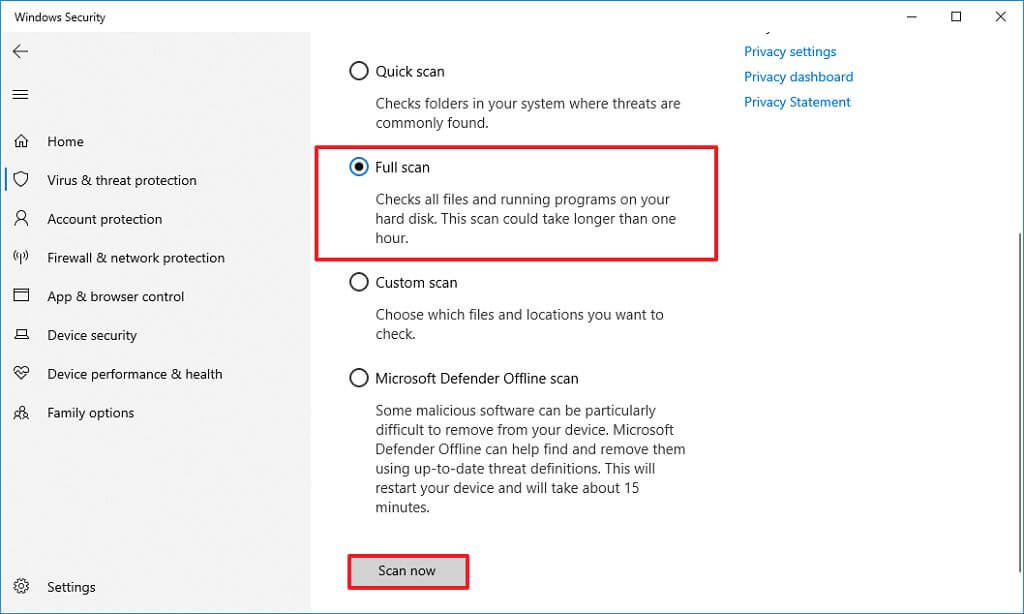
Step 4: Run the system scan, wait for it to finish.
Step 5: Reboot your system and check if the error has been resolved or not.
Method 2: Update your Windows Operating System
Windows bring patches for different bugs and issue included in their latest system updates. Therefore, update your system to the latest version can possibly fix your error. To update Windows operating system
Step 1: Go to Search box in Start menu.
Step 2: Type Update and click the first result.
Step 3: Find Check for Updates and click on it.
Step 4: Download and Install all the latest update available.
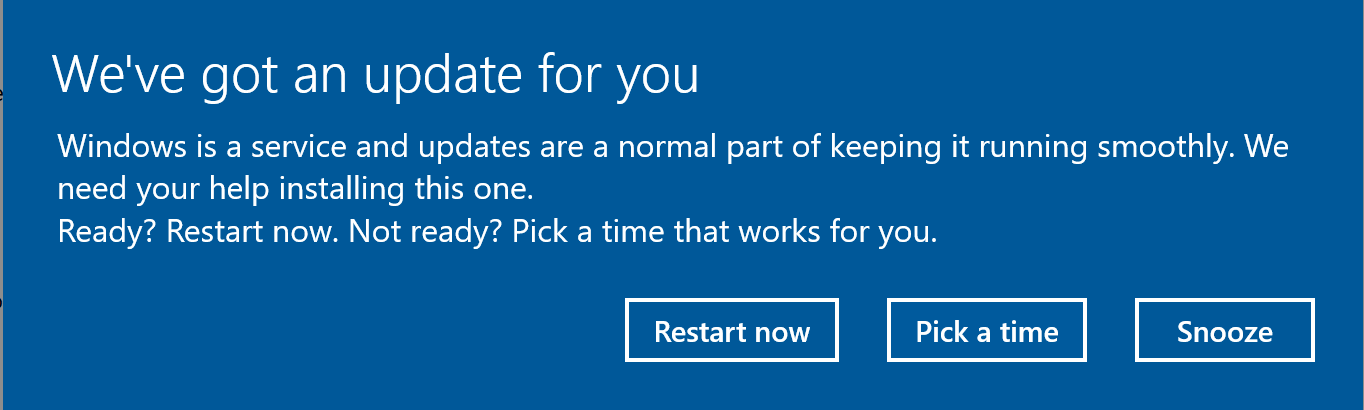
Step 5: Reboot your system after the update.
Method 3: Remove Windows Temporary Cache Files
Step 1: Open Run dialogue box by pressing Windows + R key simultaneously.
Step 2: Type temp in the dialogue box and press Enter.
Step 3: Delete all the files that are available.
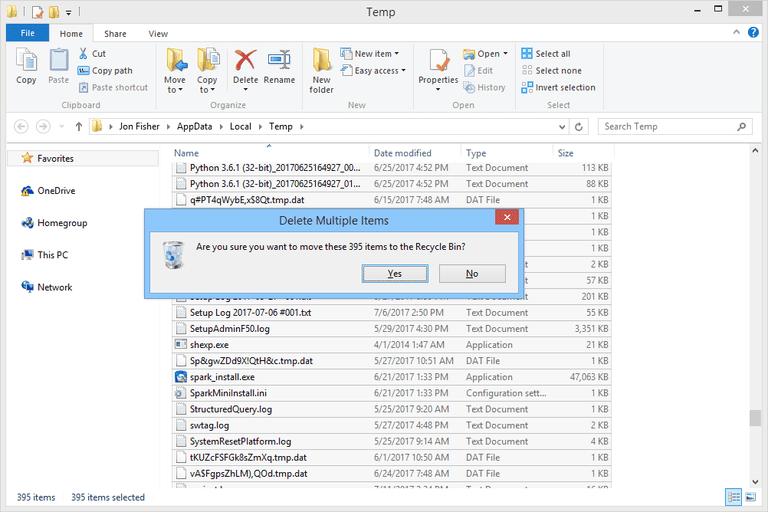
Step 4: Open Run again.
Step 5: Type %temp% in the box and press Enter.
Step 6: Delete all the files.
Sometimes, junk files can also affect your System causing it to malfunction. Deleting temp files is the best option to prevent it from malfunctioning and causing error including this error.
Method 4: Uninstall Recent Installed Application
Third party applications sometimes clash with your system application resulting in error similar to this or like this. For that reason, uninstall the recently installed apps temporary and see if this resolves your issue or not.
Step 1: Open Search bar from the Start menu.
Step 2: Type Add and Remove and press Enter.
Step 3: Sort by recently installed software.
Step 4: Uninstall them and restart your computer.
Check if the issue persists or not.
Method 5: Repair Registries
Windows has provided users with System File Checker included in their operating system. SFC Scan will scan your full computer looking for error and fix them. To run SFC Scan, follow the steps
Step 1: In Search bar type cmd.
Step 2: Right click on the command prompt and select Run as Administrator.
Step 3: Type the following command and press Enter.
sfc /scannow
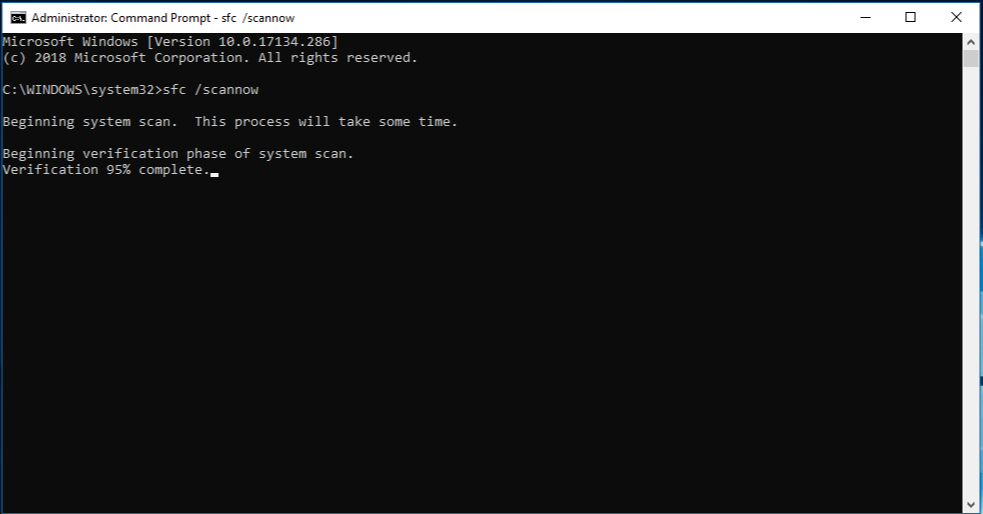
Step 5: Wait for the process to complete and reboot your computer. All the damaged or missing registries will be fixing during the reboot process.
If this method did not work then we would recommend you to do a complete system scan with dedicated software. Our Advance System Repair tool not only scans your whole system looking for issue but it fixes them automatically using its complex algorithm design and mechanized logic.
⇓Download Advance System Repair Tool⇓
Method 6: Use System Restore
System restore will allow you to recover your entire system configuration file to a past date without losing any of your data files. To use System Restore follow the instructions below
Step 1: Open Start and type System Properties in Search bar.
Step 2: In System Properties go to System Protection and click System Restore.
Step 3: Click next, and form the given list choose a Restore Point.
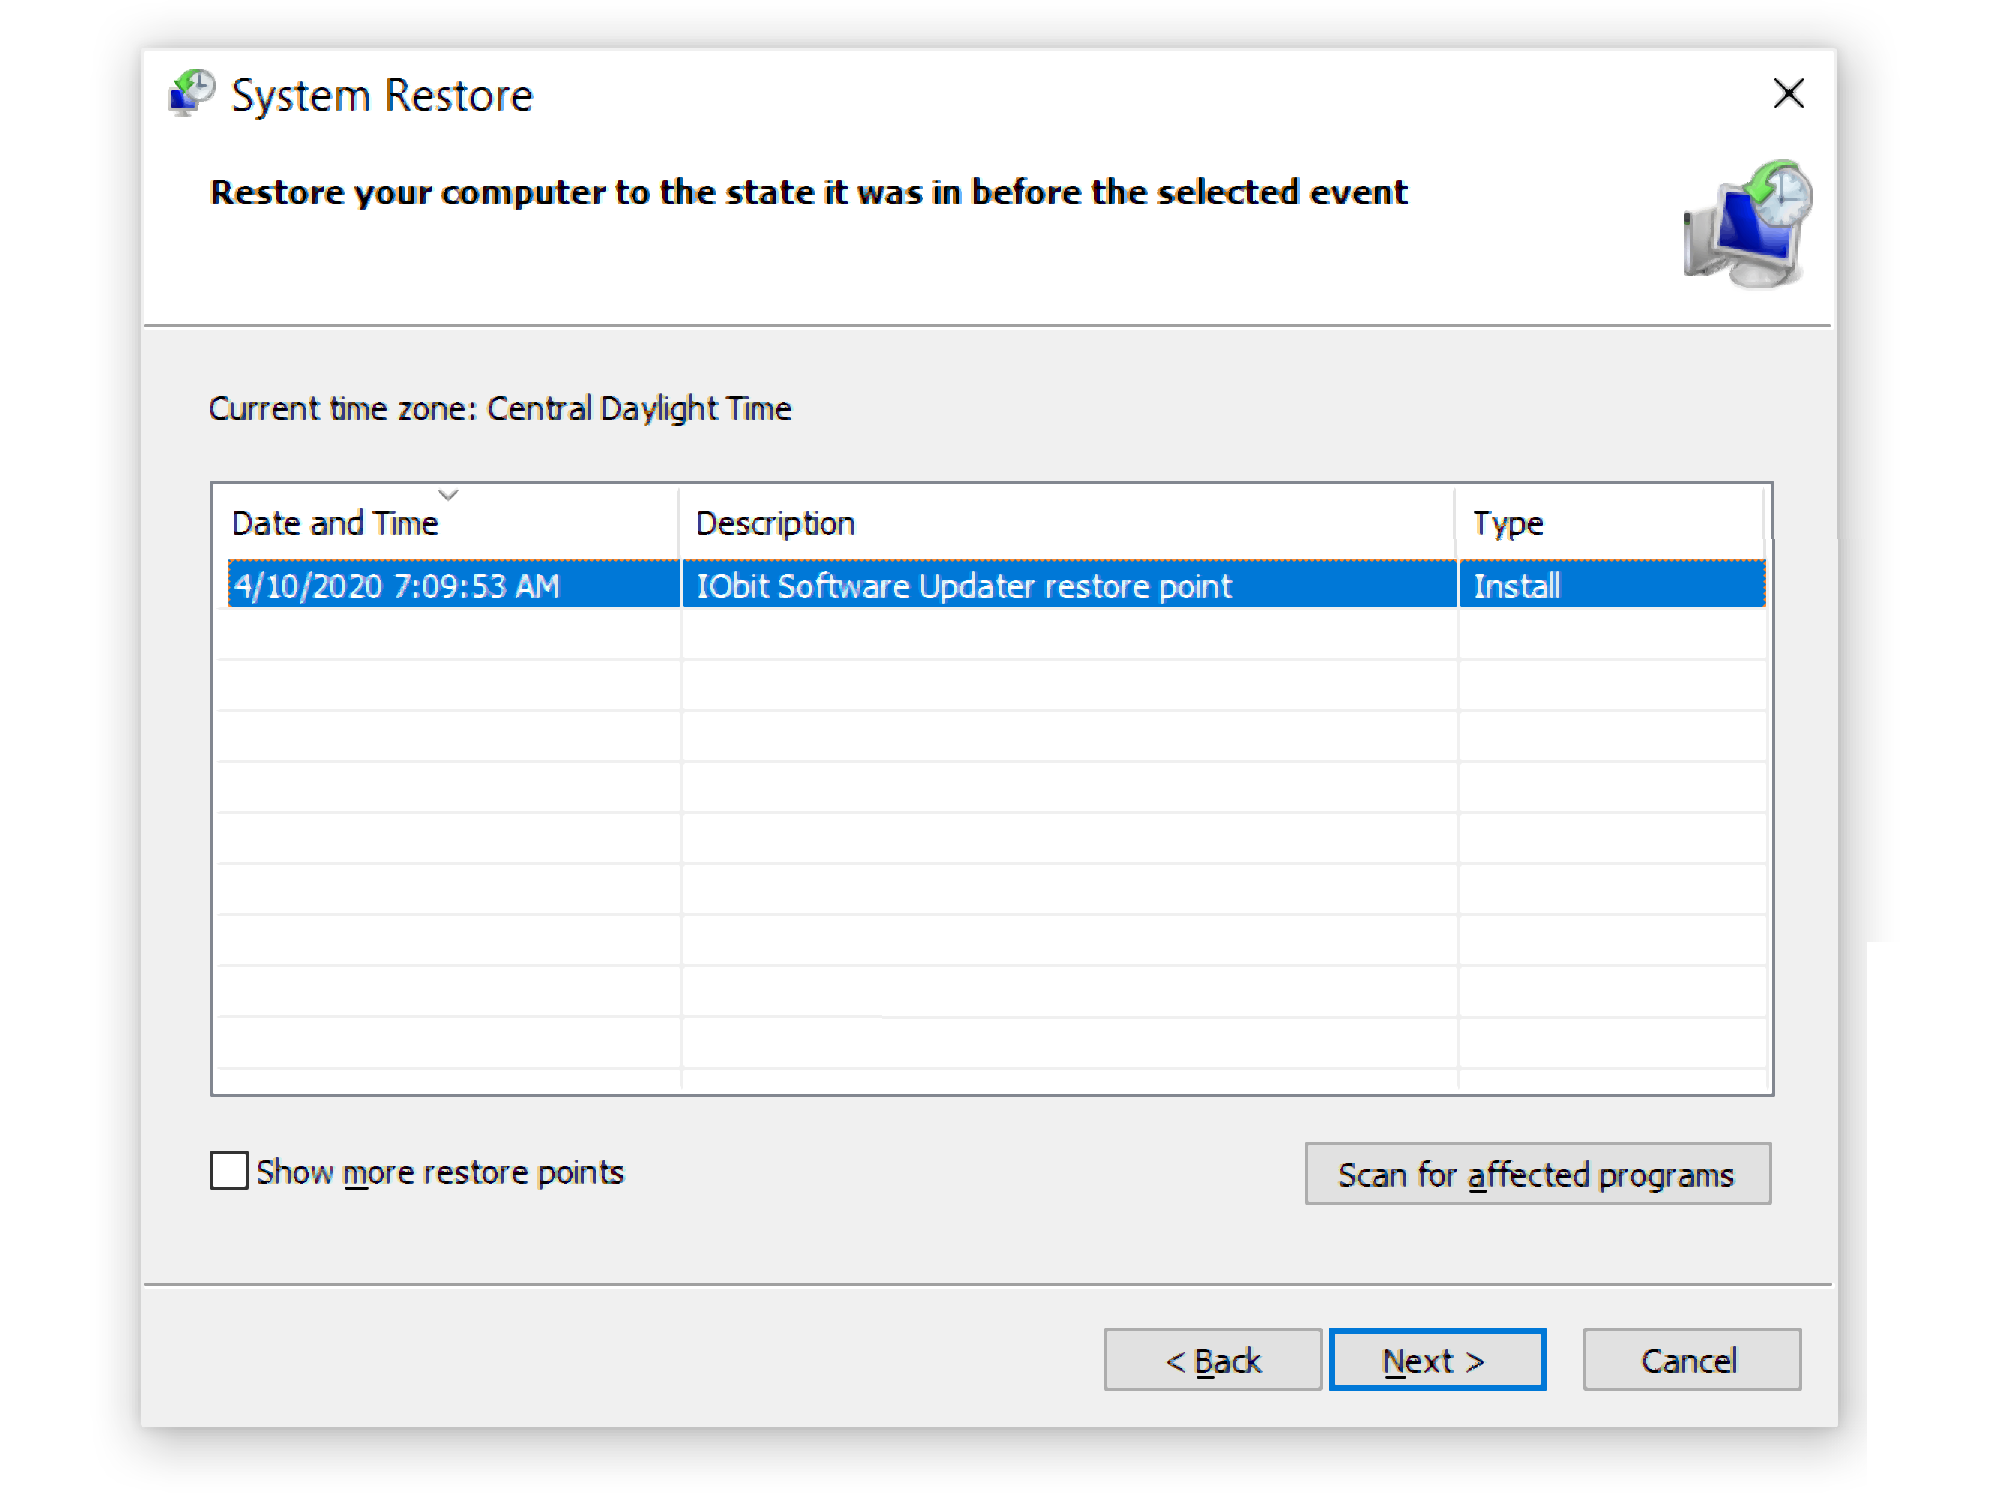
Step 4: Follow the on-screen instructions and click Finish.
Step 5: Your computer will reboot and system restore will start.
After the process is complete, check if the error is still there or not.
There are many people affected by the system cannot move the file to a different disk drive Windows 10, so don’t worry we have provided you with all methods and solutions with the steps required for you to follow and resolve your error.


