People encounter the group or resource is not in the correct state Windows 11 error message on the screen when they try to launch UWP or Universal Windows Platform application. This app can easily be installed from Microsoft Store and so the problem like this during the installation is truly annoying.
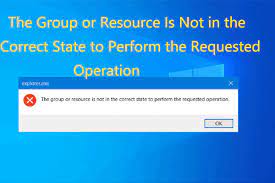
When users try to install the application, the installation fails with the error message in a pop-up window on the screen that says nothing about the error and just says the following:
“The group or resource is not in the correct state to perform the requested operation.”
Although there are many reasons possible what could lead into this error, we have mentioned below some of the main ones:
- Corrupted system files – The corruption of the Windows file can trigger this issue. System crashes, defective programs and malware infections are the main reasons behind corrupted files,
- Outdated and Disabled Network Adapters – Outdated drivers and disabled hidden adapters could cause the problem. You should enable them so that the UWP app could run,
- Conflicting Programs – There could be a conflict caused by Microsoft services that triggers this issue. Microsoft services might be clashing with the UWP applications causing the error to appear,
- Wrong Windows Installation – Several users have reported that the problem occurs right after Windows Installation. So, there could be a chance that improper Windows Installation could lead into this error.
Now, as we understand the nature of the issue and the reason why it appears, we are in the position to learn the possible fixes. Below, we have provided possible fixes for the issue under discussion that should help you:
Possible fixes for the group or resource is not in the correct state Windows 11
Fix 1: Run System File Checker and DISM Commands
System File Checker is a process to restore corrupted system files. It scans your device and restores the files that get corrupted. On the other hand, DISM command is used to repair Windows Image along with the files. Below are the steps how you can run these commands:
- On the Windows Search bar, type Command Prompt and open it as administrator by clicking Ctrl + Shift + Enter,
- If received UAC prompt, click Yes,
- Once the terminal is opened, type the below commands one by one and hit Enter to repair Windows files:
DISM /Online /Cleanup-Image /RestoreHealth
sfc /scannow
- Try opening the problematic application and check if the problem is fixed.
Fix 2: Update Network Adapters/ Drivers
As per researchers, the error message could appear due to outdated drivers as most of the UWP applications require latest network driver to run properly. So, if your network drivers are not updated, try updating the drivers using the below steps and see if this provides you the fix for the group or resource is not in the correct state Windows 11:
- Right-click on Start menu and select Device Manager,
- Go to the Network Adapter, right-click on it and select Update Driver,
- Click on Search Automatically For Drivers on the window opens up and install it,
- If you receive the message, The Best Drivers for Your Device Are Already Installed, uninstall the current driver and restart your computer and your problem should be gone.
Fix 3: Enable Hidden Network Adapters
It could be possible that you have disabled hidden Network adapters and this becomes the culprit why the UWP applications are not running from installation. Enable them and see if it brings any changes:
- Press Win+ R, type devmgmt.msc and hit Enter,
- Click on View on the top and click on Show Hidden Devices,
- Go to the network adapters section and right-click on Microsoft Kernal Debug Network Adapter and click Enable,
- Once done, open the app and see if the problem remains.
Fix 4: Restart TCP/ IP Net BIOS Helper
This is a service that makes communication with each other over a TCP network possible. By default, this service is enabled. But, it might get disabled in certain occasion and due to which the error appears while installing UWP application. As a required fix, you should just restart the said service using the below steps:
- Press Win+ R, services.msc and hit Enter,
- Once in the service page, find and right-click on TCP/IP Net Bios Helper,
- Click on Properties and change the startup type from Manual to Automatic,
- Click on Stop and then click on Start to restart the service.
Fix 5: Perform a Clean Boot
The group or resource is not in the correct state Windows 11 could occur because of conflicts between the services and applications. To find such services and apps that are causing the error, run a clean boot, a troubleshooting technique to start Windows with minimum services and drivers. Suppose you encounter the issue even after running clean boot, this means third party or even Microsoft services are not responsible for the said error. To perform a clean boot:
- Click the Start menu and type MSConfig,
- Click on the first option to open System Configuration Window,
- Now, click on Selective Startup and go to the Services tab,
- Under it, check the option named Hide All Microsoft Services and then click Disable All option,
- Once done, click Apply and then click Ok and restart your computer to see if the error persists.
Fix 6: Run Programs Troubleshooters
If the issue still appears, you should run built in troubleshooters to identify and fix the problem:
- Click on Start Menu and go to the settings,
- Navigate System and scroll down to the bottom and select Troubleshoot,
- Click on Other Troubleshoot,
- Now, run Program Compatibility Troubleshooter and Windows Store Apps Troubleshooter,
- That’s it! This should fix the error the group or resource is not in the correct state Windows 11.
Fix 7: Revert to Previous Restore Point
if the problem persists, you should go back to the previous restore point. If you did not create any restore point in the past, you should proceed with the next method:
- To restore Window, type rstrui in the Search Menu and hit Enter,
- Now, open System Restore and click Next,
- Select recently created restore point and click Next,
- Finally, click Finish option and the issue will be fixed.
Fix 8: Reset Windows
If nothing works, you should reset Windows. There could be a chance that an incorrect Windows installation leads to this issue. So, you may consider Windows Install. But, if you don’t know what adequately it works, we recommend you just reset Windows:
- To do that, type Reset This PC in the search menu and open it,
- Click on Reset PC and select Keep My Files,
- Now, pick Local Reinstall,
- Click on Reset option and check now if the issue is resolved.
Conclusion
That’s all! We have provided all possible solutions for the group or resource is not in the correct state Windows 11. Hope so, these methods are helpful for you in getting the required fix. if problem still appears, we recommend you use PC Repair Tool to get their automatic fix.


