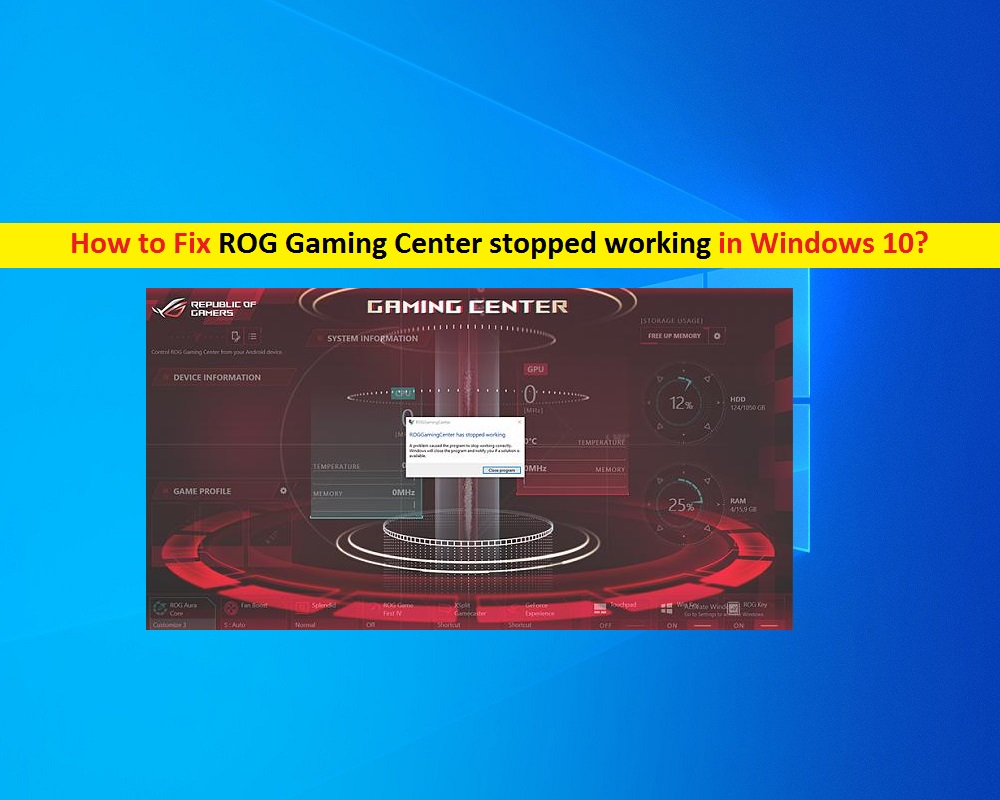
What is ‘ROG Gaming Center stopped working’ issue in Windows 10?
If you are experiencing ‘ROG Gaming Center stopped working’ issue while trying to open ‘ROG Gaming Center’ tool in your Windows 10 computer, then you are in right place for the solution. In this post, you will be guided with easy steps/methods to resolve the issue. Let’s starts the discussion.
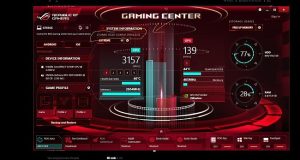
‘ROG Gaming Center’ Tool: ROG Gaming Center is utility software mainly associated with ROG models such as ‘ROG G-series’ and ‘ROG GL-series’ that includes Intel’s 7th generation CPU. This software offers you various options for releasing memory, running applications, overclocking, shortcuts, lighting effects and boosting fan performances.
ROG Gaming Center tool includes various functions and settings including overclocking function, turbo gear settings, advanced calibration, release memory, game mode settings and other. Different ROG models may show different functions and settings.
However, several users reported that they faced ‘ROG Gaming Center stopped working’ while they tried to open ROG Gaming Center application on their Windows 10 computer. This issue indicates that you can’t open or launch the ROG Gaming Center tool in Windows 10 for some reasons. There could be several reasons behind this issue including the interference of third-party antivirus software, faculty drivers like corrupted or outdated graphics card drivers, administrator permission for ROG Gaming Center tool is missing, outdated Windows OS, problem with recently installed software, malware or viruses attack in computer, and other reasons.
Sometimes, this issue is occurred if some third-party applications like your third-party antivirus software is blocking ROG Gaming Center tool from opening for some security reasons or due to its over security features. In such case, you can disable or uninstall the problematic third-party applications or antivirus software in computer in order to fix the issue.
You should make sure all Windows drivers are up-to-date in your computer. If you are not aware, ROG Gaming Center tool is designed to manage various gaming-related devices like your graphics, mouse and keyboard. Missing, corrupted or outdated drivers for these devices can cause ‘ROG Gaming Center stopped working’ issue. In such case, you can update your Windows drivers in order to fix the issue.
Also, make sure ROG Gaming Center tool is allowed to run as administrator in your computer. It might possible that admin permission is required for this tool to access certain files or resources of your computer. So, you can grant admin permission to ROG Gaming Center tool in order to fix the issue. Let’s go for the solution.
How to fix ROG Gaming Center stopped working in Windows 10?
Method 1: Fix ‘ROG Gaming Center not working’ with ‘PC Repair Tool’
‘PC Repair Tool’ is easy & quick way to find and fix BSOD errors, EXE errors, DLL errors, problems with programs/applications, malware or viruses issue, system files or registry issues, and other system issues with just few clicks. You can get this tool through button/link below.
Method 2: Add ROG Gaming Center tool to exception list of your antivirus or disable/uninstall antivirus
As mentioned, this issue can occur if your third-party antivirus software like ‘Avast Antivirus’ is blocking this tool for some security reasons. In such case, you can at first try to add ROG Gaming Center tool to ‘Exception List’ of your antivirus. This way, your antivirus software will scan your entire computer but except the files/programs included in ‘Exception List’.
Add ROG Gaming Center tool to ‘Exception List’ of your antivirus:

Step 1: Open ‘Avast AntiVirus’ by double-clicking on its icon on desktop/taskbar
Step 2: Now, click ‘Menu’ or ‘Avast Menu’ at top-right corner of application and hit ‘Settings > General tab > Exceptions’
Step 3: Click on ‘Add Exception’ and click ‘Browse’, navigate to the folder where you decided to install ROG Gaming Center like ‘C:\Program Files (x86)\ROG Gaming Center’ path
Step 4: Select the folder and click ‘Add Exception’ button.
Step 5: Now, restart your computer and try opening ROG Gaming Center tool and check if it works.
Disable or uninstall your antivirus software:
If adding this tool to ‘Exception List’ of antivirus didn’t work for you, then you can disable your antivirus software temporarily in your computer in order to fix ROG Gaming Center stopped working issue. If disabling antivirus didn’t work, then you can uninstall your antivirus completely in order to resolve the issue.
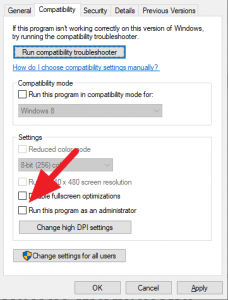
Method 3: Run ‘ROG Gaming Center’ tool as Administrator
You can grant ROG Gaming Center a administrator permission in order to fix the issue.
Step 1: Open ‘File Explorer’ and open the folder where you have installed ‘ROG Gaming Center’ tool means go to installation folder of ROG Gaming Center like ‘C:\Program Files (x86)\ROG Gaming Center’
Step 2: Find and right-click on executable of ROG Gaming Center tool, and select ‘Properties’
Step 3: In ‘Properties’ window, click on ‘Compatibility‘ tab, select ‘Run this program as an administrator’ checkbox, and then hit ‘Apply’ and ‘OK’ to save the changes.
Step 4: After that, try opening ROG Gaming Center tool as administrator, and check if the error is resolved.
Method 4: Update Windows 10 drivers
Outdated or corrupted drivers for graphics card, mouse, keyboard or other devices integrated/attached to computer can cause this type of issue. You can fix the issue by updating Windows 10 drivers.
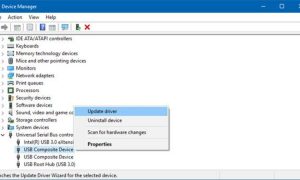
Step 1: Press ‘Windows + X’ keys on keyboard and select ‘Device Manager’
Step 2: Locate and right-click on the device with ‘Yellow Exclamation Mark’, and select ‘Update Driver’
Step 3: Follow on-screen instructions to finish update process and once done, restart your computer
Step 4: You can also try to download the latest drivers for problematic device from manufacturer’s official site, and install it into computer. But before installation, you can uninstall already installed driver in order to fix any driver conflict issue.
Download or reinstall Windows 10 drivers update [Automatically]
You can also try to update all Windows drivers with ‘Automatic Driver Update Tool’. This software will automatically find and install the latest updates for all Windows drivers. You can get this tool through button/link below.
Method 5: Reinstall ROG Gaming Center tool
This issue can also be occurred due to problem with ROG Gaming Center application itself. You can uninstall and then reinstall this tool in order to fix the issue.
Step 1: Press ‘Windows + R’ keys on keyboard, type ‘Control’ in the opened ‘Run’ dialog box and hit ‘OK’ button to open ‘Control Panel’
Step 2: Go to ‘Uninstall a Program > Programs & Features’, find and select ‘ROG Gaming Center’ tool, and select ‘Uninstall’ option
Step 3: Follow on-screen instructions to finish uninstall process and after that, restart your computer
Step 4: After restart, open your browser and download & install latest version of ROG Gaming Center tool from official site, and then run the tool and check if the error is resolved.
Method 6: Update Windows 10 OS
Updating Windows 10 OS to latest available build can resolve any issue in Windows computer and improve performances as well. Let’s try.
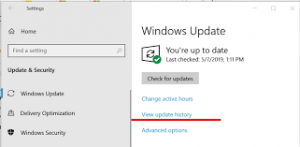
Step 1: Press ‘Windows + I’ keys on keyboard to open ‘Settings’ App in Windows 10
Step 2: Go to ‘Update & Security > Windows Update’ and click on ‘Check for updates’ button
Step 3: This will show you the list of available Windows update. Click on ‘Download and install’ to install the updates
Step 4: Once done, restart your computer to see the changes and check if the trouble is resolved.
Conclusion
I am sure this post helped you on How to fix ROG Gaming Center stopped working issue in Windows 10 with several easy steps/methods. You can read & follow our instructions to do so. That’s all. For any suggestions or queries, please write on comment box below.


