Tips to fix Remote Desktop Connection an internal error has occurred Windows 10/11:
In this article, we are going to discuss on How to fix Remote Desktop Connection an internal error has occurred Windows 10/11. You are provided with easy steps/methods to resolve the issue. Let’s starts the discussion.
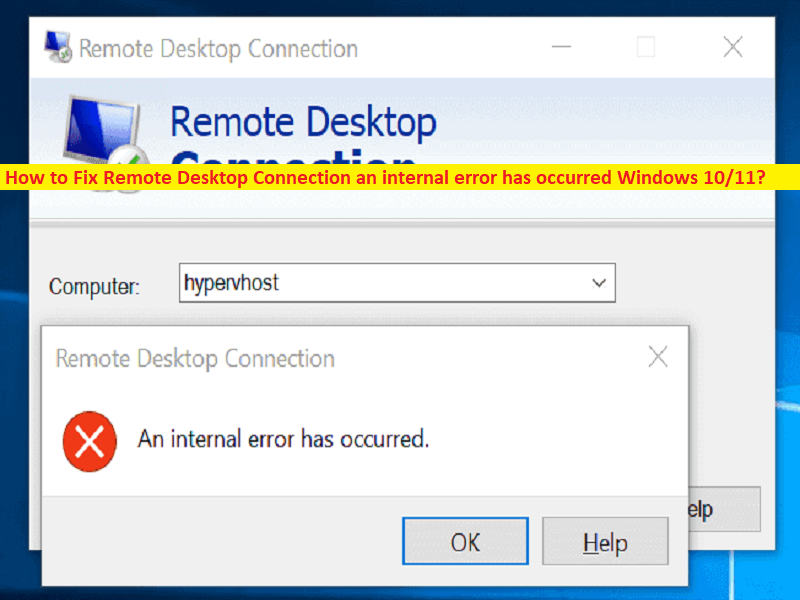
‘Remote Desktop Connection an internal error has occurred’ error:
It is common Windows Problem considered as Remote Desktop Connection error. This error is usually occurred when you try to connect to a remote computer. This error is often caused by RDP settings or its local group policy security. Several users reported about this issue and explained they are unable to use Remote Desktop Connection client to connect to another computer for some reasons. The error is appeared with message saying An internal error has occurred‘.
The possible reasons behind the issue can be the issue with Remote Desktop Connection settings, due to Remote Desktop Connection security, issue with computer’s domain, malware or viruses infections in computer, and other issues. Before applying the solutions provided here, make sure that you are using an administrator account in Windows computer. It is possible to fix the issue with our instructions. Let’s go for the solution.
How to fix Remote Desktop Connection an internal error has occurred Windows 10/11?
Method 1: Fix Remote Desktop Connection an internal error has occurred with ‘PC Repair Tool’
‘PC Repair Tool’ is easy & quick way to find and fix BSOD errors, DLL errors, EXE errors, problems with programs/applications, malware or viruses infections in computer, system files or registry issues, and other system issues with just few clicks.
Method 2: Change Remote Desktop Connection settings
Step 1: Open ‘Remote Desktop Connection’ client app via Windows Search Box and click ‘Show Options’ to unveil all settings
Step 2: Switch to ‘Experience’ tab and make sure ‘Reconnect if the connection is dropped’ box is checked, and then try again and check if the issue is resolved.
Method 3: Re-joining domain
Step 1: Open ‘Settings’ app in Windows PC and go to ‘Accounts’ and switch to ‘Access Work on School’ tab
Step 2: Select the domain you have connected your system to and then click ‘Disconnect’ and confirm it
Step 3: Disconnect your system and then restart your computer. After restart, you can join the domain again if you wish to and try using RDP again
Method 4: Changing MTU Value
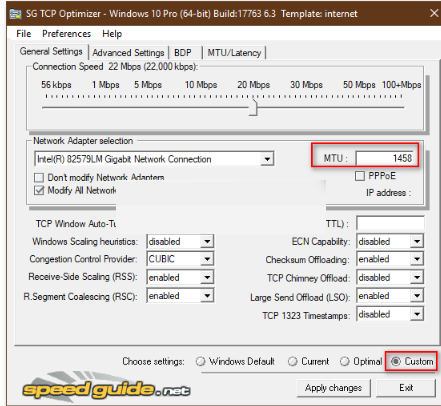
Step 1: At first, download TCP Optimizer from official page and once downloaded, launch it as administrator
Step 2: Select ‘Custom’ in front of Choose Settings and change MTU value to 1458, and save changes and check if the issue is resolved.
Method 5: Change security of Remote Desktop Connection in Group Policy Editor
Step 1: Open ‘Local Group Policy Editor’ app via Windows Search Box and go to following path
Computer Configuration > Administrative Templates > Windows Components > Remote Desktop Services > Remote Desktop Session Host > Security
Step 2: In right pane, locate ‘Require use of specific security layer for remote connections’ and double-click it to edit
Step 3: Select ‘Enabled’ radio option and then in front of Security Layer, select ‘RDP’, and then hit ‘Apply > Ok’ button to save the changes and check if the issue is resolved.
Method 6: Disable Network Level Authentication
Step 1: Right-click on ‘This PC’ and select ‘Properties’
Step 2: Click ‘Remote’ and uncheck ‘Allow connections only from computer running Remote Desktop with network level authentication’ box, and then hit ‘Apply > Ok’ button to save the changes.
Method 7: Restart Remote Desktop service
Step 1: Open ‘services’ app in Windows PC via Windows Search Box
Step 2: Find and double-click ‘Remote Desktop’ service to open its Properties. Click ‘Stop’ button under ‘Service Status’ section to stop the service
Step 3: After few minutes or seconds, click ‘Start’ button and then hit ‘Apply > Ok’ button to save the changes and check if the issue is resolved.
Method 8: Disable VPN connection
This issue can be occurred due to interference of VPN connection in computer. You can disable VPN connection in computer in order to fix the issue, and check if it works for you.
Method 9: Re-configure Local Security Policy
Step 1: Press ‘Windows + R’ keys on keyboard, type ‘secpol.msc’ in ‘Run’ window and hit ‘Ok’ button to open Local Security Policy Utility
Step 2: Click ‘Local Polices’ option, and then select ‘Security Option’ in left pane
Step 3: Scroll down and click ‘System Cryptography’ option in right pane, scroll to find ‘system Cryptography: Use FIPS 140 complaint cryptographic algorithms, including encryption, hashing and signing algorithms’ option
Step 4: Double-click on this option and check ‘Enabled’ button next to it, and then hit ‘Apply > Ok’ button to save the changes and check if the issue is resolved.
Method 10: Allow Remote connections
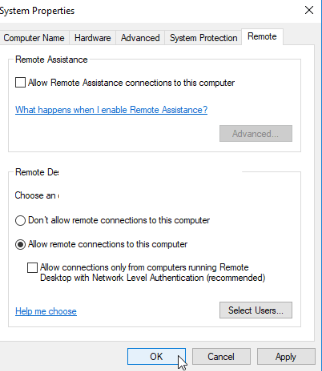
Step 1: Open ‘Control Panel’ in Windows PC via Windows Search Box and go to ‘System and Security > System > Advanced System Settings’
Step 2: Click ‘Remote’ tab and make sure ‘Allow remote assistance connections to this computer’ option is checked, and make sure ‘Allow remote connections to this computer’ tab below it is also checked, and then hit ‘Apply > Ok’ button to save the changes and check if the issue is resolved.
Method 11: Change the startup service
Step 1: Open Services app via Windows Search Box
Step 2: Find and double-click ‘Remote Desktop Service’ to open its Properties. Click ‘Stop’ button
Step 3: Now, select ‘Automatic’ from ‘Startup Type’ dropdown, and hit ‘Start’ under ‘Service Status’ section, and then hit ‘Apply > Ok’ button to save the changes and check if the issue is resolved.
Method 12: Enable Persistent Bitmap Caching
Step 1: Open Remote Desktop Connection client via Windows Search Box and click ‘Show Options’ and click ‘Experience’ tab
Step 2: Check ‘Persistent Bitmap Caching’ option and save your changes
Step 3: Try to make Remote Desktop Connection and then check if the issue is resolved.
Method 13: Disable Static IP on computer
Step 1: Open ‘Network Connections’ control panel via Windows Search Box
Step 2: Right-click on your network connection and select ‘Properties’
Step 3: Select ‘Internet Protocol Version 4 (TCP/IPv4)’ option and click ‘Properties’
Step 4: Select ‘Obtain IP address automatically’ option and save your changes. Once done, check if the issue is resolved.
Method 14: Re-configuring SonicWall VPN
Step 1: SonicWall in computer and click ‘VPN’, and then select ‘Settings’
Step 2: Look for WAN under VPN policies list and click ‘Configure’ option to right and select ‘Client’ tab, and click ‘Virtual Adapter Settings’ dropdown and select ‘DHCP Lease’ option
Step 3: Check if the issue is resolved. If not, you will have to remove current DHCEP lease from VPN and then check if the issue is resolved.
Method 15: Diagnosing connection through Command Prompt
Step 1: Type ‘cmd’ in Windows Search Box and press ‘SHIFT + ENTER’ keys on keyboard to open ‘Command Prompt as Administrator’
Step 2: Type the ‘ipconfig’ command and hit ‘Enter’ key to execute to display the IP information of the computer. Note down IP address listed under ‘Default Gateway’ heading
Step 3: Now, execute ‘ping <IP address you noted down>’ and wait to finish executing, and note down the results
Step 4: If the ping is successful, it means that IP address is accessible. Now, you will be testing the ‘telnet’ capability of computer by checking if telnet is possible over IP address
Step 5: Now, open command Prompt as administrator again and execute the following command
telnet <IP address> 3389
Step 6: You should be seeing a black screen if this telnet is successful, it is not means that the port is being blocked on computer. Once done, check if the issue is resolved.
Conclusion
I hope this post helped you on How to fix Remote Desktop Connection an internal error has occurred Windows 10/11 with easy ways. You can read & follow our instructions to do so. That’s all. For any suggestions or queries, please write on comment box below.


