What is ‘PFN_REFERENCE_COUNT BSOD error’ in Windows 10/11?
In this post, we are going to discuss on How to fix PFN_REFERENCE_COUNT BSOD error, PFN Reference Count BSOD error in Windows 10. You are provided with easy steps/methods to resolve the issue. Let’s starts the discussion.
‘PFN_REFERENCE_COUNT BSOD error’:
It is common Windows Problem considered as BSOD error. This error is appeared with message saying ‘Your PC ran into a problem and needs to restart. We’re just collecting some error info, and we’ll restart for you’ along with some Windows Stop codes like PFN_REFERENCE_COUNT BSOD error. This BSOD error is appeared usually while working on Windows computer or when you start/restart your computer.
There could be several reasons behind the issue including the corruption in system files or registry, malware or viruses infections in computer, corrupted/outdated device drivers or network drivers, bad configured settings, corruption in Windows computer, and other issues. If you are facing the same and looking for ways to fix, then you are in right-place for the solution. It is possible to fix the issue with our instructions. Let’s go for the solution.
How to fix PFN_REFERENCE_COUNT BSOD error in Windows 10?
Method 1: Fix PFN_REFERENCE_COUNT BSOD error with ‘PC Repair Tool’
‘PC Repair Tool’ is easy & quick way to find and fix BSOD errors, DLL errors, EXE errors, problems with programs/applications, malware or viruses infections in computer, system files or registry issues, and other system issues with just few clicks.
Method 2: Rollback network driver
This issue can be occurred due to problematic network driver version installed. You can install the previous network driver version by rolling back operation in order to fix.
Step 1: Open ‘Device Manager’ in Windows PC via Windows Search Box and expand ‘Network Adapters’ category
Step 2: Right-click on your network adapter and select ‘Properties’. Click ‘Driver’ tab and click ‘Rollback driver’ button and follow on-screen instructions to finish process and once done, restart your computer and check if the issue is resolved.
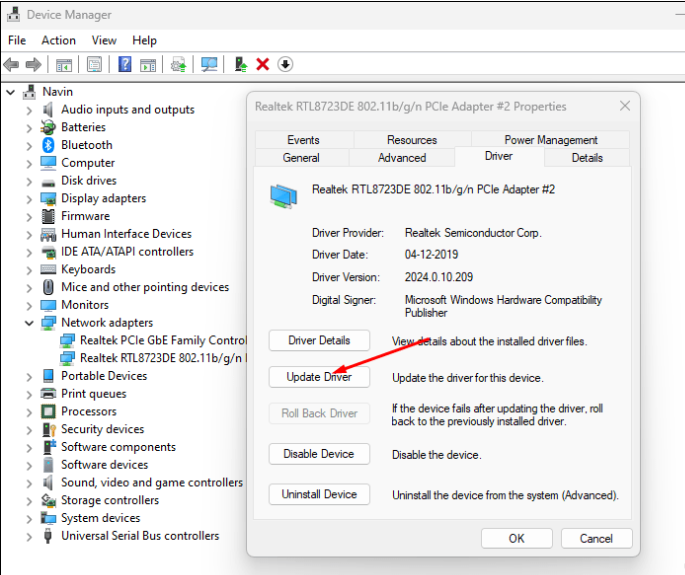
Method 3: Update Network driver
Updating network driver to latest version can resolve the issue.
Step 1: Open ‘Device manager’ in Windows PC and expand ‘Network Adapters’ category
Step 2: Right-click on your network adapter driver and select ‘Update Driver’, and follow on-screen instructions to finish update and once updated, restart your computer and check if the issue is resolved.
Download or reinstall network adapter driver update in Windows PC [Automatically]
You can also try to update all Windows drivers including network adapter driver using Automatic Driver Update Tool. You can get this tool through button/link below.
Method 4: Disconnect all external peripherals
This issue can be occurred due to problematic hardware attached into your computer. You can disconnect all peripherals from your computer and then restart your computer and check if it works for you toward resolving the issue. However, you can reconnect each peripherals in order to check which hardware is problematic.
Method 5: Run SFC scan and DISM scan
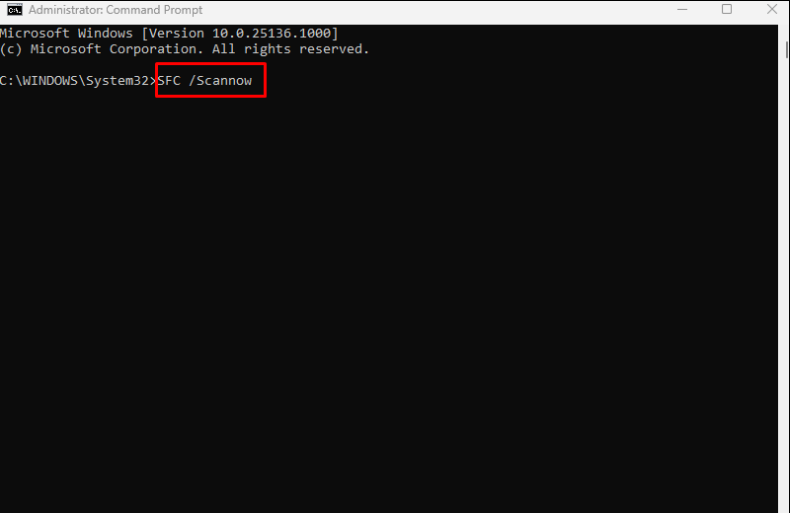
You can run SFC scan and DISM scan in computer to repair corruption in system files and system image to fix.
Step 1: Type ‘cmd’ in Windows Search Box and press ‘SHIFT + ENTER’ keys on keyboard to open ‘Command Prompt as Administrator’
Step 2: Type the following commands and hit ‘Enter’ key after each to execute.
sfc /scannow
DISM /Online /Cleanup-Image /RestoreHealth
Step 3: Once executed, restart your computer and check if the issue is resolved.
Method 6: Uninstall problematic Windows update
You can uninstall the problematic Windows update to fix the issue.
Step 1: Open ‘Settings’ app in Windows PC and go to ‘Update & Security > Windows Update > View Update History > Uninstall Updates’
Step 2: Find and right-click on your problematic Windows update or recently installed updates, and select ‘Uninstall’ to uninstall it and then restart your computer and check if the issue is resolved.
Method 7: Disable Fast Startup
Step 1: Open ‘Control Panel’ app in Windows PC via Windows Search Box
Step 2: Go to ‘Power Options’ in Control Panel via Search and go to ‘Choose what the power button does > Change settings that are currently unavailable’
Step 3: Uncheck ‘Turn ON fast startup (recommended)’ and click ‘Save Changes’ and then check if the issue is resolved.
Method 8: Uninstall unnecessary apps
Step 1: Open ‘Control Panel’ in Windows PC and go to ‘Uninstall a Program > Programs & Features’
Step 2: Find and right-click the problematic application, and select ‘Uninstall’ to uninstall it and then restart your computer, and check if the issue is resolved.
Method 9: Check Disk for error
Step 1: Open ‘This PC’ in Windows PC and right-click ‘Windows Installation drive like C: drive’, and select ‘Properties’
Step 2: Go to ‘Tool’ tab and click ‘Check’ button, select Scan driver and proceed and once finished, check if the issue is resolved.
Method 10: Run Windows Memory Diagnostic Tool
Step 1: Open ‘Windows Memory Diagnostic Tool’ via Windows Search Box
Step 2: Select ‘Restart now and check for problems’ and wait to finish process and once finished, check if the issue is resolved.
Method 11: Perform Clean Boot
Step 1: Open ‘System Configuration’ app in Windows PC via Windows Search Box
Step 2: Click ‘Services’ tab, tick ‘Hide all Microsoft services’ checkbox, and hit ‘Disable All’ button
Step 3: Click ‘Startup’ tab, and click ‘Open Task Manager’, right-click each startup item and select ‘Disable’ to disable them and then close Task Manager
Step 4: Finally, click ‘Apply > Ok’ button on System Configuration app to save the changes and check if the issue is resolved.
Method 12: Perform System restore
Step 1: Press ‘Windows + R’ keys on keyboard, type ‘rstrui’ in ‘Run’ window and hit ‘Ok’ button to open ‘System Restore’ app
Step 2: Click ‘Next’, select a valid restore point according to date & time when there was no issue at all in computer, and then click ‘Next > Finish’ to start restoring process and once finished, check if the issue is resolved.
Conclusion
I hope this post helped you on How to fix PFN_REFERENCE_COUNT BSOD error, PFN Reference Count BSOD error in Windows 10 with easy ways. You can read & follow our instructions to do so. That’s all. For any suggestions or queries, please write on comment box below.


