Tips to fix Mapped Network Drive not showing Windows 10:
In this article, we are going to discuss on How to fix Mapped Network Drive not showing Windows 10. You will be guided with easy steps/methods to resolve the issue. Let’s starts the discussion.
‘Mapped Network Drive not showing Windows 10’: It is common Windows Problem considered as Mapped Network Drive issue. This issue indicates you are unable to find Mapped Network Drive in File Explorer in your Windows 10 computer. When you open File Explorer app in Windows 10 computer, you may experience Mapped Network Drive is not showing there. Some users reported they can use the network drive under File Explorer but it doesn’t show all folders/files.
There could be several reasons behind the issue including the use of UAC (User Account Control), required administration permission not given to Mapped Network Drive and other issues. Another reason is responsible for the shared network drive not showing in the usage of File Explorer. All the legal rights of usage are included in this case, but when you map a drive as an admin, all the standard rights aren’t shared. Let’s go for the solution.
How to fix Mapped Network Drive not showing Windows 10?
Method 1: Fix Mapped Network Drive not showing Windows 10 with ‘PC Repair Tool’
‘PC Repair Tool’ is easy & quick way to find and fix BSOD errors, DLL errors, EXE errors, problems with programs/applications, malware or viruses infections in computer, system files or registry issues, and other system issues with just few clicks.
Method 2: Fix Mapped Network Drive not showing Windows 10 using Registry Editor
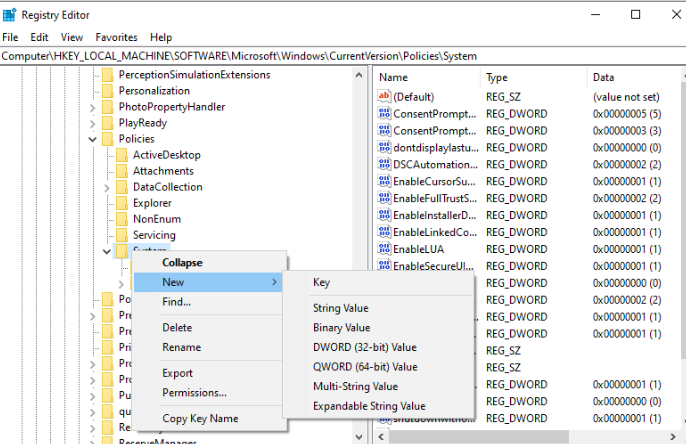
Step 1: Open ‘Registry Editor’ app in Windows PC via Windows Search Box and go to following path
HKEY_LOCAL_MACHINE > SOFTWARE > Microsoft > Windows > CurrentVersion > Policies > System
Step 2: Right-click the subkey to create new DWORD value and name the value to ‘EnableLinkedConnections’, and right-click it to ‘Modify’ the Value data to ‘1’ and then save the changes.
Step 3: Once done, restart your computer and check if the issue is resolved.
Method 3: Configure network proxy settings
Step 1: Open ‘Settings’ app in Windows PC via Windows Search Box and go to ‘Network & Internet > Status > Change Adapter Settings’
Step 2: Right-click on Ethernet connection and select ‘Properties’. Under ‘Networking’, choose ‘Internet Protocol Version 4 (TCP/IPv4)’ and hit ‘Properties’. Tick ‘Obtain an IP address automaticity’ and ‘Obtain DNS server address automatically’
Step 3: Return on Status tab, under ‘Change adapter options’ section, click ‘Sharing Options’
Step 4: In the new window, expand ‘Private’ to make sure ‘Network Discovery’ section is turned ON and click ‘Save Changes’
Method 4: Turn ON SMB features
Step 1: Type ‘Programs and Features’ in Windows Search Box and open it from results appear
Step 2: Click ‘Turn Windows Features ON or OFF’ in left pane to open Windows Features window. Find and tick the checkboxes relating to SMB and then hit ‘Ok’ button to save the changes
Step 3: Once done, restart your computer to see the changes.
Method 5: Show hidden items in File Explorer
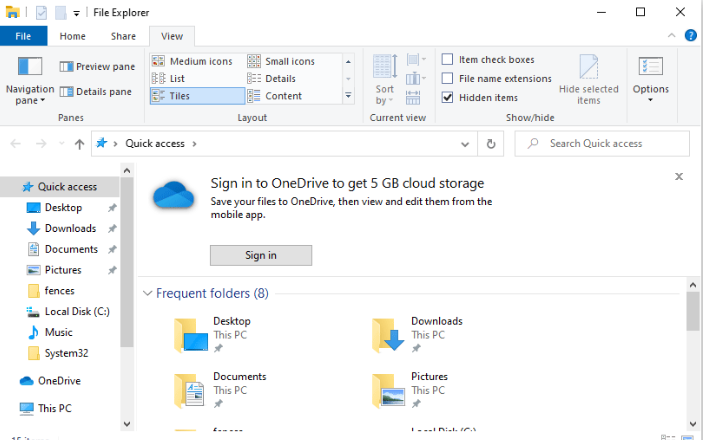
This issue can be occurred if folders and files are hidden on NAS drives including Mapped Network drive and network drive. You can show hidden items in File Explorer in order to fix.
Step 1: Open ‘File Explorer’ in Windows PC and click ‘View’ tab
Step 2: Find and check ‘Hidden Items’ checkbox, and then check if the issue is resolved.
Conclusion
I am sure this post helped you on How to fix Mapped Network Drive not showing Windows 10 with easy ways. You can read & follow our instructions to do so. That’s all. For any suggestions or queries, please write on comment box below.


