What is ‘lockapp.exe system error’ in Windows 10?
If you are facing ‘lockapp.exe system error’ in Windows 10 computer while trying to use ‘lockapp.exe’ program, then you are in right place for the solution. Here, you will be guided with easy steps/methods to resolve the error. Let’s starts the discussion.
‘lockapp.exe’ in Windows 10: lockapp.exe is legitimate executable file associated with Microsoft Windows Operating System. This program is designed to create graphical user interface and the overlay of lock screen in Windows 10 computer that you seen when you log in. Its original file location is ‘C:\Windows\SystemApps\Microsoft.LockApp_cw5n1h2txyewy’ or ‘C:\Windows\SystemApps\’.
The purpose of lockapp.exe program is to create GUI which overlays lock screen. All background images, date, time and other notifications and status that you see on lock screen are created, maintained and updated using ‘lockApp’ or ‘lockapp.exe’ program in Windows 10 computer. This program is only executed when you are on your lock screen overlay or when you signing into your Windows computer. You can press ‘Windows + L’ keys on keyboard to go to lock screen manually on Windows 10.
Why lockapp.exe process is disabled or consuming System resources? Is lockapp.exe file a virus?
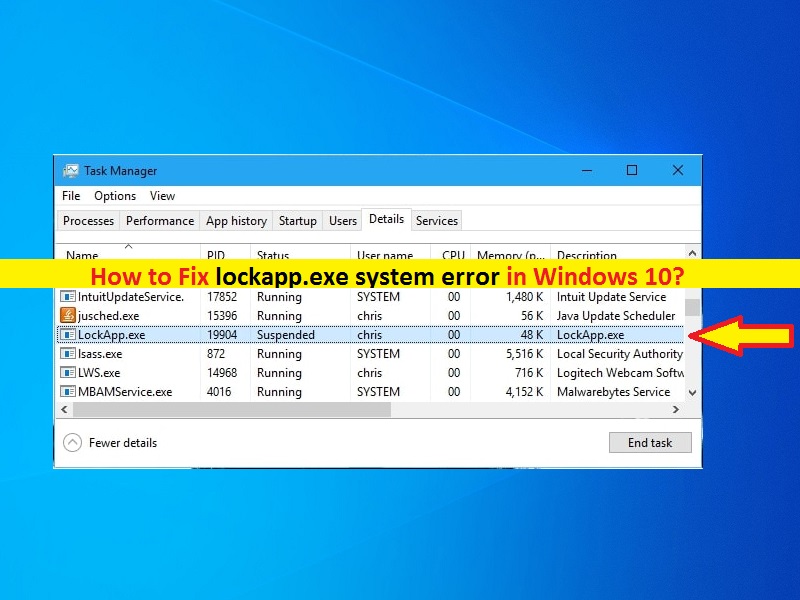
Several users reported that they faced ‘lockapp.exe system error’ while trying to use lockapp.exe or LockApp program in Windows 10 computer. They also explained that when they open ‘Task Manager’ in Windows 10 in order to check status of lockapp.exe process, they notice about 10-12 MB of memory uses when they are on lock screen.
As mentioned, lockapp.exe process is suspended after you have signed in and takes about 48K worth of memory in its suspended states. In sort, this process doesn’t consume any memory at all in your Windows computer. However, if lockapp.exe process is showing high CPU/memory consumption in Task Manager, then at first you should check the file location of lockapp.exe file and check if it is not a virus.
lockapp.exe is genuine file and associated with Windows 10 computer but it might possible malware or rough program with same name is running in your computer and causes High CPU/memory usage issue. It is simple to check if lockapp.exe file running in Task Manager whether it is genuine or virus file by checking its file location. If File Location is same as file location of original lockapp.exe file, then there is no issue at all, and if file location is different, then it could be virus or rough program.
In such case, you can run system scan for malware or viruses in Windows 10 computer with some powerful security tools in order to fix the issue and remove infections. You can try Windows 10 build-in Windows Defender antivirus or any third-party antivirus software for this and check if the issue with lockapp.exe program is resolved.
lockapp.exe system error: lockapp.exe is missing or corrupt error
Sometimes, ‘lockapp.exe is missing or corrupt error’ is appeared when you trying to access lockapp.exe program in Windows 10. It might possible lockapp.exe file you have deleted from its original location accidently or the file is deleted by some programs or malware installed in computer. Missing lockapp.exe can cause ‘LockApp program not working Windows 10’ or similar issue.
Some common lockapp.exe system errors:
- exe is corrupted
- exe cannot be located
- Runtime Error – LockApp.exe
- exe file error
- exe file cannot be loaded. Module was not found
- cannot register LockApp.exe file:
- exe file could not be loaded
- exe file doesn’t exist
How to fix lockapp.exe system error in Windows 10?
Method 1: Fix ‘lockapp.exe is missing or corrupt’ error with ‘PC Repair Tool’
‘PC Repair Tool’ is easy & quick way to find and fix BSOD errors, EXE errors, DLL errors, problem with programs/applications, malware or viruses issues, system files or registry issues, and other system issues with just few clicks. You can get this tool through button/link below.
Method 2: Run System Scan for malware or viruses with some powerful security program in Windows 10
This error can be occurred due to malware or viruses attack in Windows 10 computer. You can run system scan for malware or viruses with some powerful antivirus software in order to remove all threats and fix the issue. You can try Windows 10 build-in Windows Defender Antivirus, or third-party antivirus software for this. You can also try ‘PC Repair Tool’ offers you to remove malware infections and resolve PC issues.
Method 3: Update Windows 10 drivers
Updating Windows 10 drivers can resolve the issue with hardware device attached/integrated into computer and improve performances.
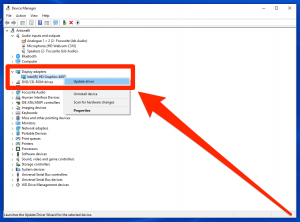
Step 1: Type ‘Device Manager’ in Windows 10 and expand each device category one-by-one and find the device with ‘Yellow Exclamation Mark’ on it
Step 2: Right-click on the device with ‘Yellow Mark’ on it, and select ‘Update Driver’. Follow on-screen instruction to update the driver. Repeat the same steps to update all other necessary drivers and then restart your computer, and check if the error is resolved.
Download or reinstall Windows 10 drivers update [Automatically]
You can also try to update all Windows 10 drivers to latest available update version with ‘Automatic Driver Update Tool’. You can get this tool through button/link below.
Method 4: Update Windows 10 OS
Updating Windows 10 OS to latest available build can resolve any issue in Windows computer. Let’s try.
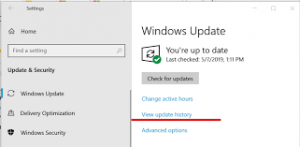
Step 1: Make sure your computer is connected to stable internet. Now, open ‘Settings’ App in Windows 10 and go to ‘Update & Security > Windows Update’ and click on ‘Check for updates’ button
Step 2: Install the available updates in computer and once done, restart your computer to see the changes.
Method 5: Run SFC Scan tool in Windows 10

Corruption in system files can be resolved by using Windows 10 build-in SFC Scan tool.
Step 1: Press ‘Windows + X’ keys on keyboard and select ‘Command Prompt as Administrator’
Step 2: Type ‘sfc /scannow’ command and hit ‘Enter’ key to execute.
Step 3: Once executed, restart your computer and check if the error is resolved.
Method 6: Restore Windows System
One possible way to fix this error is to restore your Windows computer to restore point according to date & time when there was no issue at all or no issue with lockapp.exe program.
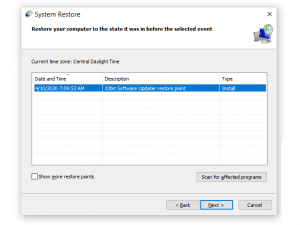
Step 1: Press ‘Windows + R’ keys on keyboard, type ‘rstrui’ in the opened ‘Run’ dialog box and hit ‘OK’ button to open ‘System Restore’ window
Step 2: In the opened window, click on ‘Next’, select a restore point according to date & time when there was no issue at all, and click on ‘Next > Finish’ to start restoring process
Step 3: Once done, restart your computer and check if the problem is resolved.
Conclusion
I am sure this post helped you on How to fix lockapp.exe system error in Windows 10 with several easy steps/methods. You can read & follow our instructions to do so. That’s all. For any suggestions or queries, please write on comment box below.


