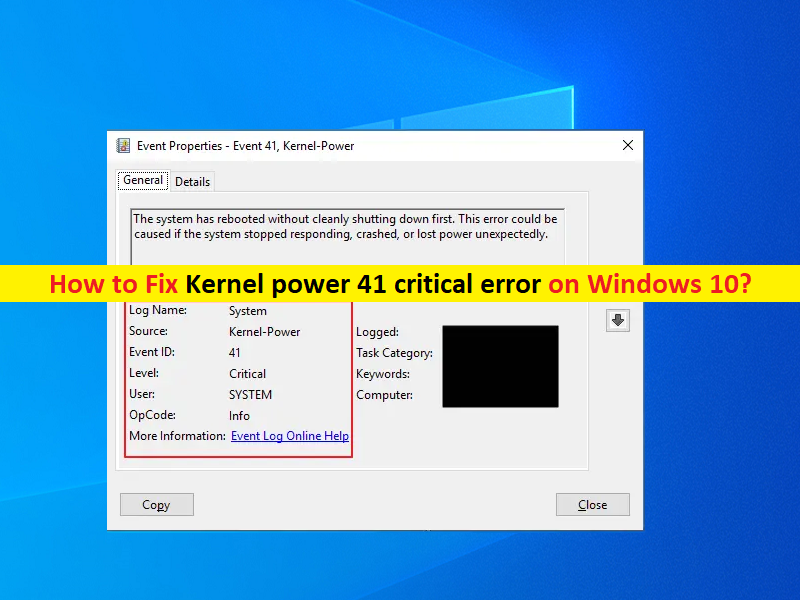
What is ‘Kernel power 41 critical error’ on Windows 10?
In this post, we are going to discuss on How to fix Kernel power 41 critical error on Windows 10. You will be guided with easy steps/methods to resolve the issue. Let’s starts the discussion.
‘Kernel power 41 critical error’: It is common Windows Problem usually occurred inside Windows Event Viewer. This error is associated with Event ID 41 in Windows Event Viewer App. This error indicates the system has rebooted without cleaning shutting down. This critical error is generated when Windows computer starts after its last shutdown and your Windows computer finds that computer was not previously shutdown cleanly.
There could be several reasons behind the issue including underpowered or failing power supply, issue with RAM or memory, hard disks problem and other hardware problem. You can try to fix the issue by shutting down your Windows computer properly and wait for cool it down, and after few minutes or hours, start your Windows computer again and check if the issue is resolved. If not, you can follow our instructions to fix.
You should also make sure all device drivers are properly installed in your computer and are up-to-date to latest & compatible driver version. If not, device driver updates are necessary in Windows computer. This issue can be occurred due to outdated BIOS firmware software, so you can fix the issue by updating BIOS to latest & compatible version. Let’s go for the solution.
How to fix Kernel power 41 critical error on Windows 10?
Method 1: Fix Kernel power 41 critical error with ‘PC Repair Tool’
‘PC Repair Tool’ is easy & quick way to find and fix BSOD errors, DLL errors, EXE errors, problems with programs/applications, malware or viruses issues, system files or registry issues and other system issues with just few clicks.
Method 2: Customize Power Settings
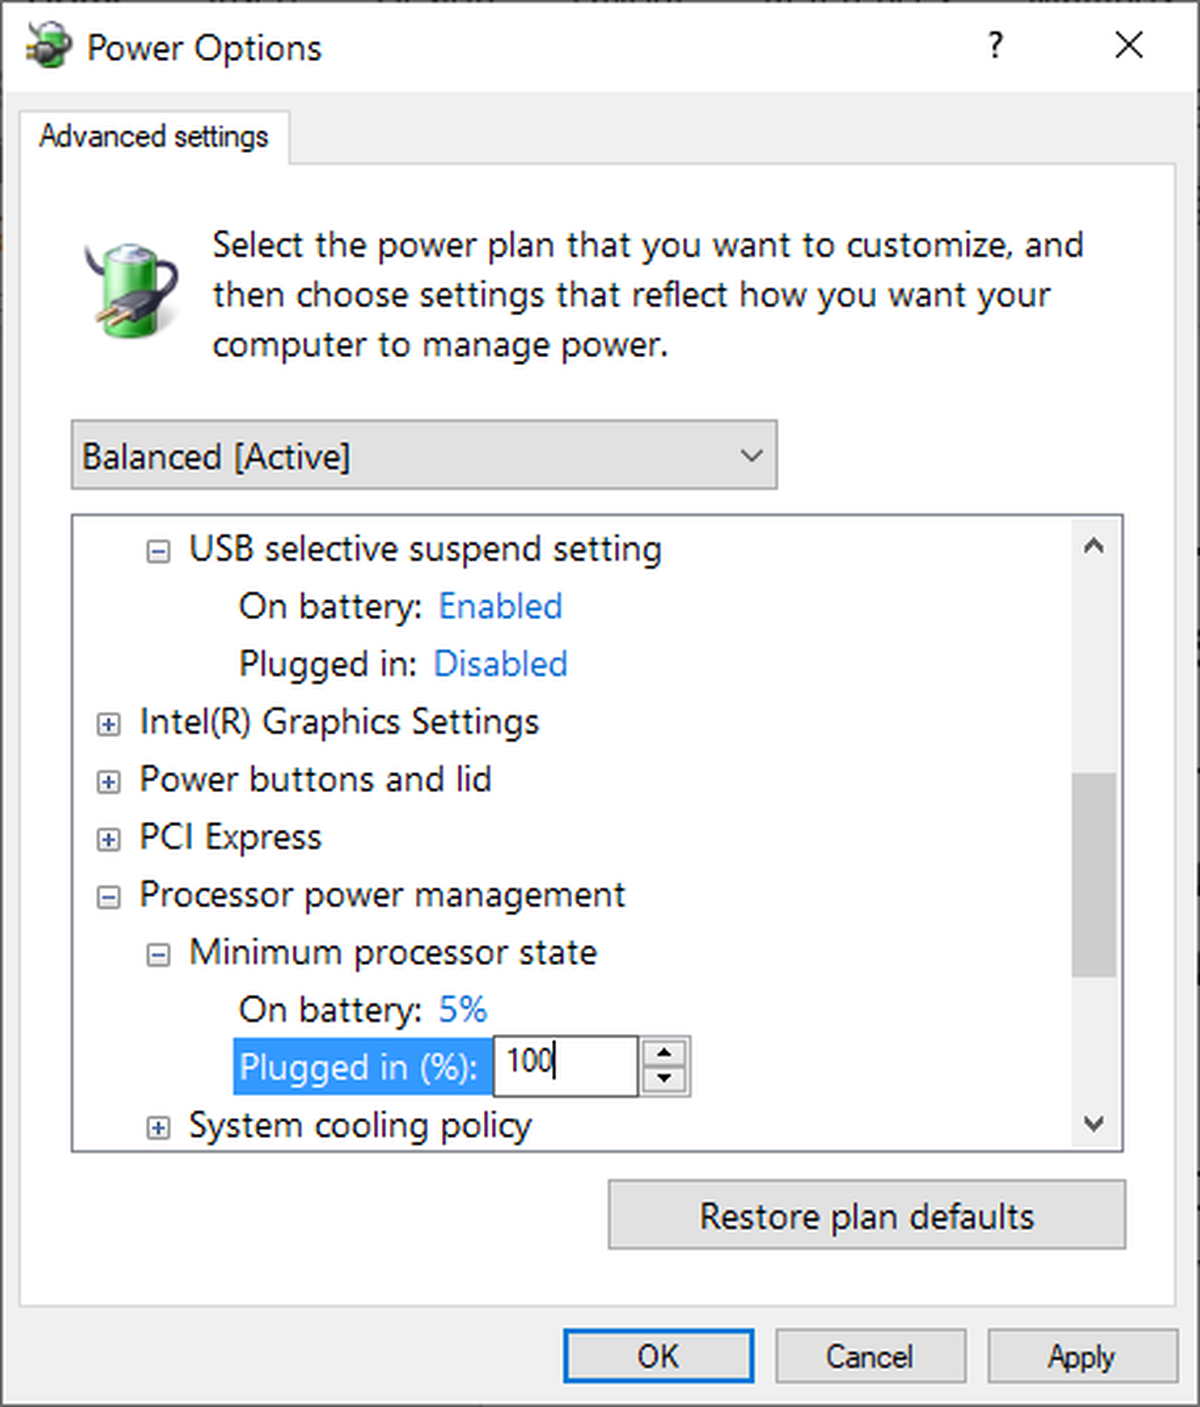
You can customize Power Settings in your Windows computer in order to fix.
Step 1: Type ‘Power Options’ in Windows Search Box and click ‘Power & Sleep Settings’ from results appear
Step 2: Click ‘Additional Power Settings’ under related settings on right pane
Step 3: In ‘Power Options’ window, find and click ‘Change when the computer sleeps’ option and click ‘Change advanced power settings’
Step 4: Expand ‘Hard Disk’ and ‘Turn Off hard disk after’ sections and make sure ‘On Battery’ and ‘Plugged in’ are set to ‘Never’. If these settings are configured differently and there is no ‘Never’ option, type ‘0’ and change to ‘Never’
Step 5: Now, expand ‘Sleep’ and ‘Sleep After’ sections, and make sure both ‘On Battery’ and ‘Plugged in’ are set to ‘Never’ and then hit ‘Apply’ to save the changes. Once done, check if the issue is resolved.
Method 3: Update Device Drivers in Windows PC
Updating all necessary device drivers to latest & compatible version can resolve the issue. You can update all Windows drivers including graphics card driver, sound card driver and other device drivers using Automatic Driver Update Tool. You can get this tool through button/link below.
Method 4: Update BIOS
Another possible way to fix the issue is to update BIOS firmware software in your computer to latest & compatible version. You should follow your PC’s motherboard manufacturer official guideline to download and install BIOS update in your computer. You can visit your PC’s motherboard manufacturer official site and follow their instructions to get BIOS update. Once updated, check if the issue is resolved.
Method 5: Turn OFF ‘Fast Startup’

Another possible way to fix the issue is to turn OFF ‘Fast Startup’ option in Power Plan Settings in computer.
Step 1: Type ‘Power’ in ‘Windows Search Box’ and go with ‘Choose Power Plan’ option from results appear
Step 2: In the opened window, click ‘Choose what the power button do > Change settings that are currently unavailable’, and uncheck ‘Turn ON Fast Startup (recommended)’ option if it is enabled. Click ‘Save Changes’ to save the changes and restart your computer, and check if the issue is resolved.
Method 6: Reseat RAM and graphics card
If the issue is still persist, then you can perform RAM and graphics card reseat operation in computer in order to fix. To do so, you need to open your PC/laptop’s CPU case and remove RAM and graphics card from their slots. Clean the dust from RAM and graphics card using soft cloths and then re-insert RAM and graphics card into their correct slot properly. Now, turn ON your computer and check if the issue is resolved.
Conclusion
I am sure this post helped you on How to fix Kernel power 41 critical error on Windows 10 with several easy steps/methods. You can read & follow our instructions to do so. That’s all. For any suggestions or queries, please write on comment box below.


