Ethernet doesn’t have a valid IP configuration error occurs when your NIC or Network Interface Card hooked up to your Router or Modem via the Ethernet Cable is not able to get a valid IP address. This is necessary for the system to communicate with the router and function on the internet.
Three main issues that possibly cause this error are faulty router, incorrect assigned IP address to the system and faulty NIC. In this article, we will provide you different solutions to address these three issues. You should maintain the sequence listed.
Possible fixes for Ethernet doesn’t have a valid IP configuration error
Fix 1: Power-Cycle your system
A feature named Fast Startup is responsible for reducing boot and start-up time on system. It loads settings form system memory or cache so as to provide this function. Many users reported this issue got the error fixed on restarting their system and then disabling this fast start-up feature:
- Right-click on the Start menu to open WinX menu,
- Click on Power Options there in,
- Select Choose what the power buttons do/ Choose what the power button does,
- Click on Change settings that are currently unavailable,
- Uncheck all the checkboxes besides Turn on Fast startup (recommended) to disable the Fast startup,
- Confirm this change,
- Close the system settings the then and restart your computer.
Fix 2: Check your NIC
As stated, this router assigns IP address automatically, although you have an option to manually choose specific address. In this case, you should still set it automatic first and check the properties for the correct settings and re-configure it manually:
- Press Win+ R, type in ncpa.cpl and click Ok,
- In the opened Network Connections window, right-click on your Network Adapter and go to its properties,
- Click on the highlighted Internet Protocol Version 4 TCP/IPv4 and then click on Properties,
- On the next window, select ‘Obtain an IP address automatically’ and ‘obtain DNS server address automatically’.
Fix 3: Reboot your Router/ Modem
Power off your router and the modem, wait for 5 minutes and turn it on thereafter to see if it now has a valid configuration. If this does not work, you should use different Ethernet cable from your router to the computer. If this also does not work, connect your computer to a different router. If the error persists even after that, you might have to replace your router.
Fix 4: Reset your Network Settings
Another solution that you should try with is to reset your internet settings. The network settings might become outdated or conflict with the existing network resulting in Ethernet doesn’t have a valid IP configuration error. Flush the DNS server in this case and reset the socket. This will reinitialize the connection procedure in hopes that this will solve the issue:
- Press Win+ S, type in command prompt and hit enter,
- On the command prompt, execute the below instructions:
ipconfig /flushdns
ipconfig /renew
nbtstat –R
nbtstat –RR
netsh int ip reset c:\resetlog.txt
- netsh winsock reset
- Restart your computer the then. Once started, press Win+ R, type in Control Panel and hit Enter,
- Select Network and Sharing center and click on Change adapter settings,
- Right click on the Ethernet hardware and select Disable. Enable it the then by right-clicking to it again.
Fix 5: Check connected cables
Make sure if all the cables are properly connected with your PC and are in router/ switch locations. Many users reported that the cables were not connected properly. You receive a click sound when you plug-in an Ethernet Cable. Immediate blinking indicates that the cable is connected correctly.
Fix 6: Uninstall and Reinstall your Network Adapter
- Press Win+ X, type in hdwwiz.cpl and click Ok,
- Expand Network Adapters and note down the name of your network card,
- Right-click on your Ethernet and click on Uninstall,
- Click Action > Scan for hardware changes.
Fix 7: Disable IPV6
Generally, systems have IPv4 connection configuration. But, you can reconfigure the network settings to run the IPv6 configuration. You might do this and then started encountering this issue. Disabling IPV6 connection is therefore necessary in this case to get the error fix:
- Right-click on the network icon and select Open Network and Internet settings,
- Select Network and Sharing center and click on Change Adapter settings option,
- Right-click on the network connection you are using and click on properties,
- Locate Internet Protocol version 6 from the list and uncheck it,
- Click OK to apply the changes and check if this fixes the issue.
Fix 8: Disable Microsoft kernel Debug Network Adapter
If certain network adapter has been installed on your system in addition with the default network adapter, they can internet with each other and cause the Ethernet connection problem. The Microsoft kernel debug network adapter may sometimes manifest itself on system and prevent the default drivers from working properly. Disabling the network adapter completely is the required solution in this case:
- Press Win+ X and select Device Manager from the list,
- Select Views option under it and check Show Hidden Devices option,
- Right-click on the Microsoft kernel Debug Network Adapter option and select Disable,
- Click ‘Yes’ to confirm this action.
Fix 9: Assign Mac address to the Network Card
For establishing a connection with the internet router, your Mac address must be assigned to the network card. If the Mac address is not entered properly, it can prevent the device from connecting through the internet. Here is how you can manually assign the network card a Mac Address:
- Press Win+ R, type in cmd and hit Enter,
- Enter ipconfig/ all and note down the physical address in the next page appears,
- Right-click on the network icon the then and select Open Network and Internet settings,
- Click on Network and Sharing Center option and select Change Adapter Settings,
- Now, right-click on the network connection that you are using and click on properties,
- Click on Configure option and go to the ‘Advanced’ tab,
- Select Network Address from the list and check the value option,
- Enter the address you noted down,
- Click Ok to save the changes and then see if the issue is gone.
Fix 10: Enable DHCP
DHCP on your system takes the responsibility to detects and assigns the network configuration. It is possible that it is disabled on your system and therefore you are receiving Ethernet doesn’t have a valid IP configuration error. Here is how to enable DHCP:
- Press Win+ R to open Run,
- Type in Services.msc and hit Enter,
- In the opened services window, double-click on DHCP client,
- Click Startup and select Automatic option,
- Click Start the then and navigate back to the DHCP client option,
- Click on Restart-service and confirm with Yes to complete the process.
Fix 11: Disable power saving feature of your Network Adapter
The power saving feature may disable certain functions to converse energy. This could be preventing the network adapter to function as usual. You need to disable the Power Saving function in this case:
- Right-click on Network and select Open Network and Internet settings,
- Go to the Network and Sharing Center section and click on Change Adapter Settings,
- Right-click to the internet connection and click Disable,
- Now, go to its properties by right-clicking it once again,
- Click on the configure option there in,
- Now, go to the Power Management tab and uncheck the option that says Allow the computer to turn off this device to save power,
- Click Ok to confirm the changes,
- Right-click on the internet connection again and click on Enable.
Fix 12: Reinitialize your IP configurations
Your IP configurations might be preventing your Ethernet from connecting properly. Renew the IP configuration in this case to get the required solution:
- Press Win+ R, type in cmd and hit Enter,
- Type in the following command one by one and hit Enter:
IPconfig /release
IPconfig /flushdns
IPconfig /renew
- Check if this fixes the issue.
Fix 13: Disable antivirus tool you are using
Temporarily disable the third party antivirus tool you are using and see if this works:
- Right-click on the Antivirus icon to find Disable option,
- In case no such option appears, search the web for the directions how to disable your antivirus tool.
Fix 14: check for bad sectors of your hard drive
It can be the case that Ethernet doesn’t have a valid IP configuration error occurs because certain areas of your Hard Drive are corrupted and that interfere with Ethernet Drivers and prevent it from functioning well. Perform a check disk scan in this case to find the bad sectors and fix that:
- Press Win+ R, type in cmd and hit Enter,
- Type in Chkdsk c:/f and hit Enter,
- Press Y to confirm with scheduling of a disk check scan,
- Wait for the process to complete. Once done, check if the issue is gone.
Fix 15: Manually set your IP and DNS
Consider setting both your IP and DNS manually if obtaining the IP address and DNS automatically did not help:
- Press Win+ R, type in Ncpa.cpl and hit Enter to open Network Management window,
- Under it, right-click on the Network connection you are using and go to its properties,
- In the connection properties, select Internet Protocol Version 4 (TCP/IPv4) and click on properties,
- Click on Use the following IP address (and type in IP address 192.168.1.x (x is from 2 to 253), subnet mask 255.255.255.0, and default gateway 192.168.1.1. in case of router’s LAN IP address is 192.168.1.1. – the IP addresses vary so make sure you connect to another computer to the network and check its connection status to get the exact information),
- Now, click on use the following DNS server address and type the DNs server IP address, provided by your ISP,
- Click on Apply to confirm these changes and pres Ok to close out the window and see the then if this fixes the issue.
Fix 16: Install Network Driver in Compatibility Mode
The case could be that the driver you are using is not supported by your OS or any hardware installed within. In this case, you would have to install these drivers in compatibility mode. It will allow make the users to run certain apps in accordance with the architecture of the older Windows OS and make the drivers to be working within the system:
- Download the Ethernet driver setup file from the manufacturer website,
- Pres Win- R, type in devmgmt.msc and hit Enter,
- In the device management window, expand Network Adapters option and right-click on the drivers you are using,
- Click Uninstall device and confirm your action on the very next pop-up window appears on the screen,
- Confirm your action that you delete the driver and follow the on-screen instructions to complete the steps,
- Now, right-click on those downloaded setup files and go to its properties,
- In the compatibility tab, click on Run this program in Compatibility mode and select an older version of the OS,
- Wait for the driver to be installed within system and check if this fixes the issue.
Fix 17: Set your Power Plan for maximum performance
In some cases, systems are set to prevent high power usage hardware from working. This feature however sometimes malfunctions and prevents users from using the Ethernet connection entirely. Disabling it completely through control panel is the required solution in this case:
- Press Win+ R, type in control panel and hit Enter,
- In the control panel window, click on View by and select large icons,
- Click on Power options the then,
- In the power management window, click on Change plan settings,
- Select Change advanced power settings in the next window,
- In the Advanced power management window, double-click on Wireless Adapter settings and double click on the Power saving mode,
- Click on Maximum performance,
- Confirm your action with first clicking on Apply and then on OK button.
Fix 18: Disable Ethernet devices
If you are still receiving Ethernet doesn’t have a valid IP configuration error, you should remove your virtual Ethernet drivers as these are sometimes causing problems with connecting PC to the internet. Here are the steps to find and disable the virtual Ethernet devices:
- Press Win+ R, type in ncpa.cpl and hit Enter,
- In the opened network configuration window, right-click an entry belongs to the software and has no physical connection to which the computer is connected to,
- Click on Disable option to disable the virtual network connection.
Fix 19: Reduce Power Usage
If you have set your Power Output to the maximum value, you might get the Ethernet issues where you are not able to properly work with your network adapter. The simple solution in this case is to reduce the power usage:
- Press Win+ R, type in Devmgmt.msc and hit Enter,
- In the Device Manager, double-click on Network Adapters and select the network adapter that you are using,
- Click on the Properties option,
- Now, under Advanced tab, within the Property section, click on Power Output property,
- On the drop down menu, change the value from 100% to 70% or 50% when you are also using an external monitor,
- Click Ok, close the Device Manager, restart your device and then check if the problem is solved.
Fix 20: Use BIOS to enable Ethernet Adapter
If you are reporting that your Ethernet is not working, you can re-install the adapter using the computer BIOS:
- Firstly, make ensure that you shut down your system completely and turn it back after sometimes,
- During the startup time, pay close attention to the Press This button to get into the BIOS message,
- Press the key indicate on the message repeatedly to enter your computer’s BIOS,
- Once in the BIOS page, you can use only the arrow keys to navigate through the options available,
- Find “Integrated Peripherals,” “Onboard Devices,” “On-Chip PCI Devices,” and similar options and hit Enter,
- Find and click on the “Integrated LAN,” “Onboard Ethernet,” or similar option the next and enable the Ethernet adapter from there,
- Press F10 to open a dialogue asking to save your settings and exit the BIOS,
- Press Y to confirm,
- Your system restarts the then. Windows should now automatically detect your driver and your Ethernet should now work as normal.
Fix 21: Ping to the Loopback Address
This is a reversed IP address from InterNIC to use in testing network cards. This specific IP corresponds to the software loopback interface of the network card that does not have hardware associated with it and does not require any physical connection to the network. Some users reported the Ethernet doesn’t have a valid IP configuration error because of system corruption or virus installed. In that, you should perform ping operation that verifies whether your network card is working or not:
- Press Win+ R, type in cmd and then press Shift+ Ctrl + Enter to run it as admin,
- Type in the command ping 127.0.0.1 to send the message to the internet network stack on the system to get a response something like the following:
Pinging 127.0.0.1 with 32 bytes of data:
Reply from 127.0.0.1: bytes=32 time<10ms TTL=128
Reply from 127.0.0.1: bytes=32 time<10ms TTL=128
Reply from 127.0.0.1: bytes=32 time<10ms TTL=128
Reply from 127.0.0.1: bytes=32 time<10ms TTL=128
Ping statistics for 127.0.0.1:
Packets: Sent = 4, Received = 4, Lost = 0 (0% loss),
Approximate round trip times in milliseconds:
Minimum = 0ms, Maximum = 0ms, Average = 0ms
- If the command successfully pinging the IP address, this is an indication that the networking should be working and issue is most probably with the software configuration.
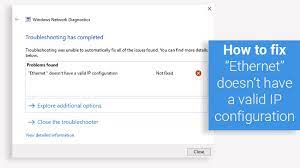
Fix 22: Run Windows Network Diagnostic Tool
Your Ethernet adapter might be using a false configuration to establish a connection with your computer and this is the reason you are receiving Ethernet doesn’t have a valid IP configuration error. In this case, perform full diagnostic test of your network adapter and see if the performing it fixes the issue:
- Press win + R, type in ncpa.cpl and hit Enter to open Network Configuration panel,
- Right-click on the Ethernet adapter therein and select Diagnose,
- The automatic diagnostic process would begin soon after this. Follow the on-screen instructions to diagnose the issues with the Ethernet connection and see if this fixes the issue.
Fix 23: Uninstall Recent Updates
Faulty updates could be the problematic, especially when you encountered the issue just after the upgrade. Thus, in this step, you would have to uninstall the latest update from your computer and see the then if this fixes your issue:
- Press Win+ I to open settings,
- Click on Update and Security under settings and select Windows Update,
- Select View Update History in the new window,
- Under the Update History, click Uninstall Updates to be on the page where the list of all installed updates are shown to you,
- From the list, right-click on the update that you have installed recently and select Uninstall to remove it completely.
Fix 24: Enable QoS feature
Enabling QoS feature is the next method you should try to if you still not got the issue. It is in charge of limiting your network speed. However, some of the users reported that enabling this feature was resolved this issue:
- Launch your browser and type in your IP address in the address bar,
- Press Win + R, type in CMD and pres Shift + Ctrl + Enter and also type in ipconfig/all in the cmd and press Enter to get the IP address you have to enter,
- Enter this IP address to open Router login page,
- Enter your log-in details,
- And after logging in, look to configure the QoS settings and check if this fixes the issue.
Fix 25: Enable Ethernet Autoconfig service
Third party apps might disable this service. You can enable it from the below steps:
- On the search bar, type in cmd and click Run as Administrator,
- Type in the below command one-by-one:
sc config dot3svc start= demand
- Restart your computer and see if this fixes the issue.
Fix 26: Reinstall the Drivers
- On the search bar, search for command prompt and click on Run as Administrator,
- Once the command prompt window is opened, type the following command and hit Enter:
netcfg -d
- Restart your computer once the command is executed.
Conclusion
Now, we are round off our article how to fix Ethernet doesn’t have a valid IP configuration error. If none of the methods shown above have helped you to resolve the issue, we recommend you use PC Repair Tool. Here is its direct download link.
It will scan your system to replace a corrupt and missing file. This works in most of the cases where the issue is a result of system corruption. The tool is also known for optimizing the system for maximum performance.


