What is ‘ERR_CONNECTION_REFUSED error’ on Google Chrome in Windows 10?
In this post, we are going to discuss on How to fix ERR_CONNECTION_REFUSED error on Google Chrome in Windows 10. You will be guided with easy steps/methods to resolve the issue. Let’s starts the discussion.
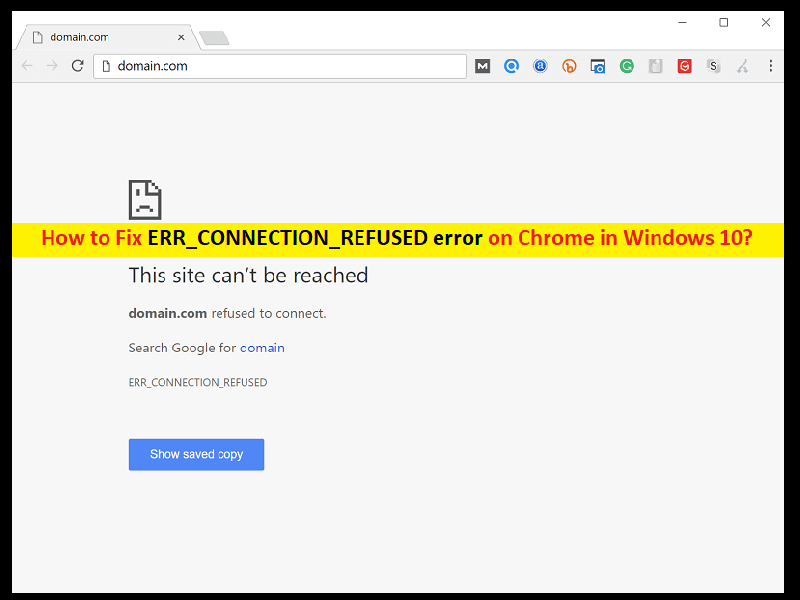
‘ERR_CONNECTION_REFUSED error’: It is common problem usually occurred when you try to access a specific website or certain websites in your browser like Google Chrome in Windows 10 computer. This issue indicates you are unable to access a specific website that you are trying to visit on Chrome in your computer. When you attempt to access certain/specific website on browser, you may experience ‘This site can’t be reached’ message along with ‘ERR_CONNECTION_REFUSED’ error.
One possible reason behind the issue can be the issue with the server of website itself. It might possible the website that is causing error, is facing some issue with its server or the website/server is temporarily down for some reasons. In such case, you will need to wait until the server/site issue is resolved. You can also contact website administrator via telephone number or social media network and ask them to resolve.
If you investigate there is no issue with website or server of site that is causing ERR_CONNECTION_REFUSED error in your browser, chances there is some problem in your browser, issue with internet connection, bad networking settings, IP settings and DNS settings, and other system issues that is triggering the error. Let’s go for the solution.
How to fix ERR_CONNECTION_REFUSED error on Google Chrome in Windows 10?
Method 1: Fix ERR_CONNECTION_REFUSED error with ‘PC Repair Tool’
‘PC Repair Tool’ is easy & quick way to find and fix BSOD errors, DLL errors, EXE errors, problems with programs/applications, malware or viruses issues, and system files or registry issues, and other system issues with just few clicks. You can get this tool through button/link below.
Method 2: Check if website/website server is up and running properly
This issue can be occurred if there is some issue with website or website itself. You should check if website or website server is up and running properly. To check this, you can try accessing the website in another browser or on another computer/mobile, and check if you can access the website without any issue. You can use ‘https://downforeveryoneorjustme.com/’ page to check the status of site/server that is causing issue.
Method 3: Reset/restart your router
This issue can be occurred due to poor internet connection, bad router settings, bugs on router’s settings, and other router issues. You can restart/reset your router in order to fix network/internet connection issue, and once finished, check if the issue is resolved.
Method 4: Clear browser cache and cookies
Corrupted/outdated cache and cookies of browser like Google Chrome could be reason behind the issue. You can fix the issue by resetting Chrome cache and cookies.
Step 1: Open Google Chrome browser in Windows PC and press ‘CTRL + SHIFT + DELETE’ keys on keyboard to open ‘Clear Browsing Data’ tap/page
Step 2: Select ‘All Times’ from ‘Time Range’ dropdown, tick all the checkboxes relating to cache, cookies and tick all other checkboxes if you want, and then hit ‘Clear Data’ and confirm it. Once done, restart your browser and check if the issue is resolved.
Method 5: Stop Synchronizing with Google Account

Some users reported that stopping Synchronization with Google Account and Google Chrome browser fix the issue.
Step 1: Open ‘Google Chrome’ browser, type ‘Chrome://settings/people’ into address bar
Step 2: If you have a Google Account connected to your browser, click ‘Turn OFF’ button to stop synchronization. Once done, restart your browser and check if the issue is resolved.
Method 6: Disable your third-party antivirus/firewall program
This issue can be occurred due to interference of third-party antivirus/firewall program installed in computer. You can fix the issue by disabling your third-party antivirus/firewall program in your computer and check if the issue is resolved.
Method 7: Clear DNS cache in Windows PC
One possible way to fix the issue is to clear DNS cache in your computer.
Step 1: Type ‘cmd’ in Windows Search Box and press ‘SHIFT + ENTER’ keys on keyboard to open ‘Command Prompt as Administrator’
Step 2: Type ‘ipconfig /flushdns’ command and hit ‘Enter’ key to execute. Once executed, restart your computer and check if the issue is resolved.
Method 8: Change DNS Server address
You can change DNS server address in computer in order to fix.
Step 1: Open ‘Network and Connection’ settings page via Windows Search Box and go to ‘Change Adapter Settings’
Step 2: Right-click on your internet connection and select ‘Properties’. Select and double-click on ‘Internet Protocol Version 4 (TCP/IPv4)’ to open its properties.
Step 3: Select ‘Use the following DNS server addresses’, type ‘8.8.8.8’ and ‘8.8.4.4’ in preferred and alternate DNS server address field, and then hit ‘Ok > Apply > Ok’ button to save the changes. Once done, check if the issue is resolved.
Method 9: Remove problematic browser extensions

This issue can be occurred due to some problematic browser extension installed. You can remove unnecessary or problematic browser extension to fix.
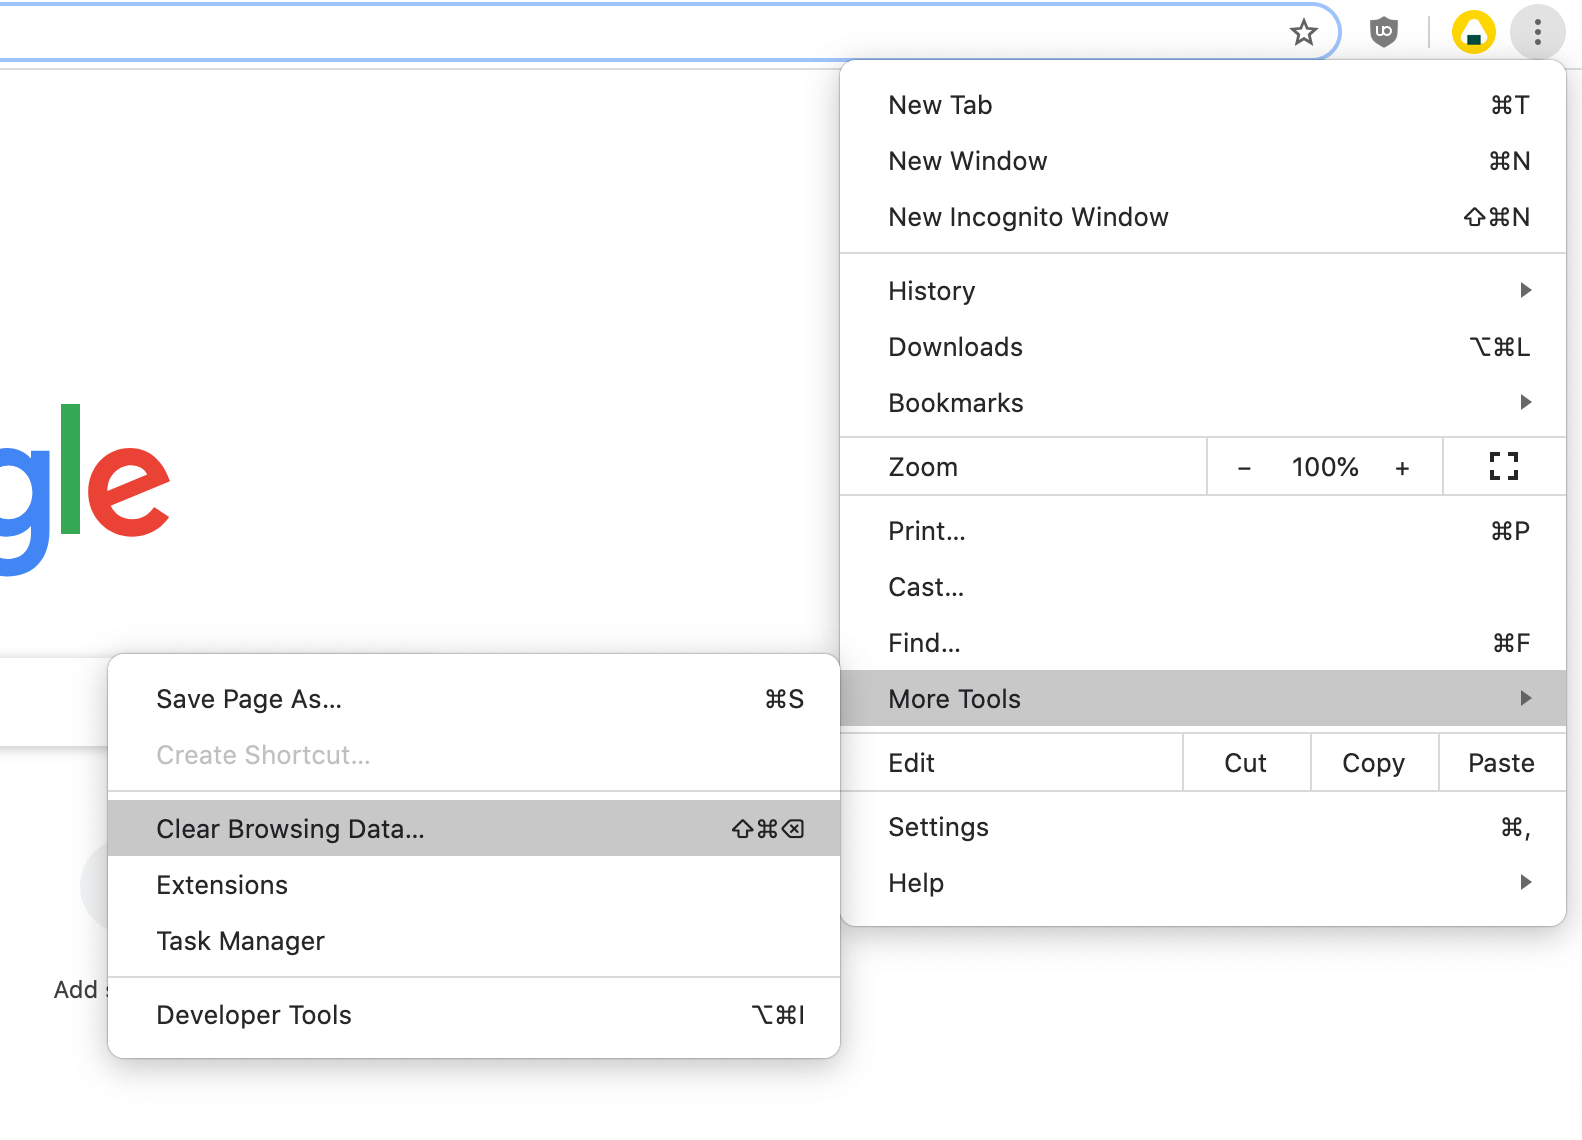
Step 1: Open ‘Google Chrome’ browser and click ‘Three-Dots’ icon at top-right corner, and click ‘More Tools > Extensions’
Step 2: Remove all unnecessary or problematic extensions from there and once done, restart your browser and check if the issue is resolved.
Method 10: Reset Google Chrome settings
If the issue is still persist, you can reset Google Chrome settings in order to fix.
Step 1: Open ‘Google Chrome’ in your computer and click ‘Three-Dots’ icon at top-right corner and click ‘More Tools > Settings’
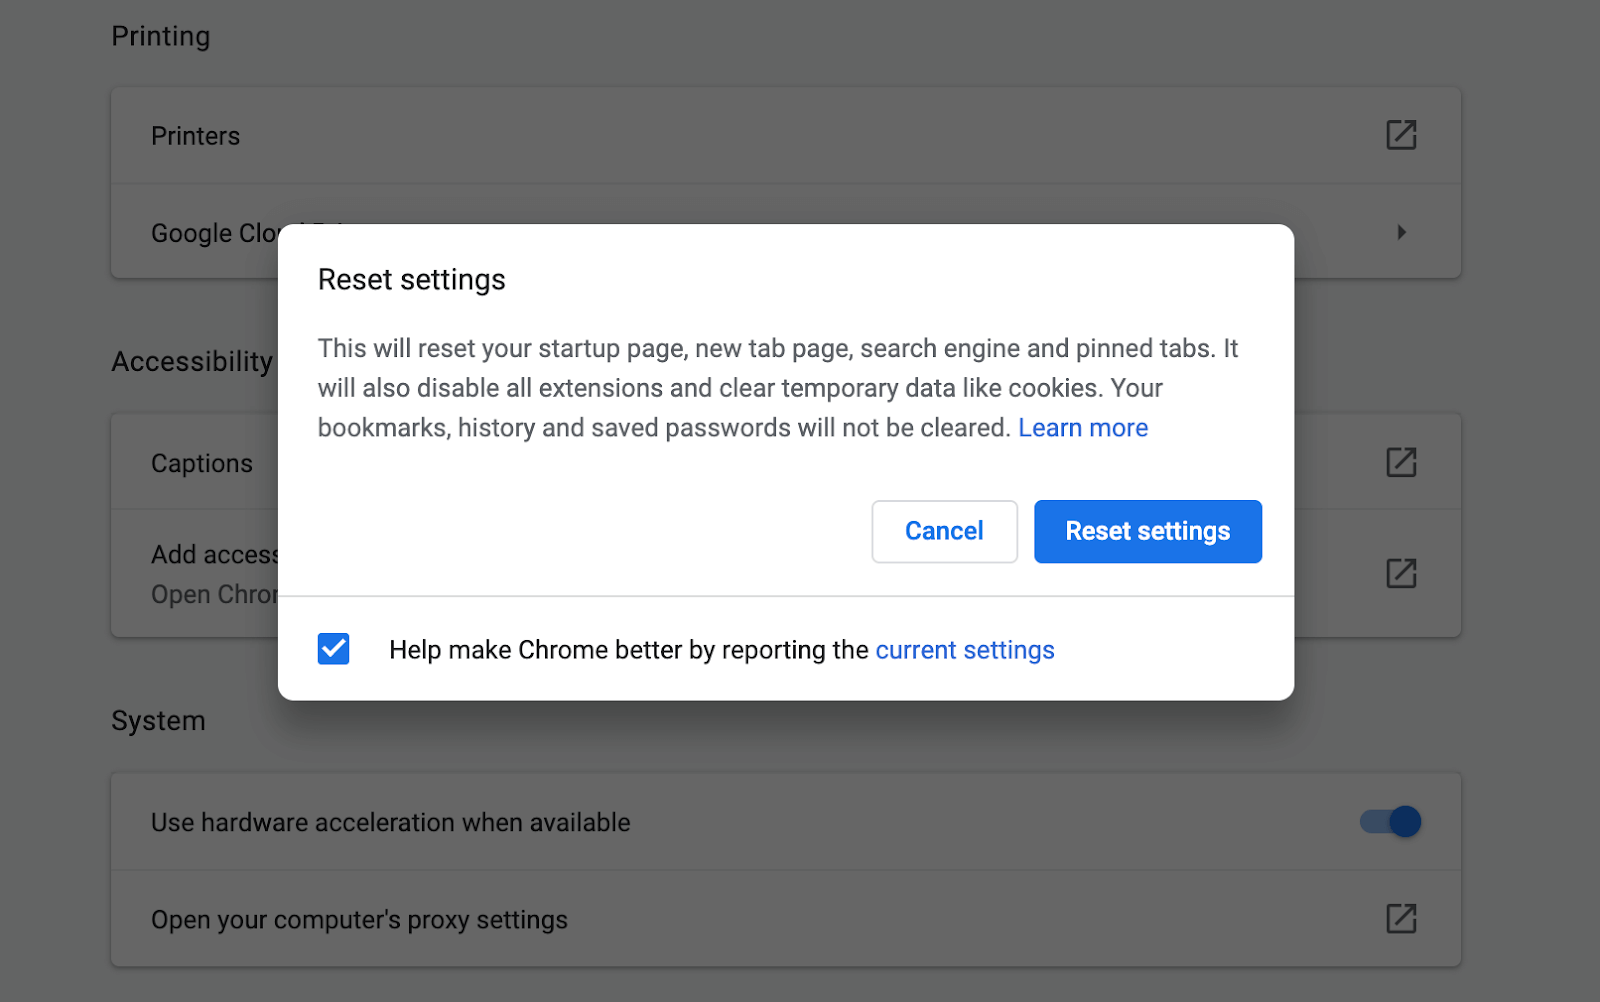
Step 2: Click ‘Advanced’ at bottom and navigate to ‘Reset and cleanup’ and click ‘Restore settings to their original defaults’
Step 3: Click ‘Reset settings’ button and confirm it, and once finished, restart your computer and check if the issue is resolved.
Method 11: Run ‘Internet Connections’ troubleshooter
Windows built-in Internet Connections troubleshooter can resolve the issue.
Step 1: Open ‘Settings’ App in Windows PC via Windows Search Box and go to ‘Update & Security > Troubleshoot’
Step 2: Find and select ‘Internet Connections’ troubleshooter, and click ‘Run the troubleshooter’ and follow on-screen instructions to finish troubleshooting and once finished, restart your computer and check if the issue is resolved.
Conclusion
I am sure this post helped you on How to fix ERR_CONNECTION_REFUSED error on Chrome in Windows 10 with several easy steps/methods. You can read & follow our instructions to do so. That’s all. For any suggestions or queries, please write on comment box below.


