
Are you struggling with Clock Watchdog timeout Error and desperately wants to get rid of this error. You have arrived at the right platform. Here in this article we will thoroughly discuss about this error.
In order to understand the rots of this error, you need to know about “System Interrupt.” It’s a system level process and while it does appear as a process in Task Manager. But it’s not really a process in the traditional sense. Rather it’s a kind of representative that reports the CPU usage of all interrupts that happen on a lower system level.
Interrupts can originate from software or hardware including the processor itself. When the interrupt handler task is completed, the processor resumes the state at which it was interrupted.
Interrupts are a form of communication of software and hardware with the CPU. For instance, when you start typing on your keyboard, the respective hardware and software send interrupts to the CPU to trigger the processing of your input. It’s completely a normal Windows function.
Nevertheless, if the system spends too long at the interrupt phase, known as the interrupt request level (IRQL), it leads to a Blue Screen of Death Error. It’s pertinent to mention one may encounter a number of BSOD errors when this occurs. And Clock Watchdog timeout Error is one classic example. Note that, here clock means CPU while Watchdog is the process monitoring the interrupt.
Also Read: timer_or_dpc_invalid (ntoskrnl.exe)
What Causes this Error?
#. Obsolete device drivers
#. Issues with RAM
#. Overclocking of the CPU
#. Corrupted System file issue
#. Outdated Firmware
#. Malicious Programs
Considering the reasons, we have enlisted some of the tried and tested measures to resolve the error. You can try them one by one.
Solutions to fix Clock Watchdog timeout Error
Method 1: Run Windows Memory Diagnostic Tool
Windows provides so many utility tools to troubleshoot issues. Windows Memory Diagnostic tool is one of them. This in-built tool is designated to test your RAM. In order to run this tool, use the following steps:
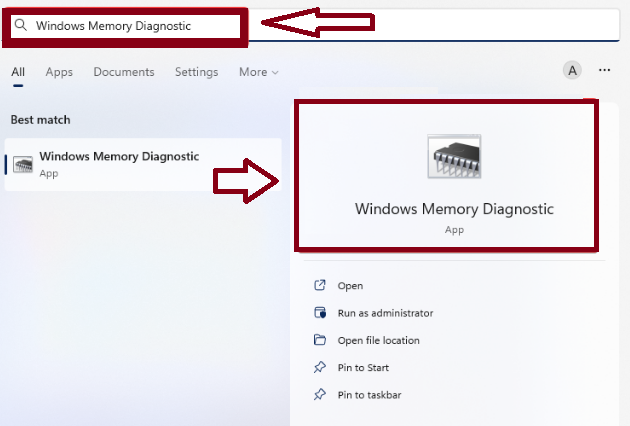
Step 1: Click the magnifying glass icon on the Taskbar, then type in Windows Memory Diagnostic in the search tool’s text box> then click Windows Memory Diagnostic to open its Window
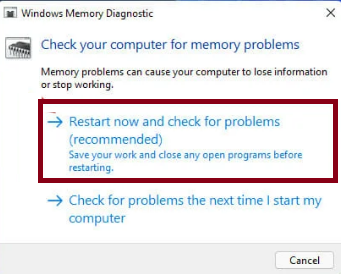
Step 2: Select Restart Now and check for problems
Step 3: Then Windows will restart > after that wait for the Windows Memory Diagnostic tool to check your RAM
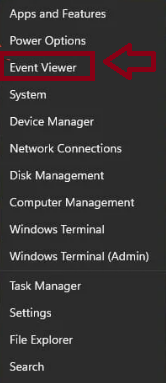
Step 4: When Windows Restarts, a Windows Memory Diagnostic result should appear. If it doesn’t, however, right-click Start and select Event Viewer
Step 5: Select Windows Logs and System on the Event Viewer window > then click the Find Option on the right side of the Event Viewer
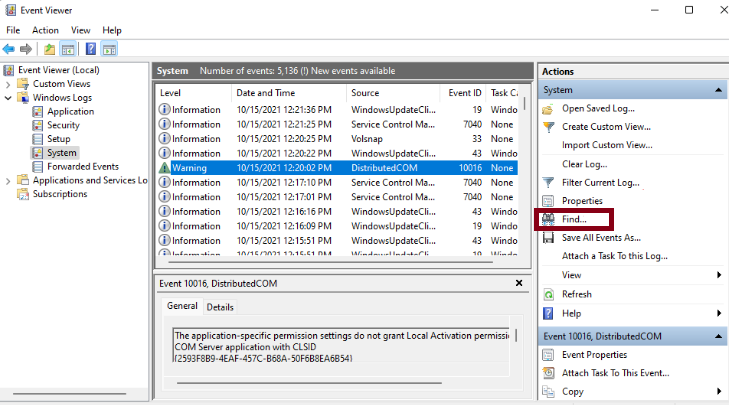
Step 6: Type Memory Diagnostic within the Find what box > then click the Find Next button
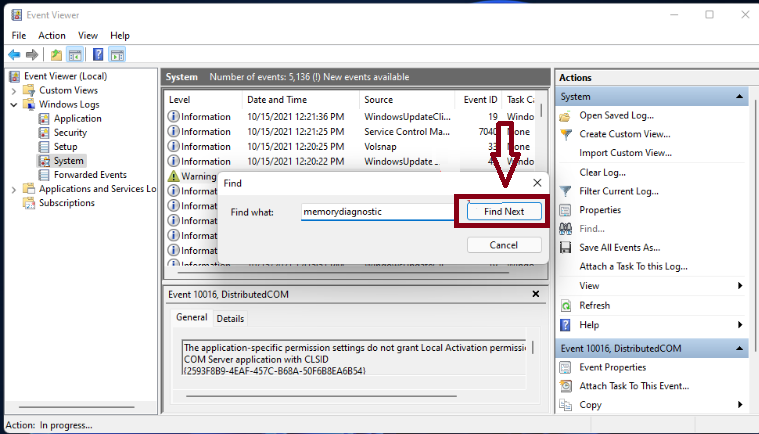
Step 7: After that, you can View the Memory Diagnostic result on the General tab at the bottom of Event Viewer.
Note: If the Windows Memory Diagnostic highlights a RAM issue then you might need to replace a memory module on your PC.
Method 2: Update Windows 11
In this method we suggest you to update your Windows to the latest version. To do so follow the below mention guidelines:
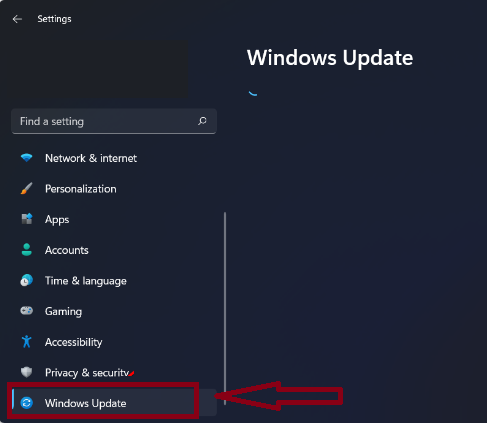
Step 1: Use Windows + I keys to open Settings > then click the Windows Update tab
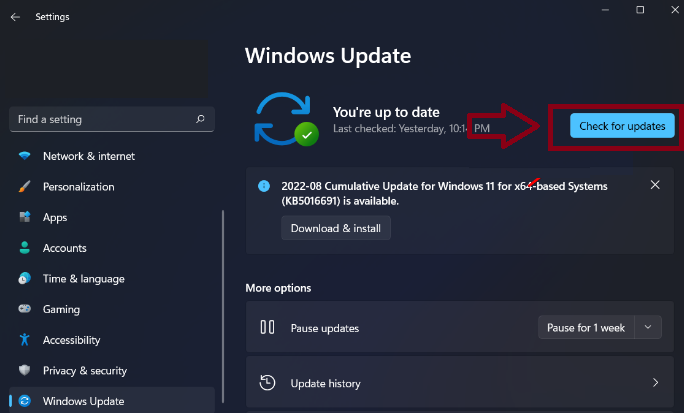
Step 2: Press the Check for Updates button on that tab
Method 3: Check the Disk for Errors
Windows provides CHKDSK utility will scan the hard disk to ensure it’s intact. In order to get started with the tool, follow the below mention steps:
Step 1: First of all launch the PowerShell terminal or Command Prompt as an Administrator
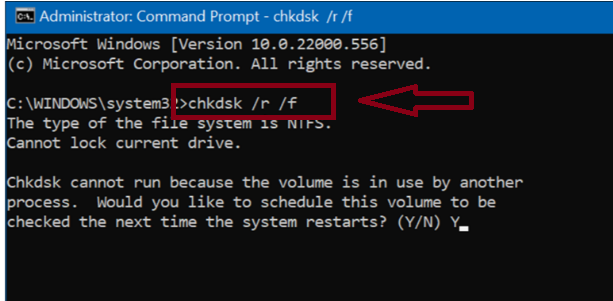
Step 2: Now Run the following command and press Enter
chkdsk /r /f
Step 3: The ChkDsk utility will prompt you to have it scan the next time you reboot- type Y and press Enter
Step 4: The next time you reboot your PC, the ChkDsk utility will scan for any errors and repair them
Method 4: Perform SFC and DISM Scan
System File Checker and Deployment Image Servicing and Management scan your system files and latter will scan the system images. Both the tools will detect errors and replace corrupt files with working ones.
Here’s how:
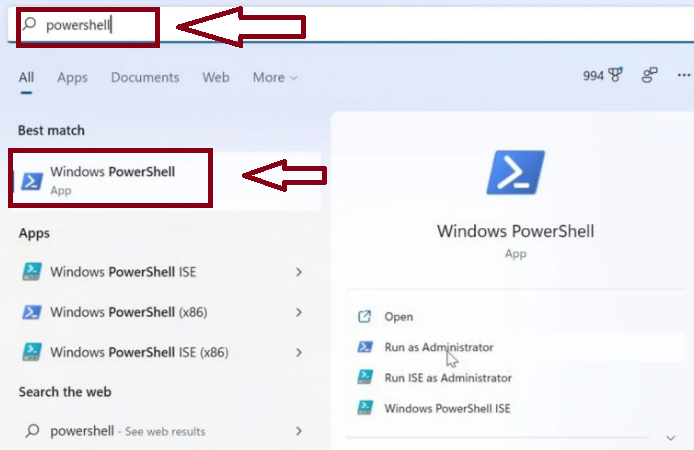
Step 1: Click the Start button or press the Windows keys and search for PowerShell
Step 2: Select Run as Administrator option on the right side of the results
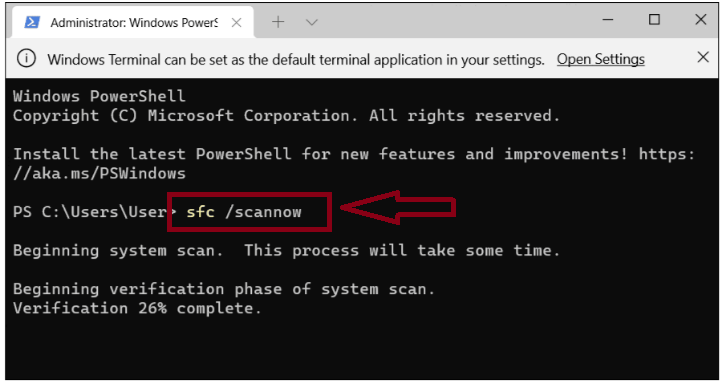
Step 3: Once the PowerShell opens, run the following command in the terminal
sfc /scannow
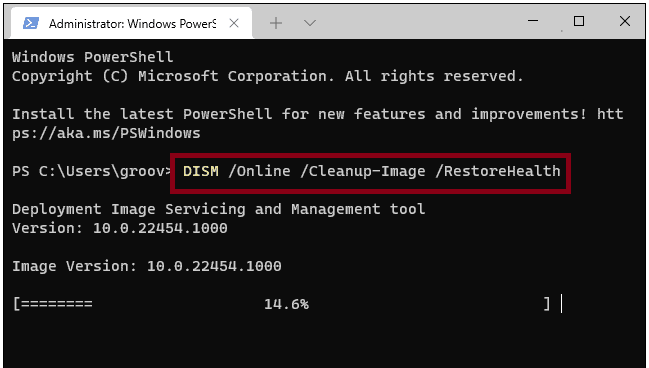
Step 4: Once the SFC scan is done, you need to run DISM Scan especially if SFC Scan can’t replace specific files.
Step 5: Then Run the PowerShell as Administrator and run the following commands:
DISM /Online /Cleanup-Image /RestoreHealth
Method 5: Stop PC Overclocking
Oftentimes System Overclocking is one of the prominent reasons to get stuck with the above mention error. System Overclocking is processes which speed up the performance of a PC by increasing the component’s clock speed. It pertinent to mention an overclocked PC should be able to perform more operations in a shorter time span. But as we have earlier mentioned, this process may create nuisance for the users. So it’s better to stop PC Overclocking.
Method 6: Update your device drivers
Obsolete device drivers may also lead to Clock Watchdog timeout Error, so ensure to update our drivers to the latest version.
Here’s how:
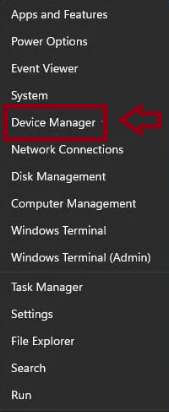
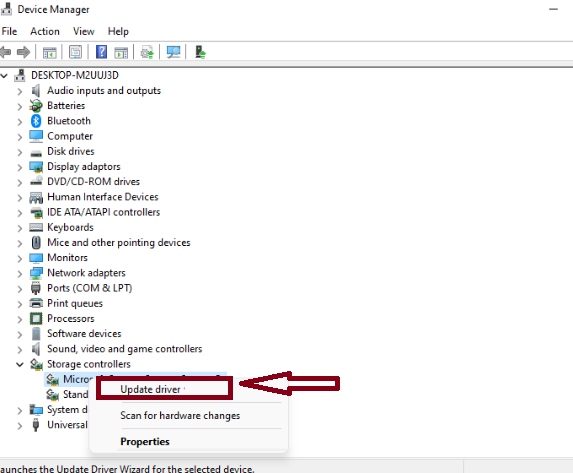
Step 1: Right-click Windows 11’s Start Taskbar button > select Device Manager on the menu
Step 2: Now look for any devices with yellow exclamation marks that indicate device errors
Step 3: Right-click a device with a yellow exclamation mark and select Update driver
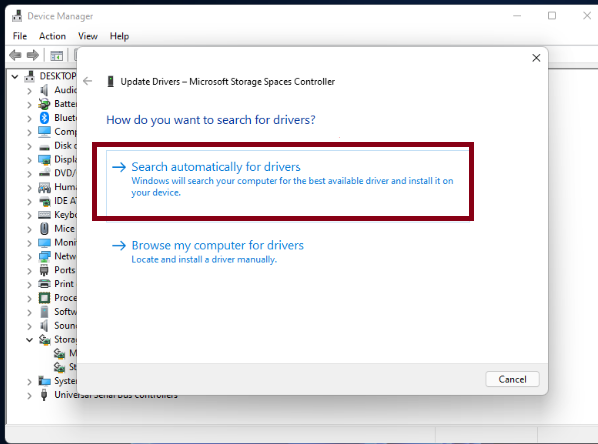
Step 4: Then select the option Search automatically for drivers
Alternatively, you can use an automatic driver tool to update your drivers. This driver tool will fulfill all the driver related requirements of your PC.
⇑Get Driver Tool from Here⇓
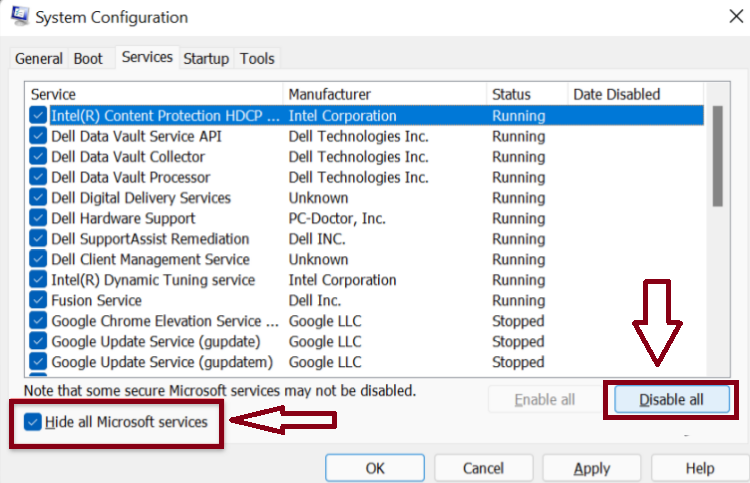
Method 7: Try Safe Mode or Clean Boot
Several users have claimed that performing a clean boot resolved their issue. A clean boot uses minimal startup apps and drivers to load the OS.
When the clean boot works, enable apps and services one at time until you find the reason.
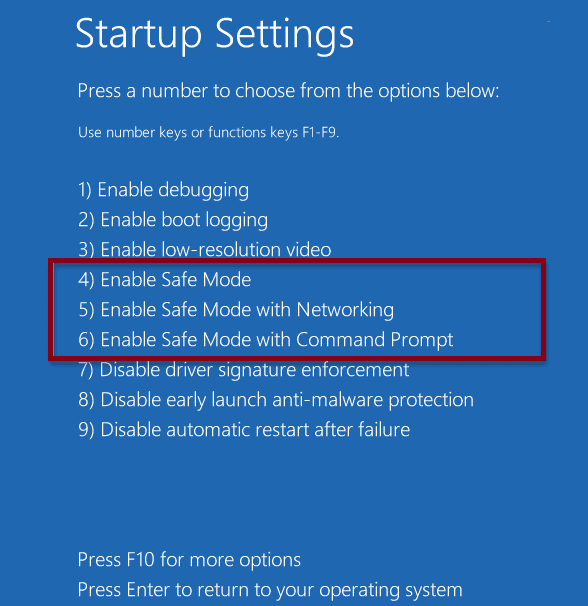
If the clean boot doesn’t work, you can boot Windows 11 into Safe Mode. Or if you are not on Windows 11 boot Windows 10 into Safe Mode.
When you get to the Advanced Boot Options, make sure select Enable Safe Mode with Command Prompt > you can launch the Command Prompt in Safe Mode by selecting that option and run utilities like ChkDsk and SFC and DISM scans.
Method 8: Update your PC’s BIOS
Updating your PC’s BIOS may also resolve the issue. In order to update the BIOS, you will need to download its latest firmware. Then with a few steps, you will easily update your BIOS. Ensure to perform this method with caution.
Method 9: Use Windows Restore Feature
If none of the above mentioned methods works for you we suggest you to use the system restore feature. To do so follow the below mention guidelines:
Step 1: Use Windows keys + R keys to open the Run utility box> in the prompted box, type the following text and press Enter key:
rstrui
Step 2: Then choose a different restore point radio button if that option is available
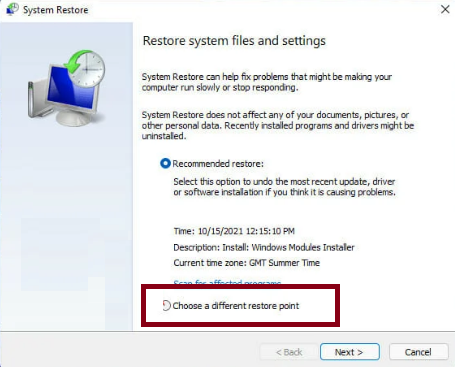
Step 3: Then click Next to proceed > Select the Show more restore points checkbox if System Restore displays that option
Step 4: Choose a restore point that will roll Windows 11 back to a time when you were not facing the above mention error. Alternatively, select the oldest restore point date you can.
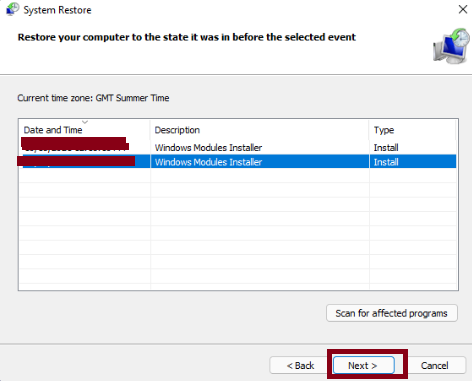
Step 5: Press Next button to go to the final step > Select the Finish option to roll Windows 11 back to the selected restore point.
Bottom Line!
Here we conclude the article. We have provided ample solutions to deal with Clock Watchdog timeout Error. It’s noteworthy to mention all the above mentioned methods are tried and tested. But if you have time constraints or don’t want to struggle with manual methods, use our recommended automatic PC Repair Tool. This tool is specifically designated to tackle BSOD Errors. So try this tool once if you are looking for a hassle free solution.


