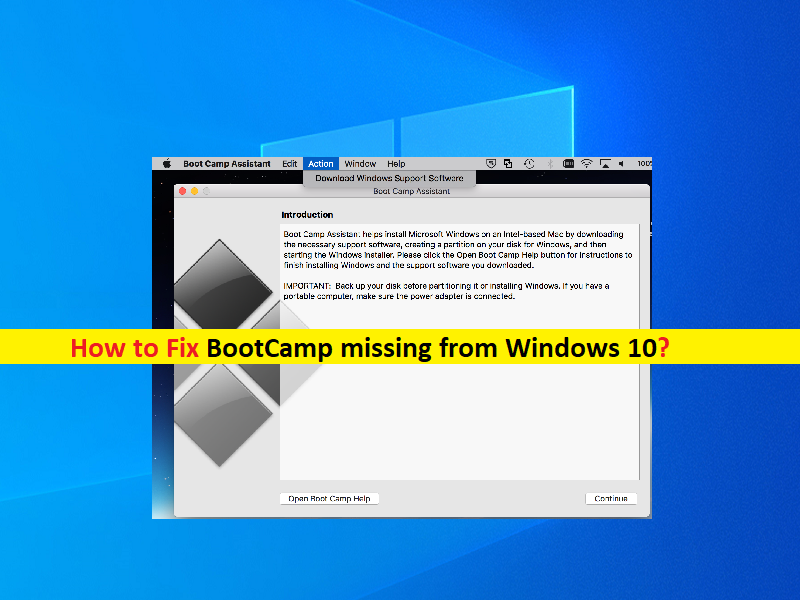
What is ‘BootCamp missing from Windows 10’?
In this article, we are going to discuss on How to fix BootCamp missing from Windows 10. You will be guided here with easy steps/methods to resolve the issue. Let’s starts the discussion.
‘Boot Camp Assistant’ Software: BootCamp or Boot Camp Assistant is multi boot utility included with Apple Inc. ‘s MacOS that assists you in installing Microsoft Windows operating system on Intel-based Macintosh computer. The utility guides you through non-destructive disk partitioning of hard disk drive or SSD and installation of Windows device drivers for Apple hardware. Boot Camp 6.0 added support for 64-bit versions of Windows 10 while Boot Camp 6.1 is available on MacOS 10.12 Sierra and latter, will only accept new installations of Windows 7 and later.
Boot Camp sits in System Tray of taskbar in Windows 10 once you have successfully installed Windows 10 in your Mac computer using Boot Camp Software. In sort, if you want to access Boot Camp or Boot Camp Control Panel in Windows 10 installed on Mac computer using BootCamp Software, then you can access it through System Tray in taskbar. If you are not aware, Boot Camp Control Panel allows you to change default startup disk and couple of keyboard and trackpad settings.
However, several users reported that they faced BootCamp missing from Windows 10 issue when they tried to access Boot Camp in System Tray of taskbar in Windows 10 computer. They explained the issue is started occurring after installation of Boot Camp in order to install Windows 10 on MacOS based computer.
There could be several reasons behind the issue including the hidden Boot Camp icon in system tray of taskbar, missing/outdated or corrupted Boot Camp drivers or Windows Device Drivers, issue with PRAM in your device, and other issues. It is possible to fix the issue with our instructions. Let’s go for the solution.
How to fix BootCamp missing from Windows 10?
Method 1: Update Boot Camp/Computer drivers
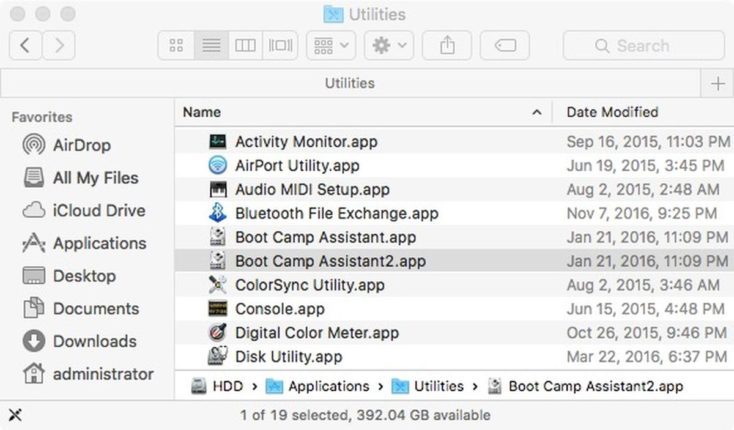
Step 1: Make sure your Mac computer is connected to internet. Now, open ‘Boot Camp Assistant’ from ‘Utility’ folder on Mac. When the assistant window opens deselected all options, but make sure that ‘Download latest Windows Support Software for Apple’ is checked and click ‘Continue’
Step 2: Make sure your USB flash drive is connected as destination disk and click ‘Continue’. Enter administrator username and password, after that, the Boot Camp Assistant should download drivers to your USB flash drive
Step 3: Once download, close ‘Boot Camp Assistant’ window. Make sure your USB is connected to Mac and go to ‘Apple LOGO > System Preferences > Startup Disk’, select the Windows Volume icon in list of drivers and click ‘Restart’ to restart
Step 4: Once downloaded, open ‘Boot Camp’ folder in USB flash drive and install the driver you downloaded. If Boot Camp ask you to make change, click ‘Yes’
Step 5: Click ‘Repair’ to reinstall or update previously installed Windows Support Software
Step 6: Click ‘Continue Anyway’ if message says software didn’t pass Windows LOGO testing, and once installation finished, click ‘Yes’ to restart your computer, and then check if the issue is resolved.
Method 2: Reset PRAM
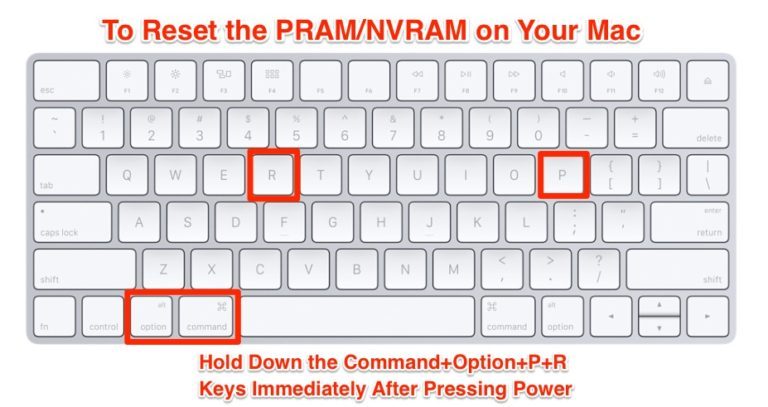
Many Mac users reported resetting PRAM on Mac resolves the issue. You can try this. Reset PRAM at least three consecutive times.
Step 1: Turn OFF your Mac computer by pressing ‘Power’ button
Step 2: Now, turn ON your computer, and press & hold ‘Command, Option, P and R’ keys on keyboard to restart.
Step 3: Keep holding the keys until your Mac restart. When you hear startup sound, release the keys and keep in mind that some of your settings have been reset. Once done, check if the issue is resolved.
Method 3: Check and Add Boot Camp icon in system tray of taskbar
Sometimes, this issue can be occurred if Boot Camp is just hidden in system tray of your taskbar. You can check and add Boot Camp icon to taskbar system tray in order to fix.
Step 1: Open ‘Control Panel’ in Windows PC via Windows Search Box and go to ‘Boot Camp’ via Search in Control Panel
Step 2: Right-click on Boot Camp applet and select ‘Create Shortcut’ to create and shortcut of Boot Camp on desktop
Step 3: Now, on desktop, press ‘Windows + R’ keys on keyboard, type ‘shell:startup’ and hit ‘Ok’ to open Startup folder, now copy or move the shortcut that you have just created on desktop to Startup folder
Step 4: Once done, restart your computer and check if the issue is resolved.
Fix Windows PC issues with ‘PC Repair Tool’:
‘PC Repair Tool’ is easy & quick way to find and fix BSOD errors, DLL errors, EXE errors, problems with programs/applications, malware or viruses issues, system files or registry issues, and other system issues with just few clicks.
Conclusion
I am sure this post helped you on How to fix BootCamp missing from Windows 10 with several easy steps/methods. You can read & follow our instructions to do so. That’s all. For any suggestions or queries, please write on comment box below.


