Tips to enable Auto HDR Windows 11:
In this post, we are going to discuss on “How to enable Auto HDR Windows 11”. You will be guided here with easy steps/methods to do so. Let’s starts the discussion.
What is HDR – High Dynamic Range?: Auto HDR Vs HDR
HDR stands for High-dynamic-range imaging that is set of techniques used to reproduce a greater range of luminosity than that which is possible with standard photographic techniques. HDR is useful for recording many real-world scenes containing, direct sunlight to extreme shade, very bright, or very faint nebulae. HDR images are often created by capturing and then combining several different, narrower range, exposures of same subject matter.
HDR as opposed to SDR (Standard Dynamic Range), is capable of showing a way wider range of colors and more details in between whites & blacks while SDR is only capable of showing details in bright part of scene or in dark one. Microsoft introduced Auto HDR takes DirectX 11 and DirectX 12 games that are not designed for HDR and automatically expands the colour and brightness range to HDR.
Auto HDR will give you same kind of HDR experience on game that you are originally designed for this technology. Auto HDR won’t match the visuals you get when you play the game in your Windows computer that was natively developed for HDR, it is still a vast improvement from SDR. Let’s go for steps to enable Auto HDR feature in your Windows 11 computer.
How to enable Auto HDR Windows 11?
Method 1: Enable or disable Auto HDR for Games via ‘Xbox Game Bar’
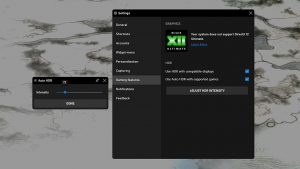
Step 1: Press ‘Windows + G’ keys on keyboard to open ‘Xbox Game’ bar on Windows 11 computer and click on ‘Gear’ icon at top-right corner of bar to open ‘Settings’
Step 2: In next screen, click on ‘Gaming Features’ in left pane and in right-pane check the checkbox relating to ‘use Auto HDR with supported games’ if you want to enable it.
Step 3: To disable this feature, repeat ‘step 2’ and uncheck ‘Use Auto HDR with supported games’ checkbox.
Method 2: Enable or disable Auto HDR on Windows 11 via Settings App
Step 1: Open ‘Settings’ App in Windows 11 via Windows Search Box
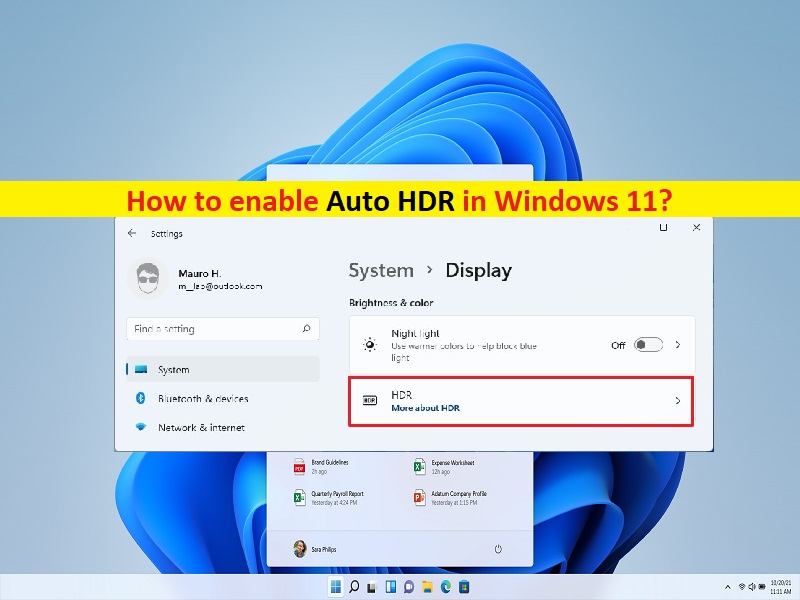
Step 2: In ‘Settings’ App, click on ‘System’ in left pane, and click ‘Display’ in right pane
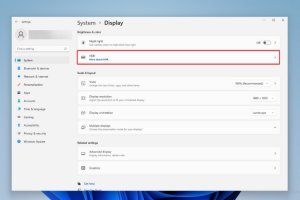
Step 3: Find and click on ‘HDR’ option
Step 4: Locate Auto HDR toggle and turn it ON if you want to enable ‘Auto HDR’ in your computer.
Step 5: To disable this feature, repeat above steps and turn OFF ‘Auto HDR’ toggle
Fix Windows PC Issues with ‘PC Repair Tool’
‘PC Repair Tool’ is easy & quick way to find and fix BSOD errors, DLL errors, EXE errors, problems with programs/applications, malware or viruses issues, system files or registry issues and other system files with just few clicks. You can get this tool through button/link below.
Conclusion
I hope this post helped you on How to enable Auto HDR Windows 11 with several easy steps/methods. You can read & follow our instructions to do so. If the post really helped you, then you can share the post with others to help them. That’s all. For any suggestions or queries, please write on comment box below.


