What is Flyer? It is an unfolded single sheet that is used for drawing attention to a particular event, service, product or idea. It is in fact the easiest way of advertising something. The process is entirely simple, but for this you should have to familiar with what you have to do and what programs you need.
For example, Google Docs provides you a plethora of options to create an eye-catching flyer. Google Slides is another application that helps you in doing the same. If you don’t know how to create flyer on Google docs/ Google slides you don’t have to go anywhere.
In this article, we have provided complete detailed steps how you can do that with an ease. Check below the separation section on how to make flyer on the different platforms.
How to create a Flayer in Google Docs?
Google Docs provides you an easy way to crate flyer as it is free as well as not dependent on your operating system. All that you require is an internet connection to make a flyer. Check below the detailed steps:
Method 1: Use Templates to create a Flyer in Google Docs
For the new users, Google Docs provide a selection of templates that they can use as a pattern for their document. Here are the required steps:
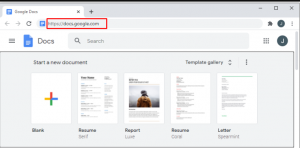
- Open Google Docs and make sure you have an account on it so that you can create and save your document,
- Once done, go to the Template galley from the right of the Start a new document tab,
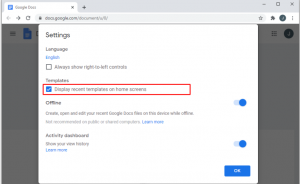
- If you can’t see the option, click on the menu button on the top left corner of the window and select settings from the drop-down,
- Mark the checkbox under Templates and confirm with Ok,
- Next, scroll down through the list of the document templates to find the suits that you need,
- Once making a selection with a particular template, click on it.
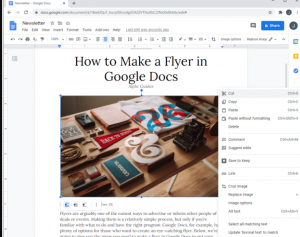
There, you can edit the text content and the images just by clicking on them. When you right-click on an image, a drop down menu appears from where you can directly replace the image from your computer, the web, or from Google Drive. Edit the document as you think fit.
Method 2: Create a flyer using Blank Document
Instead of using a template, you can start from the scratch. Here are the required steps:
- Open Google Docs,
- Click on big + sign on the Start a new document,
- A blank document appears on the screen where you can fill in with the details of your event or information.
How to make flyer on Google Slides?
If you are looking for the ways to add value, reach large users, attract more visitors to your website or capture more leads, flyer is the tool the tool that you should look for. You can make a flyer using Google slides as well. Here is how you can accomplish the task in six steps:
Step 1: Portrait or Landscape
Google Slides are default to the Landscape whereas the flyers are typically oriented in portrait. You should therefore require sliding to portrait by selecting File and Page Setup first. In the opened window, you will have a choice to set a different size options.
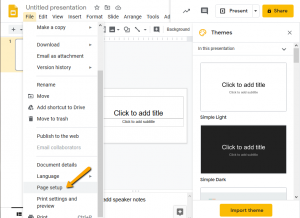
Click on the drop down and select Custom and update the n umbers so that you have 8.5 in the left box and 11 in the right box. When you click on the Apply, you will see the presentation screen change to the portrait view.
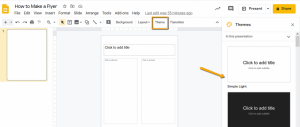
Step 2: Choose a Theme
The next step is to choose a Theme. Click on the Theme on the menu and scroll down to find the one that you want. You can also create your own theme if you want.
Step 3: Choose a layout
This will decide where your text boxes and images will start out. Here, you can choose one that will work for your flyer or can select a blank layer to place your content manually.
Step 4: Add a Background
Next step is to add a background. You can leave it appears white or choose a solid color, a gradient or insert an image. If you do choose an image, make sure you fade or blur the image so that it does not overwhelm the other content on your flyer. Once making selection with your background, click “Done”.
Step 5: Add your Content
You can insert various items to your flyer using the insert menu. You can use the shape option to add different color, boxes, bars, and backgrounds to your flyer or can use images to add photos or logos. The text boxes there are used for your content and contact information.
Step 6: Download Flyer
Your final step would be to download the flyer when you happy with it. You will find the Download option under the File button at the top left. This will list all your download options. PDF is a good format for most flyer purpose.
Conclusion
That’s all! We are now rounding off our article how to create flyer on Google Docs/ Google Slides. Hope so, the steps provided in this article are helpful for you and you are ready to make an attractive flyer for your product. We wish you for the best results.


