People use Hibernate feature Windows 11 to resume function on their system, which means that they can start their computer from where they previously left. This feature is useful in extending the battery life as well.
It works by saving your data in memory to a hard drive using HIberfil.sys system file that allows you to turn off desktop computer to save power and resume the activity from where you left off. This allows the computer to restarts faster because it does not need to re-establish those files and settings.
By default, Hibernation option is not enabled on Windows 11. Therefore, you cannot find Hibernate button in the Start menu. But, don’t worry! This article provides you complete guide how to add hibernate option in windows 11.
How to add hibernate to windows 11 start menu?
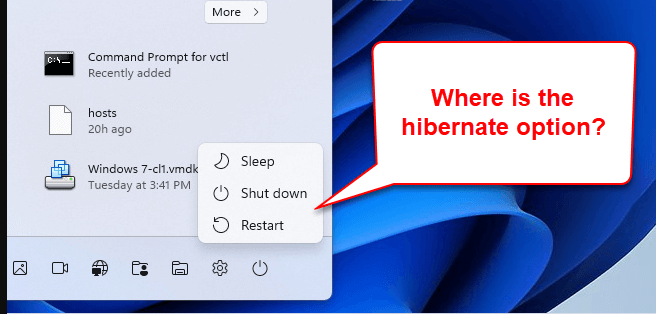
As you see, there is no hibernate option given in the Start Menu under the Power section. Below are the several methods by which you can add ‘hibernate’ option:
Method 1: Add Hibernate option in Start menu through Control Panel
- Simply search for Control Panel on the search menu and hit Enter,
- Click on Hardware and Sound> Power Option,
- Select Choose what closing the lid does,
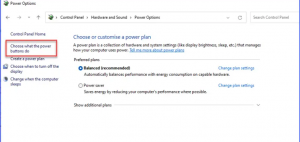
- Click on the option Change settings that are currently unavailable,
- Now, mark the check-box with Hibernate to add this option in the Power menu,
- Finally, click Ok to save the changes and done.
Method 2: Use Command Prompt to add Hibernate option
Alternatively, you can use Command Prompt to add hibernate to windows 11 start menu. Here are the required steps:
- On the search bar, type Command Prompt,
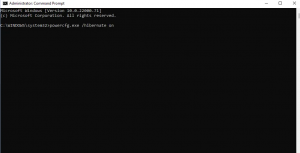
- Right-click on Command Prompt on the search results and select the option Run as Administrator,
- Type the below command and hit Enter to add Hibernate option to Windows 11 start menu:
Powercfg.exe/ hibernate on
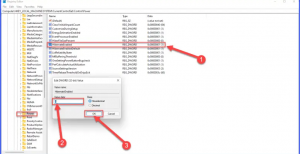
Method 3: Add hibernate option in windows 11 using Registry Editor
If you experience error in performing the previous two steps, you can use Windows Registry Editor to add Hibernate option to Windows 11 start menu. Here are the required steps:
- Press Win+ R, type Regedit and hit Enter,
- On the opened Windows Registry Editor page, navigate to the following link:
HKEY_LOCAL_MACHINE\SYSTEM\CurrentControlSet\Control\Power.
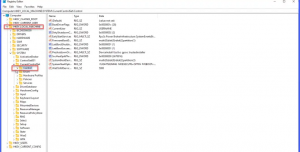
- Under the Name section, double-click on HibernateEnabled subkey on the right,
- In the opened value data box, edit DWORD value, type 1 to enable Hibernate and click OK,
- Restart your computer now and you will see then the Hibernate option on the Windows 11 start menu.
How to Hibernate your PC in Windows 11?
After successfully adding Hibernate option in Windows 11 start menu, here are the quick guide you should follow to put your device in Hibernate mode:
- Right-click on Start menu and select Shut Down or Sign out option and then the Hibernate option,
- Alternatively, click on Start button, select Power button and from the Power menu click on Hibernate option to hibernate your PC.
Conclusion
That’s it! We have guided how easily you can add hibernate option to Windows 11 start menu and how to hibernate your PC in Windows 11. If still, there is any question you have, contact us from the below comment section.


