Tips to add Environment Variable in Windows 11:
In this article, we are going to discuss on How to add Environment Variable in Windows 11, How to set Environment Variable in Windows 11. You will be guided with easy steps/methods to do so. Let’s starts the discussion.
Add /Set Environment Variable in Windows 11:
‘Environment Variable in Windows 11’: Environment Variables store information about the operating system environment. This information includes details such as operating system path, the number of processors used by the operating system, and location of temporary folders. It is used by OS and other programs. For example, the WINDIR environment variable contains the location of Windows installation folder. Programs can query the value of this variable to determine where Windows OS files are located.
It is quite simple to add or set ENV (Environment variables) in Windows 11 via Graphics User Interface (GUI). The Environment variables or Windows OS needed by it to let it known exactly where the most important files are stored, and this is the reason why the paths are important locations, they are not permanently programmed, but are stored in so-called environment variables. Let’s go for steps to add environment variables in Widows 11.
How to add Environment Variable in Windows 11?
Method 1: How to set Environment Variable in Windows 11 via System Properties?
Step 1: Open ‘Settings’ App in Windows PC via Windows Search Box and go to ‘System > About’
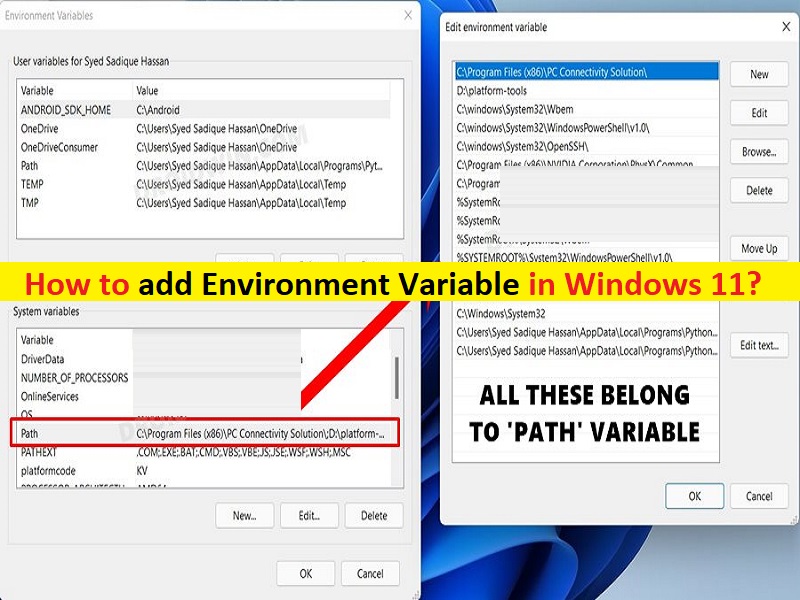
Step 2: Click ‘Advanced Settings’ and system properties panel will appear, click ‘Advanced’ tab from top bar, and select ‘Environment Variables’ button
Step 3: Double-click ‘Path’ variable in ‘System Variables’ section, click ‘New’ button, enter the file path and click ‘Ok’ button. Restart your computer to see the changes.
Method 2: How to set Environment Variable in Windows 11 via Command Prompt?
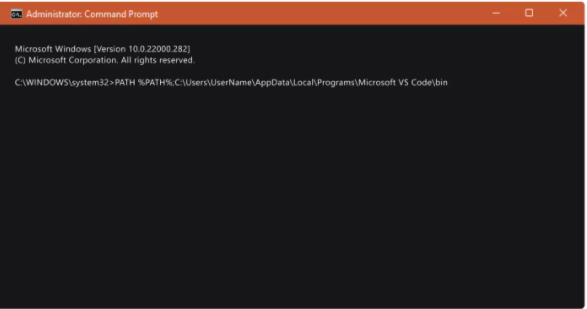
Step 1: Type ‘cmd’ in Windows Search Box and press ‘SHIFT + ENTER’ keys on keyboard to open ‘Command Prompt as Administrator’
Step 2: Type ‘Path’ command and hit ‘Enter’ key to execute to see the list of all path variables.
Step 3: To add another variable in path folder, type ‘PATH %PATH%;C:\Variable-Path-Here\’ command and hit ‘Enter’ key to execute in order to add it.
Method 3: How to add Environment Variable in Windows 11 using Windows PowerShell?
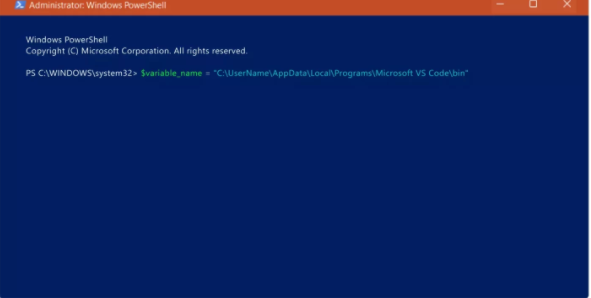
Step 1: Type ‘powershell’ in Windows Search Box, right-click on ‘Windows PowerShell’ from result appear, and select ‘Run as Administrator’ to open Windows Powershell as administrator.
Step 2: Now, execute the following command to see the list of all path variables.
[Environment]::GetEnvironmentVariable(“PATH”)
Step 3: To declare the PATH variable, execute the following command.
$Variable_Name = “C:\Path-Here\”
Step 4: Now, to add the path variable, execute the following command.
[Environment]::SetEnvironmentVariable(“PATH”, “$PATH;$Variable_Name”)
Step 5: Once done, restart your computer to see the changes.
Conclusion
I am sure this post helped you on How to add Environment Variable in Windows 11, How to set Environment Variable in Windows 11 with several easy steps/methods. You can read & follow our instructions to do so. That’s all. For any suggestions or queries, please write on comment box below.


