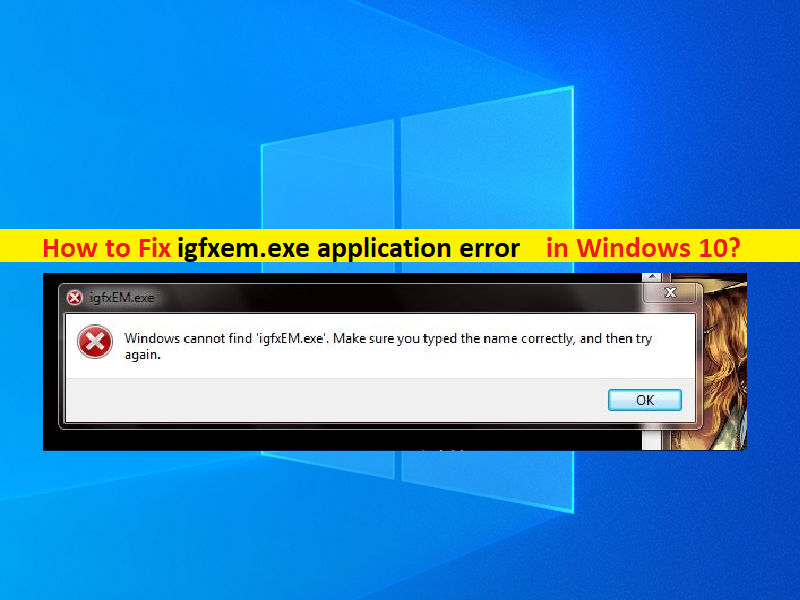
What is ‘igfxem.exe application error’ in Windows 10?
In this article, we are going to discuss on How to fix igfxem.exe application error in Windows 10. You will be guided with easy steps/methods to resolve the issue. Let’s starts the discussion.
‘igfxem.exe application error’: igfxem.exe module or Intel Graphics Executable Main Module is component of Intel Common User Interface. However, this file is no way relating to Windows Operating system and is to no core processes of Windows OS in your computer. This file is commonly used in portable devices like laptops and it acts as display resolution persistent. On other hand, malware programmers can use name of this file for malicious purposes and can trigger malware with the same name in your computer.
Once attackers gain access to your Windows computer, they can replace the original igfxem.exe file stored in your computer hard drive with the malicious one having igfxem.exe the same name. To check if igfxem.exe file is in your computer hard drive is genuine or malware, you should go to ‘C:\Windows\System32\’ path and check if the file is there, and if the file location is different, it is likely that you are dealing with malware entity.
One possible way to fix the issue is to run System Scan in your computer with some powerful antivirus software to remove infections and fix this issue. Another possible reason behind the issue can be the outdated/corrupted graphics card driver. You should make sure graphics card driver is properly installed in your computer and is up-to-date to latest & compatible version. If not, graphics card driver update is necessary. Let’s go for the solution.
How to fix igfxem.exe application error in Windows 10?
Method 1: Fix igfxem.exe application error with ‘PC Repair Tool’
‘PC Repair Tool’ is easy & quick way to find and fix BSOD errors, DLL errors, EXE errors, problems with programs/applications, malware or viruses issues, system files or registry issues and other system issues with just few clicks.
Method 2: Update graphics card driver in Windows PC
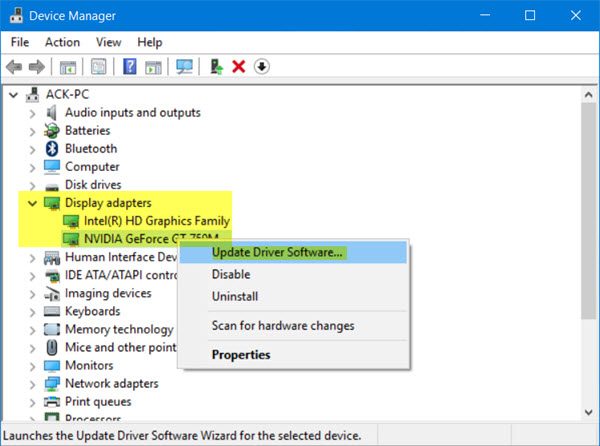
Updating graphics card driver to latest & compatible version can resolve the issue. Let’s try.
Step 1: Open ‘Device Manager’ in Windows PC via Windows Search Box and expand ‘Display Adapters’ category
Step 2: Right-click on your graphics card driver and select ‘Update Driver’ and follow on-screen instructions to finish update process. Once updated, restart your computer and check if the issue is resolved.
Method 3: Download or reinstall graphics card driver update in Windows PC [Automatically]
You can also try to update all Windows Drivers including graphics card driver update using Automatic Driver Update Tool. You can get this tool through button/link below.
Method 4: Rollback graphics card driver
This issue can be occurred due to currently installed graphics card driver version. You can rollback graphics card driver to previous version in order to fix.
Step 1: Open ‘Device Manager’ in Windows PC via Windows Search Box and expand ‘Display Adapters’ category
Step 2: Double-click on your graphics card driver to open its Properties. Click ‘Driver’ tab, and click ‘Rollback Driver’ and follow on-screen instructions to finish rolling back process and once finished, restart your computer and check if the issue is resolved.
Method 5: Increase Virtual Memory
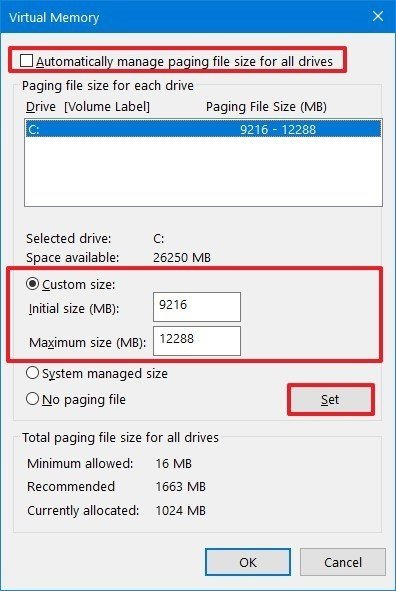
You can fix the issue by increasing Virtual memory in your computer.
Step 1: Right-click ‘This PC’ icon on desktop and select ‘Properties’
Step 2: Click ‘Advanced System Settings’ link on next window, hit ‘Settings’ button under ‘Performance’
Step 3: Go to ‘Advanced’ tab, and click ‘Change’ button, uncheck ‘Automatically manage paging file size for all drivers’
Step 4: Select the drive giving issue and set a custom size substantially larger than the earlier size, and click ‘Set’ to apply the changes and hit ‘Ok’ button, and then restart your computer and check if the issue is resolved.
Method 6: Download and update Microsoft .NET Framework
Step 1: Open your browser and visit ‘Microsoft Official site’ and download updated version of Microsoft .NET Framework from there
Step 2: Once downloaded, double-click on downloaded driver setup file and follow on-screen instructions to finish installation and once finished, restart your computer and check if the issue is resolved.
Conclusion
I am sure this post helped you on How to fix igfxem.exe application error in Windows 10 with several easy steps/methods. You can read & follow our instructions to do so. That’s all. For any suggestions or queries, please write on comment box below.


