BSOD Errors is a critical error which is quite common in Windows Operating System. This error turns the screen blue and stops your ongoing tasks. It’s pertinent to mention facing errors on Windows is not a big deal users often report different Windows Errors. There are a number of errors that gets resolve just by a simple reboot. But if we specifically talk about BSOD Errors, it varies in severity and cannot be left unresolved.
Such errors are not only annoying but also impact the productivity by reducing PC performance and speed. As we have earlier mention BSOD Errors differs in austerity, so some errors may lead to periodic crashes while some may lead to data loss or worst profound system failure.
And if we speak about the causes, there are a number of factors including driver related issues, system file corruption, overclocking, overheating, interference of third party software, presence of malware on your device or hardware failure.
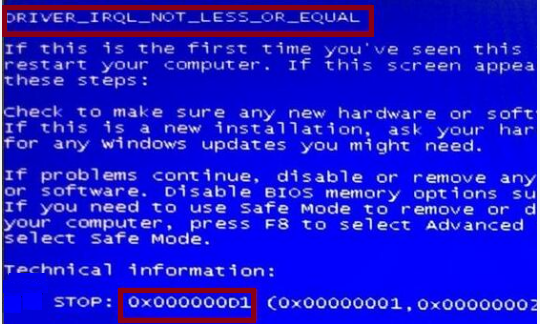
Well here in this article, we will specifically discuss about one instance of fatal Errors namely “Bluescreen 0x000000d1 Error” which appears due to driver and device issues. To elaborate, it indicates an issue with your device driver or miscommunication between the hardware and software components.
This error is also known as DRIVER_IRQL_NOT_LESS_OR_EQUAL. And if you are too concerned about resolving the same don’t panic, you have arrived at the right place.
Since BSOD Errors are dreaded errors and may lead to severe damages but thankfully it can be tackled using reliable measures. We have collected some of the effective methods, try them one by one.
Try these Solutions for resolving Bluescreen 0x000000d1 Error
Method 1: Run Memory Diagnostic Tool
Running Windows in-built tool is an easiest way to deal with above mention error. It’s pertinent to mention BSOD Errors may also get trigger due to memory issues, so it is suggested to check the RAM.
Here’s how:
Step 1: Press Windows + R keys to open Run utility box > In the prompted box, type in mdsched.exe and press Enter key to open Windows Memory Diagnostic
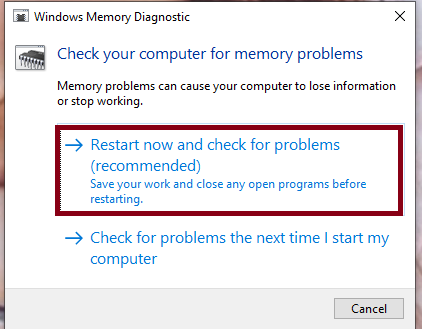
Step 2: Now click on the blue font Restart now and check for problems > hold your patience as Windows will automatically scrutinize issues for the system. Once the restoration process is completed, your device will reboot again.
Method 2: Run Hardware Troubleshooter
You are most likely to face the above mention error if there’s something wrong with your hardware. In order to run the Windows troubleshooter, use the following steps:
Step 1: Open Windows Settings and choose Hardware and Devices and click Run the troubleshooter
However, if your Windows version is later then Windows 10 1809, you will find that the Hardware and Devices option is missing. However, you can still use this tool via command prompt. To do so, use the following:
Step 1: Run the Command Prompt as administrator > Copy and paste the following command & click on Enter key:
msdt.exe -id DeviceDiagnostic
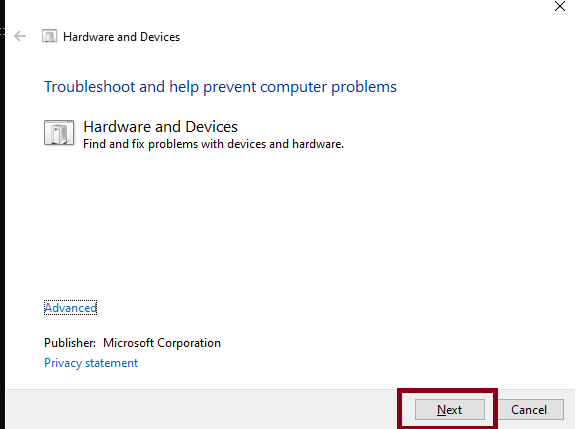
Step 2: Now the, Hardware and Devices Troubleshooter Windows will 10 open > You can click on Next to start the scanning and troubleshooting process
Method 3: Scan your PC for Malware
If your PC is infected with malware you may get stuck with the above mention error. So it’s recommended to run a comprehensive security scan. In order to proceed with the method use the following steps:
Step 1: Click on the Windows Start Menu or just press Windows keys > then in the Search bar, type in Microsoft Defender and click on Microsoft Defender Antivirus to open the application
Step 2: Click on the Virus & threat Protection option in the left-hand menu
Step 3: Then click on Quick Scan or Full Scan option
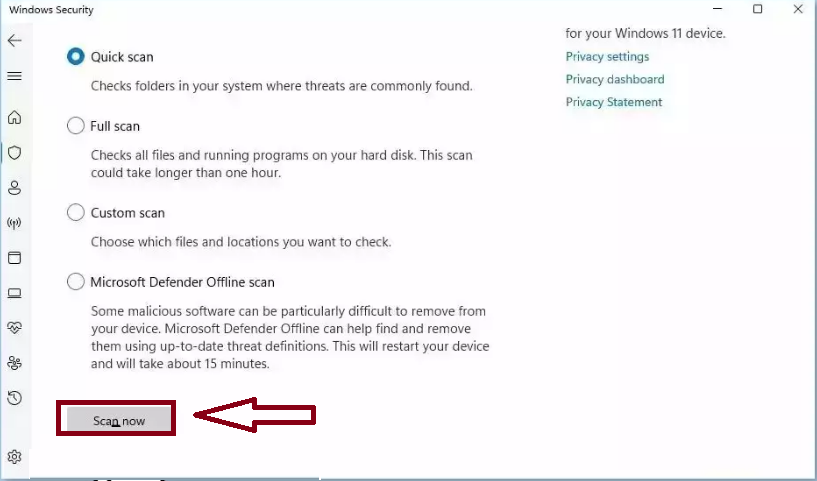
Step 4: If you choose Quick Scan, Microsoft Defender Antivirus will scan the most vulnerable and commonly infected areas of your system
Step 5: If you choose Full Scan, Microsoft Defender Antivirus will scan your entire PC, including all files, folders and programs
Step 6: Then click on the Scan Now button to start the selected scan type and wait for the scan to complete > Note that the time it takes will depend on the size of your hard drive and the number of files being scanned
Step 7: Once the scan is done, you will be informed of any threats and you can choose to quarantine or remove them
Step 8: If no threats are found, Microsoft Defender Antivirus will notify you that your device is secure.
Method 4: Update or Reinstall the drivers
Obsolete device drivers are one of the major reasons for facing the above mention error. So you are suggested to update or reinstall the drivers.
Here’s how:
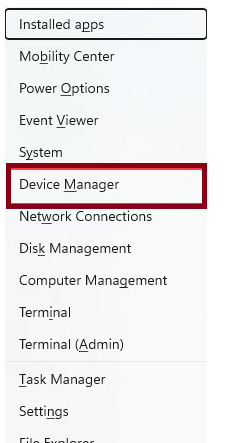
Step 1: Press Windows logo + X keys to open the Start Menu > Select Device Manager from the menu
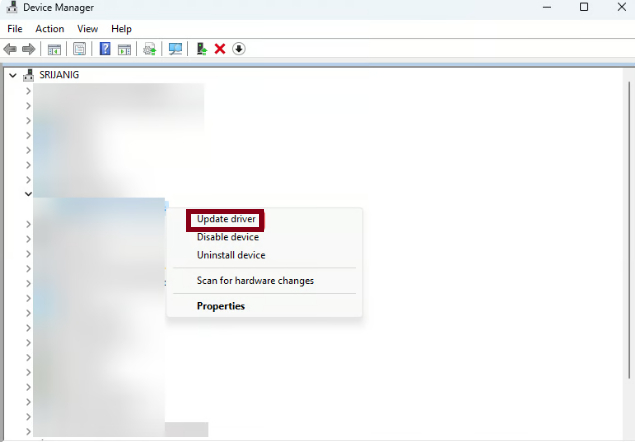
Step 2: Identify devices with a yellow exclamation mark or question mark > these symbols indicate devices with driver issues
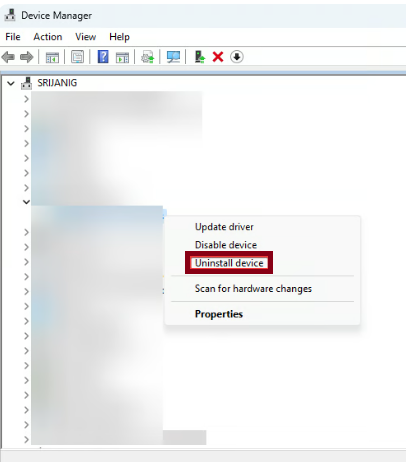
Step 3: Right-click on the device with the problematic driver and select Update driver or Uninstall device > Update driver tries to find and install the latest driver automatically.
Step 4: Uninstall device removes the driver from your PC
Step 5: If you select Update driver, choose the option to Search Automatically for drivers > Windows will search online for the latest driver version and install it.

Step 6: Once you uninstalled the driver, restart your PC > Windows will detect the device and attempt to reinstall the driver automatically
Method 5: Restart your PC in Safe Mode
If the above mention error appears while loading Windows and it stops all your attempts to work with the system, you can try loading your PC in Safe Mode.
Note: This fix is workable in circumstances when the system is blocked.
Here’s how:
Step 1: Navigate to the Start Menu and press Settings > In the Settings window, press Update & Security
Step 2: under the Recovery tab, choose Restart Now under Advanced Startup
Step 3: Once the PC reboots, Windows will ask you to choose the next step > click on Troubleshoot
Step 4: In the Troubleshoot menu, press Advanced Options > Startup Settings > Restart
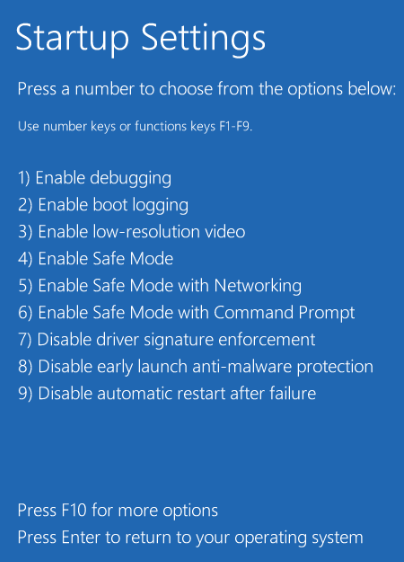
Step 5: After Restarting your PC, you will see a list of options and the 4,5 and 6 options are different ways to enable Safe Mode- 4) Enable Safe Mode, 5) Enable Safe Mode with Networking, 6) Enable Safe Mode with Command Prompt. Press F4 to choose Enable Safe Mode
Method 6: Cool down your PC
The PC generates lots of heat during running especially when you are running too many resource-consuming programs at the same time. You can either let your system rest for a while or update your CPU Fan.
Method 7: Perform SFC Scan
Windows provides so many in-built tools troubleshoot troubles and SFC is one of them. It is capable for scanning missing or corrupted system files and replaces the files if required.
In order to get started with the method, use the following:
Step 1: In the Search bar, type in cmd to find the Command Prompt > Right-click it to select Run as Administrator
Step 2: In the prompted box, type in sfc/scannow and press Enter key > then wait for the process to end.
Alternatively, you can use an automatic PC Repair Tool to repair your system files. This professional file is capable for fixing the errors originated due to system corruption. So, if you are looking for a hassle free solution, try this tool once.
⇑Get PC Repair Tool from Here⇓
Method 8: Use System Restore
System Restore is a feature in Windows which enables the users to revert their PC’s state to a previous point in time. This can be helpful if you have made changes to your system that is causing issues.
Here’s how:
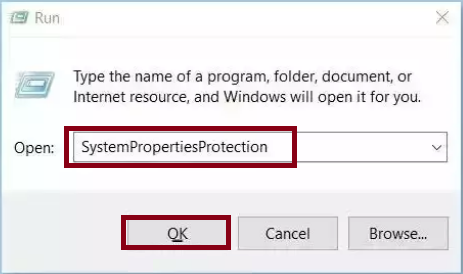
Step 1: Press the Windows + R keys to open Run utility box > In the promoted box, type in SystemPropertiesProtection and press Enter
Step 2: Navigate to the System Protection tab

Step 3: You will see the System Restore…. button > Click it to run System Restore
Step 4: Follow the prompts until you can select a restore point > Select the one you want (ideally before the issue started occurring) and go ahead with the process.
Method 9: Reset Windows
If you are still struggling with Bluescreen 0x000000d1 Error, it is suggested to reset PC. To do so follow the below mention guidelines:
Step 1: Click Settings > Update & Security > Recovery
Step 2: Under Reset this PC, click on Get Started
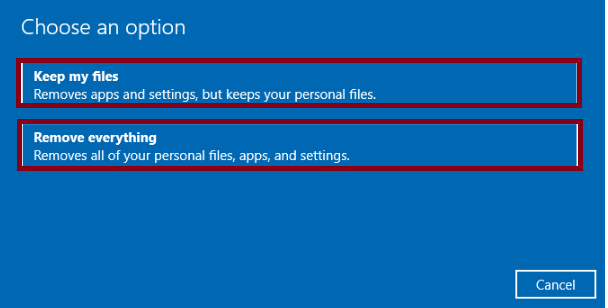
Step 3: Choose to save your files by pressing keep my files in the blue window or choose or erase them by pressing Remove everything. Click either of the according to your condition and then follow the instructions on the screen.
Bottom Line!
That’s all folks! We have tried our best to provide all the feasible solutions to get past Bluescreen 0x000000d1 Error. Now it’s your turn to follow our guidelines. Best of luck with the fixes.


